
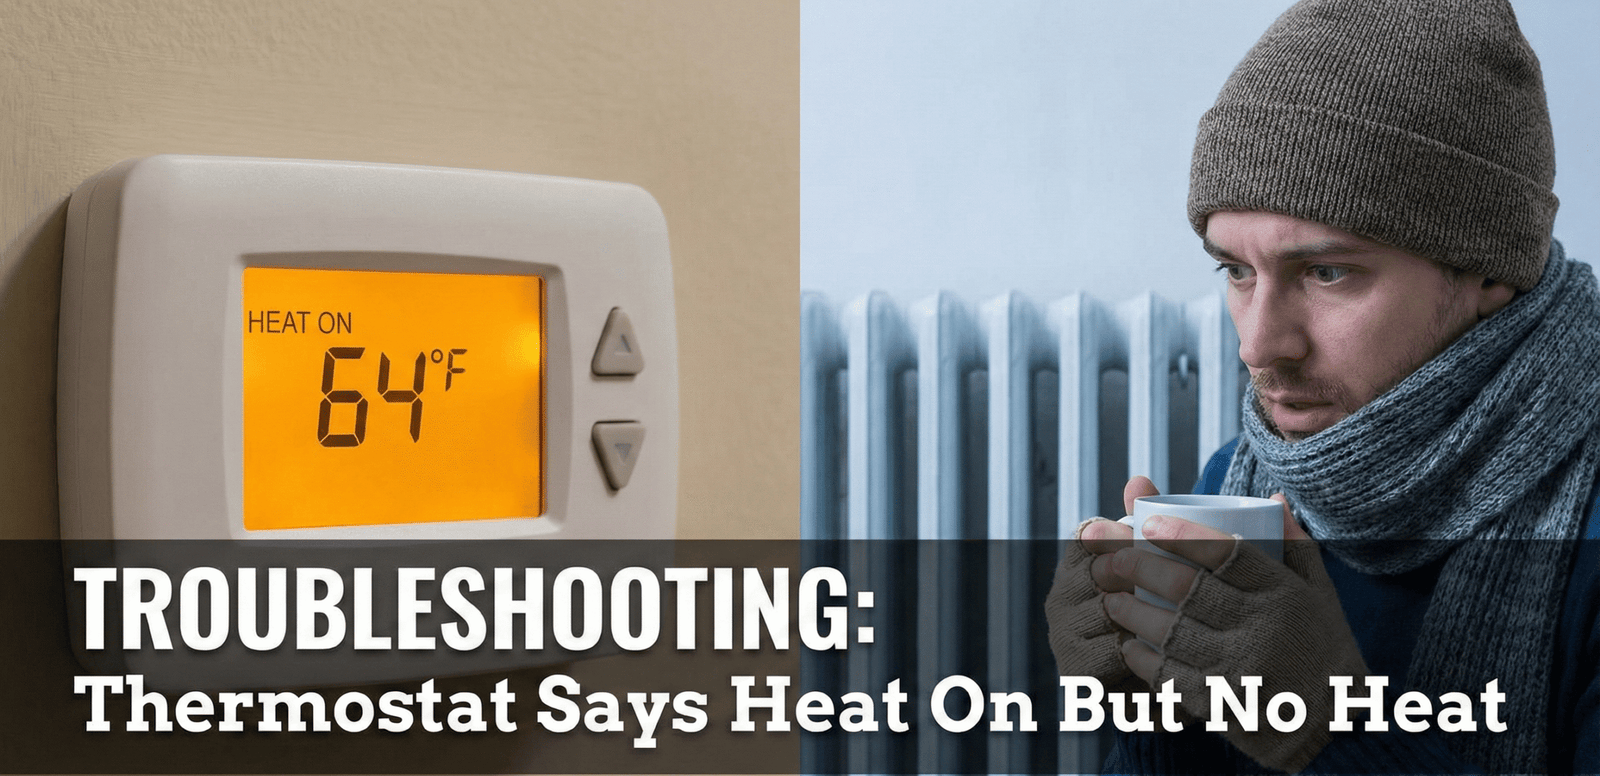
Thermostat Says “Heat On” But No Heat? (The Expert Troubleshooting Guide)
It is the most confusing signal in home HVAC: Your thermostat display confidently reads “Heat On” (or shows a little flame icon), but the vents are blowing cold air—or nothing at all. This disconnect between the “brain” (thermostat) and the “brawn” (furnace/heat pump) is a common issue that ranges from simple user errors to complex mechanical lockouts.
⚡ The Quick Diagnosis (Start Here)
If your thermostat says “Heat On” but there is no heat, check these 3 things immediately before calling a pro:
- Fan Setting: Is it set to “ON”? Switch it to “AUTO”. If it’s ON, the fan blows even when the furnace isn’t heating.
- The “Click” Test: Turn the temp up 5 degrees. Did you hear a click? No click means a bad thermostat or loose wire.
- Air Filter: Is it black/clogged? A dirty filter causes the furnace to overheat and shut down (safety lockout) while the thermostat still thinks it’s running.
In this comprehensive guide, we will walk through the entire sequence of operation, help you diagnose gas and electric systems, and determine if you need a replacement. We will also reference our deep dives into how thermostats work and how to tell if your thermostat is bad.
Understanding the “Handshake”: Why the Disconnect Happens
To fix the problem, you must understand what “Heat On” actually means. It is not a confirmation that fire is burning. It is simply a confirmation that the thermostat has closed the internal relay sending a 24-volt signal down the W (White) wire to your furnace control board.
Once that signal leaves the thermostat, the thermostat assumes the furnace is doing its job. If the furnace fails to light due to a dirty flame sensor or a bad igniter, the thermostat has no way of knowing (unless you have a high-end communicating system). It will sit there displaying “Heat On” while your house gets colder.
Phase 1: Basic Diagnostics (No Tools Required)
1. The “Fan ON” Illusion
This is the most common cause of “blowing cold air.” If your fan switch is set to ON, the blower motor runs 24/7. Between heating cycles, the furnace burners turn off, but the fan keeps spinning, circulating room-temperature air that feels cold against your skin.
The Fix: Set your fan to AUTO. Read more about fan electricity usage here.
2. The Safety Switch Check
Every furnace has a physical power switch (usually looking like a light switch) mounted on the side of the unit or a nearby wall. It’s easy to bump this switch while storing holiday decorations. Ensure it is flipped UP or ON. Also, check your breaker panel for any tripped breakers labeled “Furnace” or “Air Handler.”
3. The Battery Issue
Even hardwired thermostats often use batteries for backup or to close the relay. Weak batteries might have enough power to light up the LCD screen (showing “Heat On”) but not enough voltage to actually trip the relay that signals the furnace.
Resource: Best battery-operated thermostats guide.
Phase 2: Advanced Troubleshooting (The Furnace Sequence)
If the basics are covered, we need to look at the furnace itself. We will follow the Sequence of Operation. This is the order in which a furnace starts. Identifying where it stops tells you exactly what is broken.
-
The Draft Inducer Motor: When the thermostat calls for heat, the first thing you should hear is a small motor whirring. This is the draft inducer. It clears toxic gases from the heat exchanger.
Failure: If you don’t hear this, the inducer motor or its capacitor is dead. - The Pressure Switch: This safety device proves the inducer is working. If your chimney is blocked or the condensate trap is clogged, this switch stays open, and the furnace stops here.
-
The Igniter (The Glow): Next, you should see an orange glow (Hot Surface Igniter) or hear a clicking sound (Spark Ignition).
Failure: If you hear the inducer but see no glow, your igniter is likely cracked/dead. This is a common repair. -
Gas Valve & Flame: About 30 seconds after the glow, the gas valve clicks open, and the burners should whoosh to life.
Failure: If it glows but never lights, the gas valve may be bad, or your gas supply is off. -
The Flame Sensor (Critical): This is the most common culprit for “Heat On but no heat.” The fire lights, stays on for 3-5 seconds, and then abruptly shuts off. The system tries this 3 times and then goes into “Lockout.”
Why: The flame sensor is a metal rod that sits in the fire. Over time, it gets coated in carbon. If it can’t “feel” the fire, it cuts the gas for safety.
The Fix: Scrub the rod gently with steel wool.
Phase 3: Heat Pump Specifics
If you have a heat pump (common in milder climates), “blowing cold air” might actually be normal.
Defrost Mode
In winter, the outdoor unit can freeze. To melt the ice, the system goes into “Defrost Mode.” It temporarily switches to air conditioning mode to heat up the outdoor coils. During this time, it blows cold air inside. Usually, the “Auxiliary Heat” strips kick in to temper this, but if they are broken, you will feel a cold draft for about 15 minutes.
The Reversing Valve
The reversing valve switches the flow of refrigerant. If it gets stuck in the “Cooling” position, your thermostat will call for heat, but the outdoor unit will continue pumping cold air.
Comparison: Unsure if you need a different system? Check Is the Bosch Heat Pump Good? or see the best thermostats for them.
Phase 4: Electric Furnaces and Baseboard Heat
Everything covered so far assumes a standard gas furnace or a heat pump with an outdoor compressor. But a huge number of homes—especially apartments, condos, mobile homes, and additions—rely on electric resistance heat: either an electric furnace with heating elements inside the air handler, or individual electric baseboard heaters wired to their own line-voltage thermostats. These systems fail in very different ways than gas furnaces, and the “Heat On but no heat” complaint has its own set of causes here.
Electric Furnace Heating Elements (Sequencers)
An electric furnace doesn’t have a flame sensor, igniter, or gas valve. Instead, it has a bank of heating elements—often four or five—that switch on one at a time through devices called sequencers. When you call for heat, the blower motor starts, and the sequencers stagger the elements on every 30-90 seconds so you don’t trip the breaker with a massive current draw all at once.
If your thermostat says “Heat On,” the blower is running, but the air coming out never gets warm, the most likely culprits are:
- A blown thermal fuse or high-limit switch: Electric furnaces have limit switches on each element bank that pop if airflow is restricted (usually from a clogged filter). Once tripped, no elements will fire even though the blower runs.
- A failed sequencer relay: If one sequencer fails open, the elements downstream of it in the sequence never get power, even if the first bank works.
- A tripped double-pole breaker: Electric furnaces often have two or three separate double-pole breakers (one per element bank) in the main panel. It’s common for only one to trip, so the blower still runs off a separate circuit while zero elements heat.
Because electric furnaces draw so much current, breaker issues are far more common here than with gas equipment. Before assuming a part has failed, physically inspect every breaker dedicated to the furnace—not just the main one—and reset any that look slightly off-center, even if they don’t appear fully tripped.
Baseboard Heaters and Line-Voltage Thermostats
If your home uses electric baseboard heaters, you likely have a line-voltage thermostat (240V, not the low-voltage 24V systems described above). These thermostats mount directly on the wall and switch the full heater current themselves—there’s no relay board or furnace control panel in between.
When a line-voltage thermostat shows it’s calling for heat but the baseboard stays cold, check these in order:
- Confirm the breaker for that specific room or zone hasn’t tripped—baseboard circuits are often split by room, so one room can lose heat while the rest of the house is fine.
- Look for a small reset button on the baseboard heater itself; many units have an internal high-limit thermal cutout that trips if a heater is blocked by furniture, curtains, or carpet.
- Test the thermostat’s internal contacts. Line-voltage thermostat switches wear out from repeated arcing over years of use, and a worn contact can “click” audibly without ever completing the circuit.
Phase 5: Boilers and Radiant Heat Systems
Homes with hydronic (water-based) heat—cast iron radiators, baseboard hot water loops, or in-floor radiant tubing—use a boiler instead of a furnace. The thermostat logic is identical (it’s still just closing a 24V circuit), but what happens downstream is completely different, and it introduces a few unique failure points that don’t exist in forced-air systems.
The Aquastat and Circulator Pump
When your thermostat calls for heat on a boiler system, the signal typically goes to a device called an aquastat, which controls the boiler’s burner and the circulator pump (sometimes called a circ pump) that pushes hot water through the pipes. If the thermostat says “Heat On” but radiators stay cold, the most common causes are:
- A seized or failed circulator pump: The boiler itself may be firing and heating water, but if the pump isn’t moving that water through the loop, the radiators never get warm. You can often hear the boiler running and feel it’s hot to the touch while the pipes leaving it stay cool—that’s the telltale sign.
- Trapped air in the system (needs bleeding): Air pockets in radiators or baseboard loops block water flow. If some radiators heat and others stay stone cold, bleeding the air out with a radiator key is usually the fix.
- Low system pressure: Hydronic systems need to stay within a specific pressure range (often 12-15 PSI) shown on a gauge near the boiler. If pressure drops too low, the boiler’s safety controls may prevent it from firing at all.
- A tripped high-limit or low-water cutoff: Like furnaces, boilers have safety switches that stop operation if water level or temperature falls outside safe ranges.
Zone Valve Failures
Many hydronic systems are split into zones, each with its own motorized zone valve that opens to let hot water flow to that part of the house. If a single zone valve’s motor burns out, that zone’s thermostat will call for heat exactly as it should, but the valve simply never opens—so that zone stays cold while every other zone in the house heats normally. This is one of the most frequently misdiagnosed hydronic issues, because homeowners assume the whole boiler is broken when really it’s a $40-80 part serving one zone.
Standing Pilot Lights: Older Furnaces Without an Electronic Igniter
If your furnace is more than 20-25 years old, it may not have a hot surface igniter or spark ignition system at all. Instead, it uses a standing pilot light—a small, continuously burning flame that lights the main burners whenever the thermostat calls for heat. These systems have their own distinct failure mode that trips up a lot of homeowners because none of the “click, glow, whoosh” sequence described in Phase 2 applies.
The Thermocouple Safety Device
Sitting right in the pilot flame is a small device called a thermocouple (or on newer standing-pilot units, a thermopile). Its only job is to generate a tiny electrical signal that tells the gas valve “the pilot is lit, it’s safe to let gas through.” If the thermocouple wears out, corrodes, or gets knocked slightly out of the pilot flame, the gas valve will refuse to open the main burners even though the pilot itself is burning perfectly fine and the thermostat is correctly calling for heat.
Signs you’re dealing with a thermocouple issue rather than a thermostat issue:
- The pilot light is visibly lit (a small blue flame visible through a viewing window on the furnace).
- The main burners never ignite, no matter how many times you raise the thermostat setting.
- The pilot sometimes goes out entirely on its own, especially in windy or drafty basements.
Relighting a pilot is usually straightforward and covered by a small placard on the furnace itself with step-by-step instructions, but replacing a worn thermocouple is a five-minute, low-cost repair for most licensed technicians and often the single most common service call on these older systems.
Furnace Error Codes: Reading the Blinking Light on Your Control Board
Most furnaces built in the last 20 years have a small window on the front panel with an LED that blinks in a specific pattern. This blinking light is essentially the furnace talking to you, and it is one of the fastest ways to skip past guesswork entirely. Instead of listening for the inducer, watching for a glow, and timing the sequence yourself, you can often open the door, count the flashes, and match them against a legend printed on a sticker inside the panel or in the installation manual.
- Steady on, no blinking: Usually indicates normal standby—no fault, simply waiting for a call for heat.
- A single, evenly spaced blink: Frequently means normal operation, currently heating or cooling as expected.
- Two fast flashes, repeating: Commonly tied to a pressure switch fault—the inducer isn’t proving airflow to the control board, often from a blocked vent pipe, a clogged condensate line, or a failed inducer motor.
- Three flashes, repeating: Frequently a limit switch or flame rollout fault, often triggered by restricted airflow from a dirty filter or blocked return vent.
- Four flashes, repeating: Often points to a flame sensor failure, matching exactly the “lights, then shuts off” pattern described in Phase 2.
- Rapid, continuous flashing with no pause: Usually signals a control board or sensor wiring fault rather than a mechanical part, and often calls for professional diagnosis.
Recording the blink pattern before calling a technician—or even taking a short video of it with your phone—can dramatically speed up a service call, since many technicians can narrow down the likely part before ever opening a toolbox.
Short Cycling: When the Furnace Turns On and Off Repeatedly
A related—but distinct—complaint from “no heat at all” is short cycling: the furnace fires up, runs for only a minute or two, shuts off, waits, and fires again, never running a full heating cycle long enough to actually warm the house. The thermostat display may flicker between “Heat On” and idle every few minutes, giving the impression that heat is running when in practice almost no warm air ever makes it through the ducts.
Common Causes of Short Cycling
- Oversized furnace for the home: A furnace that’s too powerful for the square footage satisfies the thermostat almost instantly, then shuts off before the house is evenly heated.
- Restricted airflow from a dirty filter: The furnace overheats internally, trips its high-limit switch, shuts down to cool, then restarts once temperature drops—repeating indefinitely.
- A failing flame sensor early in its decline: Before a flame sensor fails completely (Phase 2), it often causes intermittent short cycles for weeks as it gradually loses sensitivity.
- Thermostat located near a heat source: A thermostat mounted near a lamp, sunny window, or supply vent can satisfy prematurely, shutting the system off before the rest of the house catches up.
Short cycling is worth taking seriously even though heat is technically running, because it accelerates wear on the igniter, inducer motor, and gas valve—components that are only rated for a certain number of on/off cycles over their lifespan.
Zoned Heating Systems: One Zone Cold, Others Fine
Larger or multi-story homes often use zoned HVAC, where a single furnace serves several thermostats, each controlling motorized dampers inside the ductwork for its own zone (upstairs, downstairs, a bonus room, etc.). If one thermostat says “Heat On” but that specific area stays cold while other zones heat normally, the furnace itself is almost never the problem.
- A stuck or failed damper actuator: Each zone has a motorized damper that must physically rotate open. If the small motor fails, the damper can remain closed regardless of what the thermostat display shows.
- Zone control board fault: The central zone panel that coordinates dampers and calls the furnace can develop a bad relay for one zone specifically while the others continue working.
- Bypass damper miscalibration: Many zoned systems use a bypass damper to relieve pressure when only one zone calls for heat. If it’s set incorrectly, one zone can starve for airflow even with a functioning damper.
Because zoned systems isolate the problem to a specific area, the fastest diagnostic step is simply comparing zones: if every other zone heats normally and only one doesn’t, focus your troubleshooting entirely on that zone’s damper and thermostat wiring rather than the furnace itself.
Ductwork Problems That Mimic a “No Heat” Furnace Issue
Sometimes every single component covered so far checks out perfectly—the flame lights, the sequence completes, the plenum above the furnace is genuinely hot to the touch—and yet specific rooms in the house still feel cold. In these cases, the “no heat” complaint isn’t really about the furnace at all; it’s about what happens to that heated air on its way through the ductwork.
- Disconnected or crushed flex duct: Flexible ductwork in an attic or crawlspace can separate from its connection or get crushed under stored items, dumping heated air into an unconditioned space instead of the room it was meant for.
- Closed or blocked supply registers: It sounds obvious, but registers closed for the summer, blocked by furniture, or covered by rugs are one of the single most common reasons a specific room stays cold while the rest of the house is comfortable.
- An undersized or leaking return duct: If the return side of the system is restricted or leaking into an attic, the blower can struggle to move enough air volume, leaving distant rooms starved even though the furnace itself fires normally.
- A failing or disconnected damper inside the main trunk line: Beyond the zone dampers discussed earlier, some single-zone systems still have manual balancing dampers in the main trunk that can be bumped closed during other work in an attic or basement.
A simple diagnostic trick: if you place your hand at every supply register in the house during an active heating cycle and one or two are noticeably weaker or cooler than the rest, the issue is almost always downstream of the furnace in the ductwork itself, not in the ignition sequence covered earlier in this guide.
Attic and Crawlspace Insulation: When the Furnace Works Fine But the House Still Feels Cold
Occasionally, homeowners troubleshoot every mechanical step correctly, confirm the furnace is genuinely producing hot air, and still feel like the house “just won’t heat up.” In older homes, or homes with additions, the missing piece is often insulation and air sealing rather than anything related to the thermostat or furnace at all.
Poor attic insulation, uninsulated rim joists in a basement, or gaps around recessed lighting and plumbing penetrations can allow heat to escape as fast as the furnace produces it, especially on the coldest nights of the year. This creates a frustrating scenario where the thermostat reads “Heat On,” the furnace is audibly and verifiably running, and the house temperature still creeps downward. Because this isn’t an equipment fault, no amount of furnace or thermostat troubleshooting will resolve it—an energy audit or simple attic insulation top-up is the actual fix.
Seasonal Changeover Issues: Switching From Cooling to Heating Mode
A smaller but very common category of “Heat On but no heat” complaints happens specifically at the start of the heating season, right after a system that’s been in cooling mode all summer is switched over for the first cold snap.
- A stuck changeover valve on heat pump systems: If a heat pump has sat in cooling mode for months, the reversing valve can occasionally stick in that position the first time it’s asked to switch, resolving itself after a few cycles or requiring a light tap or manual reset in stubborn cases.
- Furnace components that sat dormant all summer: An igniter or inducer motor that was already near failure can simply not survive being asked to work again after months of inactivity, so a furnace that heated fine last winter can fail on its very first call for heat this season.
- Forgotten manual system switch: Many older thermostats have a physical Heat/Cool/Off switch separate from the setpoint dial; it’s easy to raise the setpoint without ever confirming the mode switch itself was moved from “Cool” to “Heat.”
Because of this pattern, it’s worth testing your heating system on the first genuinely cool day of fall rather than waiting for the first hard freeze, giving you time to schedule a repair before you actually need the heat to survive a cold night.
Programmable Schedule Mistakes That Look Like Equipment Failure
Not every “Heat On but no heat” report is mechanical at all. A significant share trace back to the thermostat’s own schedule quietly working exactly as programmed, just not as the homeowner expected.
- An “Away” or “Eco” setpoint lower than the room’s current temperature: If the schedule has already dropped to a lower away-mode target that the room has already reached, the display can show “Heat On” briefly between micro-cycles while never actually raising the temperature the homeowner is expecting.
- A vacation or hold mode left active: Many smart thermostats have a vacation hold that silently overrides the normal schedule for days or weeks after a trip, and it’s easy to forget it’s still active.
- Daylight saving time or timezone drift: Occasionally a schedule shifts by an hour after a clock change or firmware update, so the “warm-up” period the homeowner expects each morning is now happening at the wrong time.
Before assuming a mechanical fault, it’s worth pulling up the thermostat’s schedule screen (or app) and confirming the current active setpoint matches what you actually want right now, rather than a leftover eco or away setting from earlier in the week.
Wiring and Digital Issues
Sometimes the hardware is fine, but the signals are crossed. This is common after installing a new smart thermostat.
- The R and W Connection: Remove the thermostat faceplate. Ensure the Red (Power) and White (Heat) wires are secure. If you have a multimeter, you should read 24V AC between R and W when heat is called for.
- Resetting the Unit: Digital thermostats are small computers. They can crash. A hard reset often fixes “ghost” readings.
Guide: How to reset your Sensi thermostat. - Clicking Sounds: If you hear a click from the thermostat but the furnace is silent, the relay inside the thermostat might be engaging mechanically but failing electrically. Why is my thermostat clicking but not turning on?
The C-Wire Problem: Why Smart Thermostats Are Especially Prone to This
If your “Heat On but no heat” issue started right after installing a smart thermostat (Nest, Ecobee, Wyze, Honeywell Home, etc.), there’s a very specific and very common explanation: a missing or inadequate C-wire (common wire).
Older systems were wired for simple mechanical thermostats that didn’t need constant power—they just closed a switch. Smart thermostats, however, have color touchscreens, Wi-Fi radios, and processors that need continuous 24V power to stay on. Without a dedicated C-wire, many smart thermostats “power steal” a tiny trickle of current through the R and W wires themselves whenever the screen needs a top-up.
This power-stealing trick usually works fine—until it doesn’t. In furnaces with very sensitive control boards, or in setups with long wire runs, that power-stealing draw can be misread by the furnace board as a real call for heat, or conversely, can drain just enough current that the actual call for heat signal becomes too weak for the furnace to register reliably. The thermostat screen will confidently display “Heating,” while the furnace control board never sees a strong enough signal to start the sequence of operation.
Most modern furnaces already have an unused C terminal on the control board with a spare wire in the wall bundle that was simply never connected during the original low-tech thermostat install. A licensed technician can typically identify and connect this in well under an hour, and several smart thermostat manufacturers, including Ecobee, sell add-on kits specifically to solve this without any new wire pulling.
Smart Thermostat Apps: When the Phone Says “Heating” But the House Disagrees
A newer variation of this classic problem has emerged with Wi-Fi thermostats: the mobile app shows a heating icon actively animating, the app history log shows a “heating” event in progress, and yet the house is cold. This is a software and connectivity issue layered on top of the mechanical ones above, and it deserves its own checklist.
- Stale cloud state: The thermostat’s cloud account can report the last known command it sent rather than the furnace’s actual current status, especially after a brief Wi-Fi dropout. The physical thermostat display on the wall is always more trustworthy than the phone app in these situations.
- Firmware update stuck mid-cycle: Some smart thermostats pause active heating calls during a firmware update and don’t always resume cleanly. A manual power cycle (remove from the wall base for 10 seconds, reseat, and let it reboot) often clears this.
- Geofencing or schedule conflicts: If you have a schedule and a manual override both active, some thermostats will display an ambiguous state where the app shows “Heat” while the actual set-point has quietly reverted to an eco/away temperature that’s already satisfied, so no real heat call is happening.
- Third-party integration conflicts: Thermostats connected to Google Home, Alexa, IFTTT, or a separate smart-home hub can occasionally receive competing commands from two different apps in the same minute, leaving the physical relay in an indeterminate state.
When in doubt, always verify the actual physical state at the wall unit and, if possible, listen or feel at the furnace itself, rather than trusting only the phone app’s icon.
Carbon Monoxide Safety: When a “Lockout” Is Actually Protecting You
It’s worth stepping back from pure troubleshooting for a moment to underline why so many of these failure points exist in the first place: they are deliberate safety features, not defects. A furnace that refuses to ignite after a failed flame sensor reading, a blocked pressure switch, or a tripped high-limit switch is doing exactly what it was engineered to do—protecting your home from a burner that lights unevenly, a blocked flue that can’t vent combustion gases, or an overheating heat exchanger that could crack and leak carbon monoxide into the ductwork.
For that reason, this guide deliberately does not walk through how to bypass, jump out, or manually override a safety switch or lockout condition. If your furnace is going into repeated lockout, the correct response is to identify and fix the underlying cause (dirty flame sensor, blocked vent, clogged filter, low gas pressure) rather than defeating the safety device that’s catching it.
What Does It Actually Cost to Fix? A Repair Price Guide
One of the most common questions after a homeowner narrows down the cause is simply, “is this a cheap fix or an expensive one?” Costs vary by region and contractor, but the table below gives a realistic ballpark for the issues covered in this guide, based on typical U.S. service call pricing.
| Issue | Typical Repair Cost | DIY Possible? |
|---|---|---|
| Dirty flame sensor cleaning | $0 (DIY) – $150 (service call) | Yes, with steel wool and basic tools |
| Thermocouple replacement | $100 – $250 | Possible, but gas connections involved |
| Igniter replacement | $150 – $450 | Moderate DIY difficulty; fragile part |
| Circulator pump (boiler) | $300 – $800 | Not recommended for most homeowners |
| Zone valve (hydronic) | $250 – $600 | Not recommended without HVAC experience |
| Zone damper actuator | $200 – $500 | Possible for handy homeowners |
| Adding a C-wire / power adapter kit | $0 (self-install kit) – $200 (electrician) | Often yes with an adapter kit |
| Smart thermostat replacement | $130 – $280 (unit only) | Yes, in most low-voltage homes |
| Electric furnace sequencer replacement | $150 – $350 | Moderate; requires care around high current |
| Full furnace replacement | $2,500 – $7,500+ | No; licensed installation required |
These figures are general estimates, not quotes, and can vary based on your region, the age and brand of your equipment, and whether the repair is done during regular hours or as an emergency after-hours call. Getting two or three quotes for anything above a simple sensor cleaning is generally worth the time it takes.
Running Cost Comparison: Gas Furnace vs. Electric Furnace vs. Heat Pump
Once a heating system has failed and needed repair, many homeowners start wondering whether it’s worth switching systems entirely rather than continuing to fix the one they have. While the right choice depends heavily on local energy prices, climate, and existing ductwork, the general cost-per-hour-of-comfortable-heat pattern tends to hold across most U.S. regions.
| System Type | Typical Efficiency | Relative Operating Cost |
|---|---|---|
| Gas furnace (standard efficiency) | 80% AFUE | Low to moderate in areas with cheap natural gas |
| Gas furnace (high efficiency) | 95-98% AFUE | Low, but higher upfront equipment cost |
| Electric resistance furnace/baseboard | ~100% (but electricity costs more per unit of heat) | Highest ongoing cost in most regions |
| Heat pump (moderate climate) | 200-300%+ efficiency (COP 2-3) | Lowest in mild-to-moderate winter climates |
| Heat pump (cold climate, with aux heat) | Efficiency drops as temperature drops | Moderate; auxiliary electric strips add cost on the coldest days |
This is part of why a heat pump’s auxiliary electric heat strips kicking on during a cold snap (mentioned in Phase 3) causes such a noticeable jump in a monthly electric bill—those strips run at the same relatively low efficiency as a plain electric furnace, only kicking in when the heat pump alone can’t keep up with outdoor temperatures.
Preventive Maintenance: Stopping This From Happening Again
Almost every failure point described in this guide—dirty flame sensors, clogged filters, tripped high-limits, sluggish igniters—shares one root cause: lack of routine maintenance. A simple annual (or twice-yearly) maintenance habit prevents the vast majority of “Heat On but no heat” calls before they ever start.
- Change or clean the air filter every 1-3 months during heating season. This single habit prevents the majority of high-limit trips and short cycling covered in this guide.
- Have a professional tune-up done annually, ideally in early fall before the first cold snap. A tech will clean the flame sensor, check gas pressure, inspect the heat exchanger for cracks, and verify the inducer motor and pressure switch are working correctly.
- Bleed hydronic radiators at the start of each heating season to clear any air that accumulated over the summer, restoring even heat across every radiator.
- Test your thermostat batteries (if applicable) each fall, even on hardwired units, since many keep a battery backup that silently degrades.
- Keep furniture, rugs, and curtains clear of baseboard heaters and floor vents to prevent internal high-limit trips on electric baseboard and forced-air systems alike.
- Schedule a chimney/flue inspection every few years on standing-pilot and atmospheric-vent furnaces to catch blockages before they trip pressure switches mid-winter.
Home Warranty and Insurance Coverage for Furnace Repairs
Before paying out of pocket for any repair beyond a simple filter change or battery swap, it’s worth checking whether the cost is already covered. Coverage generally falls into three categories, and knowing which applies to your situation can save a significant repair bill.
- Manufacturer’s warranty: Most furnaces, boilers, and heat pumps carry a parts warranty of 5-10 years and sometimes a separate, shorter labor warranty from the installing contractor. Components like igniters, flame sensors, and control boards are frequently covered if the unit is still within its original parts warranty window, even if the labor to install them isn’t.
- Home warranty plans: Third-party home warranty companies often cover HVAC system failures, including furnace igniters, blower motors, circulator pumps, and control boards, for a modest service call fee. These plans typically exclude cosmetic thermostat replacements but do cover the mechanical failures described throughout Phases 1 through 5 of this guide.
- Homeowners insurance: Standard homeowners insurance generally does not cover routine mechanical failure or wear-and-tear breakdowns like a worn-out flame sensor or a failed igniter. It may cover furnace damage caused by a specific covered peril, such as a burst pipe flooding a basement furnace or storm damage to an outdoor heat pump unit, but not simple age-related failure.
If your furnace, boiler, or heat pump is less than 10 years old, it’s always worth checking the original installation paperwork or contacting the manufacturer with your model and serial number before assuming a repair bill will be paid entirely out of pocket.
Renters vs. Homeowners: Who’s Responsible for This Repair?
For anyone renting rather than owning, “Heat On but no heat” raises an additional question that has nothing to do with wiring diagrams: who is legally responsible for fixing it, and how quickly?
- Landlord responsibility in most jurisdictions: In the large majority of U.S. states and Canadian provinces, a functioning heating system is considered part of a rental unit’s “habitability” or “warranty of habitability,” meaning the landlord is legally required to maintain and repair the furnace, boiler, or heat pump itself, along with any hardwired thermostat.
- Emergency repair timelines: Many local housing codes classify a complete loss of heat during winter months as an emergency repair, often requiring landlords to respond within 24-72 hours rather than the standard timeline for non-urgent maintenance requests.
- Tenant-owned smart thermostats: If a tenant has installed their own smart thermostat (replacing a landlord-provided unit), responsibility for wiring issues introduced by that installation, such as a missing C-wire, can shift to the tenant depending on the lease terms and local law.
- Documentation matters: Whether reporting to a landlord or a property management company, documenting the exact symptoms described in this guide (fan setting, whether the furnace clicks, whether the pilot or igniter is visible) in writing creates a paper trail and helps a maintenance technician diagnose the issue faster on the first visit.
Homeowners, of course, carry full responsibility for both diagnosis and repair, which is exactly why the phased troubleshooting approach earlier in this guide is worth working through before scheduling a service call.
DIY vs. Calling a Professional: A Simple Decision Framework
Not every step in this guide is appropriate for every homeowner, and knowing where the line sits saves both money and risk. As a general rule of thumb:
- Safe and appropriate for most DIYers: checking the fan switch, resetting breakers, replacing thermostat batteries, changing the air filter, cleaning a flame sensor with steel wool (power off), bleeding a radiator, and installing a plug-in C-wire adapter kit.
- Doable for handy homeowners with basic electrical comfort: checking voltage at the thermostat wires with a multimeter, replacing a damper actuator, swapping a like-for-like thermostat on a low-voltage system.
- Best left to a licensed technician: anything involving the gas valve, heat exchanger, circulator pump, line-voltage wiring, or repeated lockouts whose cause isn’t obvious after the basic checks above. These jobs often require specialized combustion analyzers, warranty documentation, or code-compliant permits that a DIY repair can jeopardize.
If you’ve worked through Phases 1 through 5 above and still can’t identify where the sequence of operation is stalling, that’s usually the clearest sign it’s time to bring in a professional rather than continuing to guess.
Printable Quick-Reference Checklist
Keep this list near your furnace or thermostat for the next time “Heat On” doesn’t mean warm air:
- Fan switch set to AUTO, not ON
- Thermostat batteries fresh (if applicable)
- Furnace power switch and dedicated breaker(s) confirmed on
- Air filter clean, not clogged or black
- Listen for inducer motor, watch for igniter glow, listen for gas valve click
- Check for a blinking error code on the furnace control board
- For electric furnaces/baseboards: check every dedicated breaker and any internal reset buttons
- For boilers: check system pressure gauge and bleed any cold radiators
- For zoned systems: confirm whether only one zone is affected
- For smart thermostats: confirm a proper C-wire is connected, not just power-stealing
- Confirm the thermostat’s schedule or vacation hold isn’t quietly overriding your setpoint
- If still unresolved after all of the above, call a licensed HVAC technician
Is It Time for a Replacement?
If you are using an old mercury dial or a cheap builder-grade digital unit, and you’ve ruled out the furnace filters and power, the thermostat itself is likely the failure point. Upgrading to a modern smart thermostat not only solves the reliability issue but offers better diagnostics for the future.
Here are our top recommendations based on compatibility and features, comparing top contenders like Honeywell vs Nest and Ecobee vs Wyze.

Google Nest Thermostat
Best Value Upgrade. Detects HVAC issues early and sends alerts to your phone. Simple 2-wire installation for most homes.
Check Price on Amazon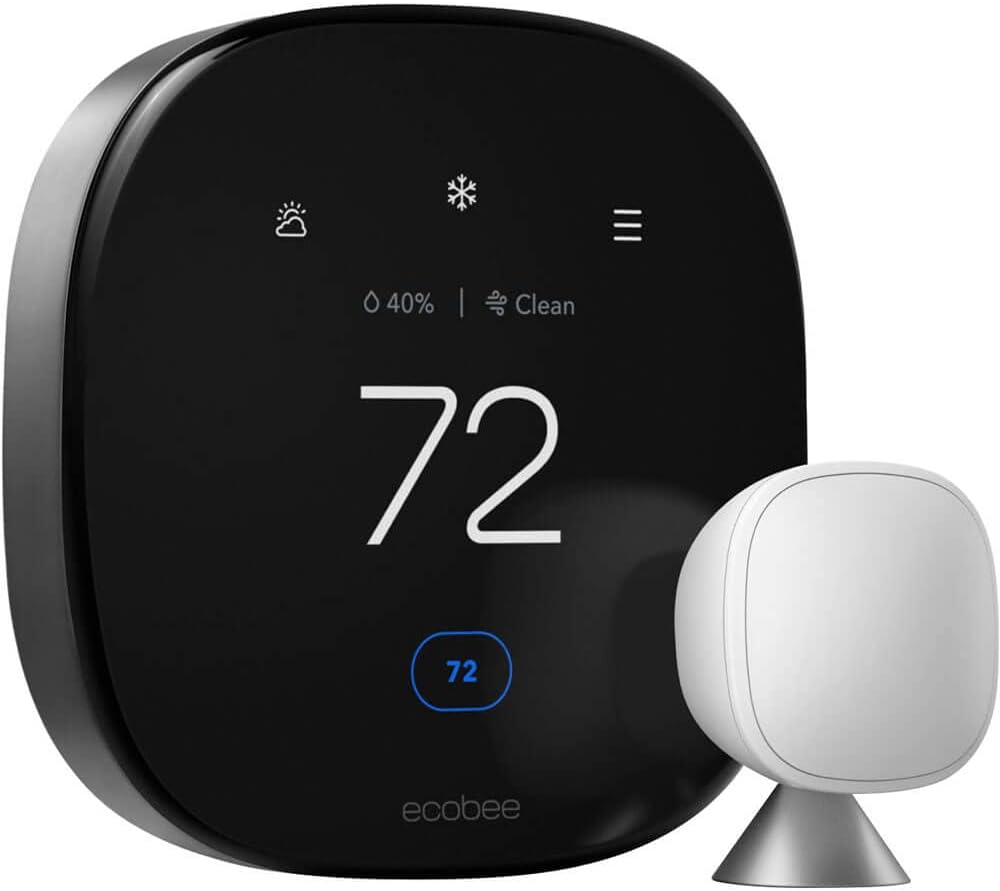
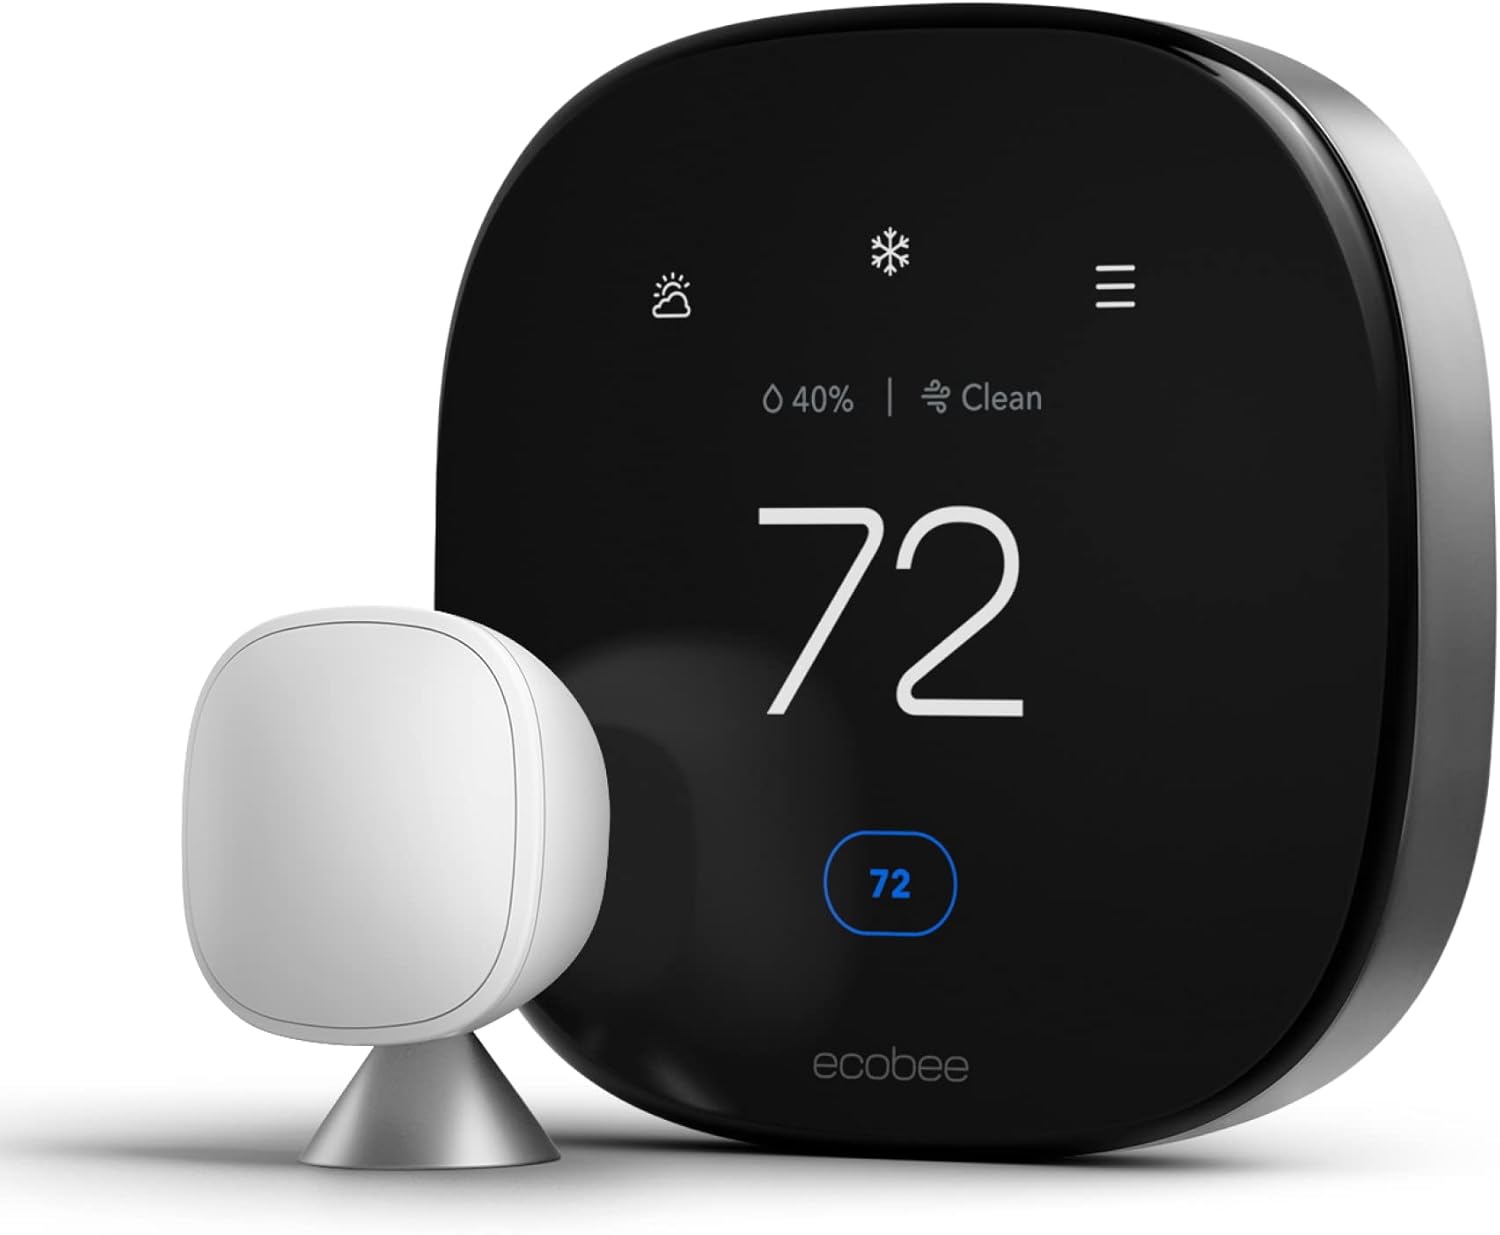
Ecobee Smart Thermostat Enhanced
Best for Data Lovers. Great for understanding usage. Includes a power extender kit if you lack a C-wire.
Check Price on Amazon
Klein Tools HVAC Multimeter
The Essential Diagnostic Tool. If you plan to DIY your furnace repair, you need this to test voltage at the gas valve.
Check Price on AmazonFAQ: Expert Answers
Why is my heat pump blowing cold air when set to heat?
Aside from “Defrost Mode,” heat pumps naturally blow air that is 85-90°F. Since your body temp is 98.6°F, this air feels cool to your hand, even though it is warming the room (which is likely 68°F). This is normal physics, not a malfunction.
Q: Can I replace my own thermostat?
A: Yes, in 90% of cases it is a simple DIY job. However, verify your voltage. If you have thick wires with wire nuts (line voltage), you need a specific type of thermostat. See our guide on switching out an HZ311 for an Ecobee.
Q: Should I set a “Permanent Hold”?
A: If your schedule is erratic, yes. Frequent temperature swings can cause wear on the igniter. Read about smart vs programmable differences.
Q: Why does my furnace run for a few seconds, click off, and then try again?
A: This “try, fail, retry” pattern almost always points to a flame sensor that’s still working but coated in enough carbon to lose the flame signal shortly after ignition. It’s the earliest warning sign of the flame sensor failure described in Phase 2, and cleaning it now can prevent a full lockout later.
Q: My electric baseboard heater’s thermostat clicks and the light comes on, but the heater stays cold. What’s wrong?
A: Check the dedicated breaker for that specific baseboard circuit first, since electric baseboard heat is often split by room. If the breaker is fine, the heater’s internal high-limit reset button (usually a small red button on the unit itself) may have tripped due to restricted airflow around the heater.
Q: Is it normal for only one radiator to stay cold while the rest of the house heats fine?
A: In a hydronic system, this is a classic sign of trapped air in that specific radiator, which blocks hot water circulation. Bleeding the radiator with a radiator key is the standard first fix, and it’s a quick DIY job.
Q: Do smart thermostats cause more “Heat On but no heat” problems than old-fashioned ones?
A: Not inherently, but they introduce new failure modes—particularly C-wire power-stealing issues and app/cloud-state mismatches—that simple mechanical thermostats never had. The trade-off is that smart thermostats also give you far better diagnostics (equipment alerts, run-time history) once properly wired.
Q: How many times will a furnace retry before it locks out completely?
A: Most modern gas furnace control boards allow three ignition attempts within a single call for heat before entering a full lockout, which typically requires either waiting an hour for an automatic reset or manually resetting power at the furnace switch or breaker.
Q: Can extreme cold outside cause “Heat On but no heat” even if nothing is broken?
A: Yes, indirectly. Extremely cold outdoor air can cause a condensate trap or PVC vent pipe to freeze shut on high-efficiency furnaces, which trips the pressure switch and stops ignition exactly as if a mechanical part had failed, even though nothing is technically broken.
Q: Why does my furnace work fine at night but seem to struggle during the coldest part of the morning?
A: This pattern is common with both aging furnaces nearing the end of their run-time capacity and heat pumps relying on auxiliary strip heat, since the coldest outdoor temperatures of the day typically occur just before sunrise, putting the maximum demand on equipment that’s already working at its limit.
Q: Is it worth replacing just the thermostat if the furnace itself is old?
A: Generally yes, since a modern thermostat is a relatively small investment that often reveals equipment problems earlier through diagnostic alerts, but if the furnace itself is already past 15-20 years old, it’s worth budgeting for a full system replacement conversation with a technician at the same time rather than treating the thermostat upgrade as a standalone fix.
Q: My new smart thermostat shows the correct temperature but the “Heat On” icon flickers on and off every few seconds instead of staying steady. What does that mean?
A: A rapidly flickering heat icon, rather than a steady one, typically points to an electrical connection issue at the thermostat itself—often a loose wire nut behind the wall plate or a weak C-wire connection—rather than anything wrong with the furnace, and is usually resolved by re-seating the wires at both the thermostat base and the furnace control board.




 Home
Home
 Info
Info
 Compare
 Reviews
 Shop
Shop