
Why Is My Thermostat Not Reaching the Set Temperature? (The Complete Diagnostics Guide)
- The “Stuck” Temperature: Common Causes
- Step-by-Step Troubleshooting Guide
- Wiring, Calibration & Advanced Fixes
- 6 More Advanced Culprits Homeowners Overlook
- Smart Thermostat Compatibility, C-Wire & Wi-Fi Problems
- Zoning Systems & Multi-Stage Equipment
- Programming Mistakes: Holds & Overrides
- Warning Signs You Need a Professional
- Is It Time to Upgrade? (Top Recommendations)
- Frequently Asked Questions
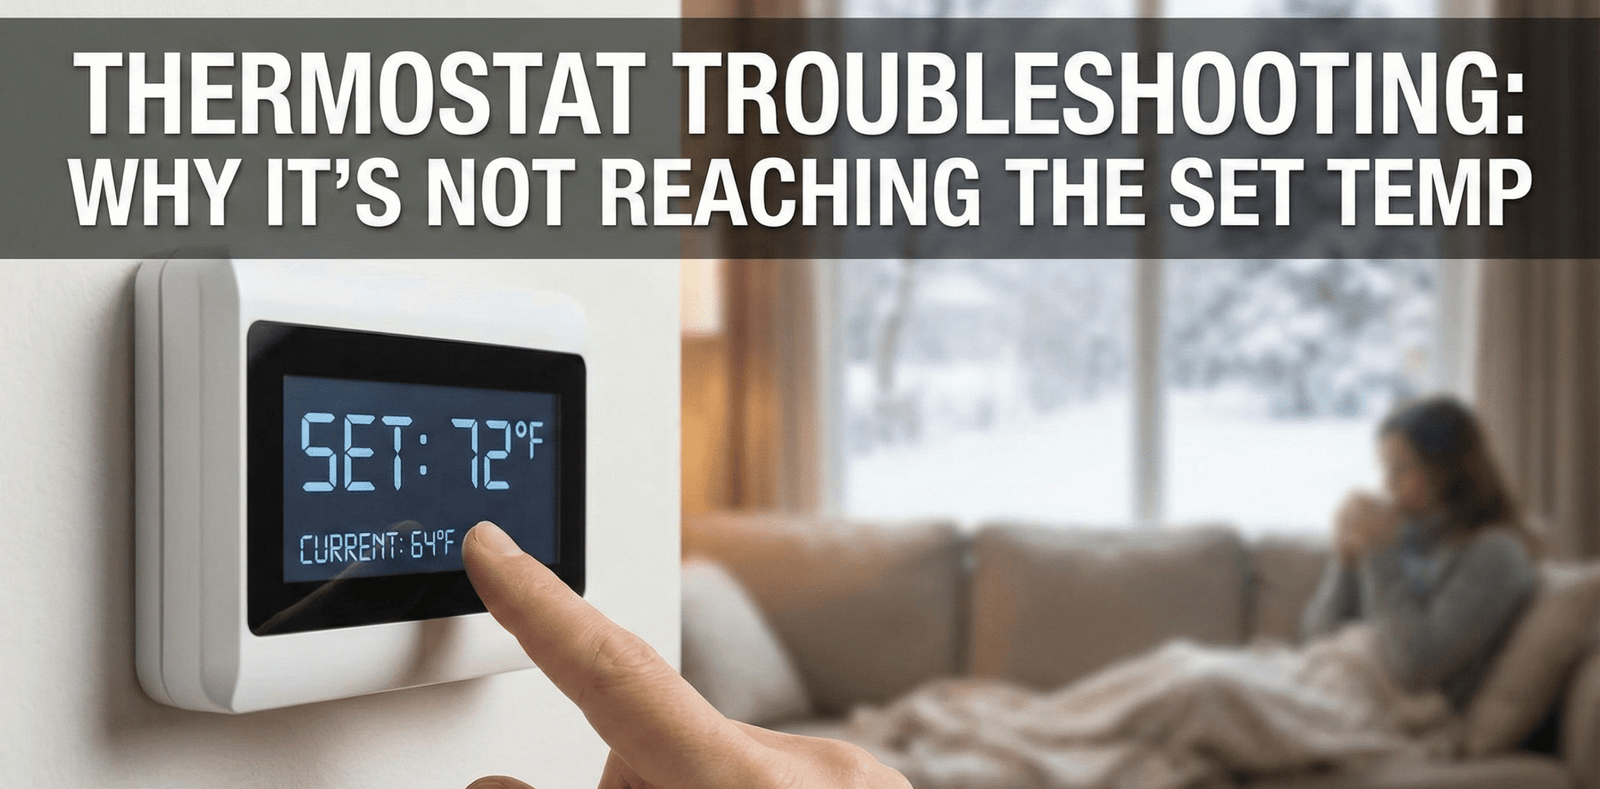
There is nothing more frustrating than setting your thermostat to a cozy 72°F (22°C) only to wake up shivering in a 65°F room. Or conversely, sweating through a summer afternoon because the AC just won’t cool the house down to the target number. If you are asking, “Why is my thermostat not reaching the set temperature?” you are dealing with a common HVAC issue that ranges from simple user errors to complex mechanical failures.
As experts in climate control, we’ve analyzed everything from smart vs. programmable thermostats to the intricacies of heating elements. This guide complies with top HVAC standards to help you diagnose, fix, or replace your unit effectively.
What makes this particular problem so frustrating is that the symptom looks identical no matter what’s actually causing it. A thermostat stuck three degrees short of setpoint in July could be caused by a two-dollar dirty filter, a two-hundred-dollar capacitor, or a two-thousand-dollar refrigerant leak, and from the homeowner’s chair, all three look exactly the same: the display just won’t move. That’s why this guide is structured as a diagnostic funnel rather than a simple list. We start with the checks that take thirty seconds and cost nothing, move through the intermediate fixes that require opening the thermostat faceplate or checking a setting menu, and finish with the deeper mechanical and electrical issues that genuinely warrant a professional technician. Working through the sections in order, rather than jumping straight to “call a repairman,” will save most homeowners a service call fee for what turns out to be a five-minute fix, while still equipping you to recognize the handful of situations where DIY troubleshooting should stop and a licensed professional should take over.
The “Stuck” Temperature: 5 Most Common Culprits
Before we rip the thermostat off the wall, let’s look at the most frequent reasons your HVAC system runs endlessly without hitting the target.
1. The Air Filter is Dirty
It sounds too simple, but a clogged air filter is the #1 reason for airflow restriction. If air cannot pass through the system efficiently, the heat exchanger may overheat (causing a safety shutoff) or the AC coils may freeze. This leads to short cycling.
2. Incorrect Sensor Reading (Ghost Readings)
Your thermostat measures the temperature exactly where it sits. If it is located near a drafty window, in direct sunlight, or near the kitchen oven, it will think the room is a different temperature than it actually is. Learn more about how these devices work in our article: Thermostat Explained.
Proper thermostat placement follows a fairly specific set of rules that many original builder installations ignore entirely. The ideal spot is on an interior wall (not an exterior wall, which conducts outdoor temperature swings through the drywall), roughly 52-60 inches above the floor (average chest height, where air is well mixed rather than stratified near the ceiling or floor), in a central, high-traffic hallway or living space that represents the “average” condition of the home rather than an outlier room. Common placement mistakes include mounting the thermostat directly above or beside a supply air register (which causes the thermostat to read the blast of freshly conditioned air rather than the room’s ambient temperature and shut the system off prematurely), near a return air grille (which can pull air from adjacent rooms and skew the reading), above a lamp, TV, or other heat-generating electronics, in a stairwell or open-concept area with significant natural convection currents, or in a room that’s rarely occupied, such as a formal dining room that stays closed off most of the week. If your thermostat sits in any of these problem locations, relocating it, which typically requires fishing new low-voltage wire through the wall or switching to a wireless remote-sensor-equipped smart thermostat, is one of the highest-impact fixes available, often solving chronic “doesn’t reach temperature” complaints in rooms far from the thermostat itself.
3. The System is Undersized or Overwhelmed
In extreme weather conditions (like a -10°F freeze or a 105°F heatwave), your system might simply be at maximum capacity. Most residential systems are designed to maintain a temperature differential of about 20°F from the outside air.
It’s worth understanding why this 20°F rule exists in the first place. HVAC equipment is selected using a “design temperature,” a statistically representative extreme (not the absolute record) for your region, based on historical weather data for the coldest and hottest days most winters and summers will produce. A furnace or air conditioner sized to that design temperature will comfortably reach setpoint on a typical day, but during a rare or record-breaking heatwave or cold snap that exceeds the design assumptions, even a perfectly healthy, well-maintained system can fall a few degrees short simply because the heat load or heat loss has exceeded what the equipment was engineered to overcome. This isn’t a defect; it’s the expected behavior of correctly sized equipment operating outside its design envelope. The practical takeaway is that a temporary shortfall during a genuine weather extreme, especially one that resolves itself once temperatures moderate, is far less concerning than a persistent shortfall during ordinary weather.
4. Power Issues or Low Batteries
Even if hardwired, many thermostats rely on batteries for backup or signal continuity. Battery-operated thermostats can behave erratically when voltage drops. Additionally, check if your breaker has tripped.
5. Thermostat Calibration
Mechanical and older digital thermostats can drift over time. The screen says 70°, but the internal sensor reads 68°. This discrepancy prevents the signal to heat or cool from triggering correctly.
6 More Advanced Culprits Homeowners Overlook
The five causes above cover the majority of “quick fix” scenarios, but they are only the surface layer. If you’ve replaced the filter, repositioned the thermostat, swapped the batteries, and confirmed calibration, and your home still isn’t hitting the number on the display, the problem usually lives deeper in the system. Below are six culprits that we see constantly in service calls, yet almost never get mentioned in basic troubleshooting checklists.
1. Leaky, Undersized, or Poorly Balanced Ductwork
A thermostat can send a perfectly good signal and the furnace or air handler can run flawlessly, but if the ductwork carrying that conditioned air is compromised, none of it matters. Leaky seams at the plenum, disconnected flex duct in the attic or crawlspace, or duct runs that are simply too narrow for the length of the house can bleed off a huge percentage of your heated or cooled air before it ever reaches a supply register. Studies commissioned by utility companies have repeatedly found that the average home loses somewhere between 20% and 30% of the air moving through the duct system to leaks. That means the blower can run continuously and the thermostat can call for cooling or heating for hours, and the room will still creep toward the set temperature at a fraction of the expected rate, if it gets there at all. A related issue is duct balancing: if the branch running to your living room is oversized relative to the bedroom, one space will overshoot the setpoint while the other lags far behind, even though both rooms are served by the same thermostat and the same system. Sealing accessible duct joints with mastic (not standard cloth-backed duct tape, which degrades quickly), insulating runs that pass through unconditioned attics or crawlspaces, and having a technician perform a duct blower-door test are the standard remedies. If you notice that some rooms are consistently colder or warmer than others regardless of the thermostat’s location, ductwork—not the thermostat—is almost always the root cause.
2. Refrigerant Leaks and Dirty Coils (Cooling Side)
On the air conditioning side, a system that is low on refrigerant due to a slow leak will still run, still blow air, and will often still feel “sort of” cool, but it will never actually satisfy the thermostat’s call for cooling. Refrigerant is the medium that actually absorbs heat from your indoor air and rejects it outside; when the charge is low, the evaporator coil can’t extract heat efficiently, and in more severe cases the coil itself will begin to ice over, which further chokes airflow and makes the problem worse in a feedback loop. Warning signs include hissing or bubbling sounds near the indoor unit, visible frost or ice on the copper refrigerant lines, a noticeably warmer-than-normal supply air temperature at the vents, and higher electric bills for the same or worse comfort. Dirty condenser coils outside the home have a similar effect: a coil caked in cottonwood fluff, grass clippings, or years of dust cannot reject heat to the outdoor air efficiently, so the whole refrigeration cycle runs at reduced capacity. Homeowners can safely rinse an outdoor condenser coil with a garden hose (with the power off) as routine maintenance, but refrigerant work legally requires an EPA-certified technician, since refrigerant is a regulated substance and improper handling can damage the compressor.
3. A Clogged Condensate Line Tripping the Safety Switch
Modern air conditioners and high-efficiency furnaces are almost always equipped with a condensate safety float switch. As the AC removes humidity from your air, that water has to drain somewhere, usually through a PVC line that runs to a floor drain, condensate pump, or outside the home. Algae, dust, and mineral buildup regularly clog these lines, and when the water backs up in the drain pan, the float switch trips and shuts the entire cooling system down as a preventive measure against water damage. From the thermostat’s perspective, it is calling for cooling and getting nothing back, which looks identical to a dead compressor or a wiring fault, but the fix is often as simple as flushing the line with a wet/dry vacuum or a cup of diluted vinegar. If your air handler or furnace is in an attic or closet and you notice the system randomly stops cooling for no obvious reason, check the drain pan and float switch before assuming the thermostat itself has failed.
4. A Weak Blower Motor or Failing Capacitor
The blower motor is the workhorse that physically pushes conditioned air through your ducts and out the registers. Capacitors act like a small storage battery that gives the motor the initial jolt of energy it needs to start spinning and then keeps it running smoothly. As capacitors age, they lose capacitance and the motor either struggles to start, runs at reduced RPM, or shuts off intermittently under load. A blower running at 70% of its rated speed can still technically move air, but it may not move enough of it to satisfy a thermostat’s call within a reasonable time, especially on the hottest or coldest days of the year when the system needs full airflow the most. A weak capacitor often shows up as a furnace or air handler that hums for a few seconds before starting, or a blower that sounds like it’s struggling. This is a component-level repair that a licensed technician can usually complete quickly and inexpensively, and it’s one of the most common reasons a system “runs and runs” without the house ever quite catching up to the setpoint.
5. Zoning Imbalances and Stuck Dampers
If your home uses a zoned HVAC system with multiple thermostats controlling motorized dampers inside the ductwork, a single stuck-closed or stuck-open damper can throw the entire system out of balance. A damper that fails in the closed position will starve that zone of air no matter what the thermostat says, while a damper stuck open can dump excess conditioned air into a zone that isn’t calling for it, robbing capacity from the zone that is. Zoning control boards can also fail to communicate properly with individual zone thermostats, leaving one zone “stuck” in a call state that never gets satisfied. If you have a zoned system and only one zone consistently fails to reach its setpoint while the others perform normally, the damper and zone control board for that specific zone—not the thermostat—should be the first thing inspected.
6. Solar Heat Gain and Time-of-Day Load Swings
It’s extremely common for a thermostat to hold the set temperature perfectly overnight and in the early morning, only to lose ground steadily through the afternoon as the sun moves across west-facing windows. This isn’t a malfunction at all—it’s simple thermodynamics. A large window exposed to direct afternoon sun can add several thousand BTUs of heat load to a room in a matter of hours, and if your system’s cooling capacity was sized around average conditions rather than peak solar gain, it will lose the battle during those peak hours even while running continuously. The same effect happens in reverse on the heating side in unheated sunrooms or rooms with large uninsulated glass on cold, windy nights. If your temperature complaints cluster around specific hours of the day rather than happening consistently around the clock, solar and thermal load—not thermostat malfunction—is very likely the explanation. Solar screens, low-E window film, and cellular shades can meaningfully reduce this effect without any HVAC work at all.
Step-by-Step Troubleshooting Guide
If you’ve ruled out the extreme weather and changed your filter, follow this logical diagnostic path.
Step 1: Check the Fan Setting
Is your fan set to ON or AUTO? If it is set to “ON,” the fan blows continuously, even when the furnace isn’t heating. This can make the air feel cool and prevent the house from feeling warm. Always use “AUTO” for temperature maintenance. Curious about consumption? Read how much electricity the thermostat fan uses.
Step 2: The “Click” Test
Turn the temperature up (for heat) or down (for cooling) significantly—at least 5 degrees. You should hear a distinct “click.”
- If it clicks but nothing happens: The issue is likely with the furnace, boiler, or AC unit (igniter, capacitor, or relay). See: Why is my thermostat clicking but not turning on?
- If it doesn’t click: The thermostat itself may be dead or the backplate connection is loose.
Step 3: Reset the Unit
Sometimes digital logic gets stuck. For smart units like Sensi or Nest, a reset is often the fix.
Reference: How to reset your Sensi Thermostat.
Step 4: Check the Differential (Swing) Setting
Every thermostat, mechanical or digital, uses a “differential” or “swing” setting, sometimes called deadband. This is the gap between the temperature that triggers the system to turn on and the temperature that tells it to shut off. A typical factory default is around 1°F, meaning if you set the thermostat to 70°F, the heat won’t kick on until the room drops to about 69.5°F and won’t shut off until it climbs to about 70.5°F. On many programmable and smart thermostats, this differential is user-adjustable in the installer or advanced settings menu, and it’s easy to accidentally set it too wide, especially on older mechanical dial units where the anticipator and differential are mechanically linked. If the differential has been set to a wide swing, such as 2°F or 3°F, the system will appear to “give up” several degrees short of your actual setpoint before cycling on again, which can look exactly like a system that can’t reach temperature even though it’s functioning as designed. Consult your specific model’s installer manual to locate this setting, and if it has been changed from the default, resetting it to a tighter 0.5°F to 1°F swing usually resolves the complaint immediately.
Step 5: Verify With an Independent Thermometer
Before assuming any component has failed, place a separate, calibrated thermometer or hygrometer about five feet away from the thermostat, at roughly the same height, out of direct sunlight and airflow. Let it sit for at least 20 minutes, then compare the reading to what the thermostat display shows. A gap of more than 1-2°F between the two readings points toward a thermostat sensor problem rather than an HVAC performance problem, and you can proceed directly to the calibration and wiring sections below. If the two readings match closely, the thermostat is accurately reporting the room’s actual condition, and the investigation should shift toward the equipment itself, the ductwork, or the building envelope, since the thermostat is doing its job correctly. This single step saves enormous amounts of time by immediately telling you whether you’re chasing an electronics problem or a mechanical/airflow problem.
Wiring, Calibration & Advanced Fixes
If the basic troubleshooting didn’t work, we need to look deeper. This often involves removing the thermostat faceplate.
Check the Anticipator (Mechanical Units)
Older analog thermostats use a “heat anticipator.” If this is set incorrectly, the system will shut off before the room reaches the target temp (short cycling). Adjusting the lever slightly towards “Longer” can help the system run long enough to satisfy the demand.
The anticipator is a small, adjustable heating element inside the thermostat that mimics the warm-up delay of the furnace itself, allowing the mercury switch or bimetal coil to “anticipate” that the room is about to reach temperature and shut off the burner a little early so the residual heat already in the ductwork and heat exchanger doesn’t overshoot the setpoint. Its dial is usually marked with an amperage scale from roughly 0.1 to 1.2 amps, and it should be set to match the amp draw of your specific furnace’s gas valve or relay, a figure typically printed on the furnace’s wiring diagram or nameplate. If the anticipator amperage is set too low relative to the actual equipment, the thermostat shuts the burner off too early and too often, producing exactly the short-cycling, never-quite-warm-enough symptom this guide addresses. If it’s set too high, the opposite happens: the system overshoots the setpoint and the room temperature swings wider than it should before settling. Because mechanical anticipators are increasingly rare on modern equipment, most homeowners will only encounter this on a decades-old analog dial thermostat still in service; if yours is digital, this section doesn’t apply, and the equivalent electronic behavior is governed by the differential/swing setting covered later in this guide.
Inspect the Wiring
Pull the thermostat off the wall. Ensure the R (Power), W (Heat), Y (Cooling), and G (Fan) wires are securely screwed in. If you recently installed a smart thermostat, ensure the C-wire is providing constant power.
Tip: Planning to switch brands? Check our guide on switching an HZ311 for an Ecobee.
Is the Thermostat Bad?
To definitively confirm if the thermostat is the culprit, you can perform a “bypassing” test (for advanced DIYers only). By touching the R and W wires together, the heat should turn on immediately. If the heat turns on when wires touch, but not when connected to the thermostat, the thermostat is faulty.
Read more: How to tell if your thermostat is bad.
Smart Thermostat Compatibility, C-Wire & Wi-Fi Problems
Smart and Wi-Fi thermostats introduce an entirely separate category of “not reaching set temperature” complaints that have nothing to do with the anticipator, filters, or ductwork discussed above. Because these units run a small onboard computer, connect to your home network, and often control multi-stage or heat pump equipment through software logic rather than a simple mechanical switch, the failure points multiply.
Missing or Unstable C-Wire Power
Traditional mechanical thermostats sip so little power that they can run off the system’s control transformer using only the R, W, Y, and G wires. Smart thermostats, with their color touchscreens, Wi-Fi radios, and always-on processors, need a continuous, stable power source, which is what the C-wire (common wire) provides. Many homes built before smart thermostats became mainstream were never wired with a C-wire at all. Manufacturers get around this with “power stealing” or “power sharing” technology that borrows tiny amounts of current from the other wires, but on some systems, particularly older furnaces, systems with electronic ignition, or setups with long wire runs, this workaround causes voltage sag. The symptom is a thermostat that appears to work, connects to Wi-Fi, and shows the correct temperature, but randomly loses connection, reboots, or fails to actually energize the call relay long enough to satisfy demand, so the system short-cycles or never fully engages. If your smart thermostat behaves erratically, especially after a firmware update or during high system demand, installing a proper C-wire (fishing new thermostat wire, or using a “fan relay” or “add-a-wire” adapter that repurposes the G wire) usually eliminates the problem completely.
Incorrect O/B Terminal Configuration on Heat Pumps
Heat pumps use a reversing valve to switch between heating and cooling mode, and that valve is controlled by a wire connected to either the O or B terminal on the thermostat, depending on the equipment manufacturer. Some brands energize the reversing valve in cooling mode (O), while others energize it in heating mode (B). If this single setting is configured backward during installation, a heat pump can end up running in cooling mode while the thermostat thinks it’s calling for heat, or vice versa. The result is a system that runs constantly, uses enormous amounts of energy, and moves the indoor temperature in exactly the wrong direction, which homeowners understandably interpret as “the thermostat isn’t working.” This is one of the most common installation errors on heat pump systems and is worth checking first if a newly installed heat pump seems to fight against whatever mode you select.
Aux Heat and Emergency Heat Confusion
On heat pump systems, most smart thermostats will automatically bring on “Aux Heat” (auxiliary heat, typically electric resistance strips) when the outdoor temperature drops low enough that the heat pump alone can’t keep up, or when the indoor temperature falls more than a couple of degrees below the setpoint and the system needs a boost to catch up quickly. Seeing the “Aux Heat” or “Emergency Heat” indicator light up is normal behavior during a cold snap, not a malfunction, though it does mean higher electric bills since resistance heat is far less efficient than the heat pump’s compressor cycle. However, if Aux Heat is running constantly even in mild weather, or if Emergency Heat mode has been left on manually (which disables the heat pump’s compressor entirely and relies solely on the expensive backup strips), the system will struggle to keep up with a rapid setpoint change and homeowners often mistake this for the system “not reaching temperature,” when in reality it’s running the least efficient mode available on purpose or by mistake.
Wi-Fi Dropouts and Firmware Bugs
A smart thermostat that loses its Wi-Fi connection generally continues to operate using its last known schedule and setpoint, but scheduled changes, geofencing “away” adjustments, and remote app commands stop working until the connection is restored. Router firmware updates, ISP outages, and 2.4GHz band congestion from other smart home devices are common culprits. Separately, thermostat manufacturers occasionally push buggy firmware updates that introduce sensor calibration errors, scheduling glitches, or touchscreen unresponsiveness. If your thermostat’s behavior changed suddenly and you didn’t touch any settings, check the manufacturer’s app or support page for a known firmware issue before assuming a hardware failure. A soft reset (holding the reset button, or pulling the unit off the wallplate for 10-15 seconds) frequently clears a stuck firmware state.
Static Discharge Lockups
In dry winter climates, static electricity discharge from simply walking across a carpeted room and touching the thermostat screen can cause the onboard processor to freeze or behave erratically, especially in older digital and early smart models with less robust electrostatic discharge protection. If your thermostat display suddenly goes blank, freezes on one screen, or stops responding to touch, and this tends to happen more in winter, try a full power cycle (removing the thermostat from its base or briefly killing power at the breaker) before assuming the unit is defective.
Zoning Systems & Multi-Stage Equipment
Beyond basic single-stage furnaces and air conditioners, a large percentage of newer homes use multi-stage or variable-speed equipment paired with zoning, and thermostat/equipment mismatches here are a frequent, under-diagnosed cause of “never reaching temperature” complaints.
Single-Stage Thermostat Controlling Multi-Stage Equipment
Two-stage and variable-speed furnaces and air conditioners are designed to run a lower-capacity first stage most of the time for efficiency and comfort, only kicking into the higher-capacity second stage when the first stage can’t keep up, typically after 10-20 minutes of continuous first-stage runtime. If a basic single-stage thermostat is installed on this kind of equipment (a common mistake during DIY replacements or budget installations), it can only send a simple on/off signal and has no way to request the second, more powerful stage. The equipment will run in low-capacity mode indefinitely, which is often not powerful enough to overcome a large temperature swing or extreme outdoor conditions, leaving the room permanently a few degrees short of target even though everything is technically “working.” The fix is straightforward: the thermostat must be matched to the equipment’s staging capability, using the manufacturer’s multi-stage compatible model.
Zone Board Faults and Bypass Duct Problems
In ducted zoning systems, a bypass duct routes excess airflow back to the return side when only one or two zones out of several are calling. If the bypass damper is stuck open or oversized for the system, so much conditioned air gets diverted back to the return that the active zones receive a fraction of the airflow they need, and they’ll run for hours without reaching setpoint even though the equipment itself is functioning perfectly. Conversely, an undersized or stuck-closed bypass can cause excessive duct pressure, freezing coils, or the safety limit switch cutting the system off early. Diagnosing zone board and bypass issues generally requires a technician with duct pressure gauges, but the telltale sign for homeowners is a system that performs fine when every zone calls simultaneously, but struggles when only a single zone is active.
Programming Mistakes: Holds, Overrides & Schedule Conflicts
A surprising number of “the thermostat won’t reach temperature” calls turn out to be programming issues rather than hardware or airflow problems. Modern thermostats offer several overlapping ways to set a temperature, and it’s easy for these to conflict with each other without the homeowner realizing it.
Temporary Hold vs. Permanent Hold
Most programmable and smart thermostats let you manually bump the temperature up or down between scheduled events. Depending on the model and its settings, this adjustment is either a “Temporary Hold” (which reverts back to the programmed schedule at the next scheduled change) or a “Permanent Hold” (which overrides the schedule indefinitely until manually changed). A common complaint is a thermostat that seems to randomly “jump back” to an uncomfortable temperature; in almost every case, this is a Temporary Hold expiring exactly as designed and reverting to a schedule the homeowner forgot they set months earlier. Reviewing and, if needed, deleting or rebuilding the weekly schedule from scratch resolves this category of complaint entirely.
Vacation and Away Mode Left Active
Smart thermostats with geofencing or manually triggered “Away” and “Vacation” modes intentionally widen the setpoint to save energy when nobody is expected to be home, sometimes by 6-10 degrees or more. If a phone’s location services glitch, a household member is added or removed from the geofencing app without updating settings, or a vacation mode was manually set and never turned off after returning home, the system will appear to actively resist reaching a comfortable temperature, when in fact it’s correctly executing an eco setback the user technically requested. Double-check the app’s current mode and any active geofencing members whenever a smart thermostat seems to be “fighting” your setpoint.
Conflicting Multi-User Schedules
In households where multiple people have the thermostat app installed on their phones, it’s common for one person to adjust the schedule or setpoint without the rest of the household knowing, leading to confusion about why the “programmed” temperature doesn’t match expectations. Most apps log a change history; reviewing it can quickly clarify whether the system is malfunctioning or simply following instructions nobody remembers agreeing to.
Warning Signs You Need a Professional, Not a DIY Fix
While a large share of “not reaching set temperature” complaints are resolved with the checks above, certain symptoms indicate a genuine equipment fault that goes beyond thermostat troubleshooting and calls for a licensed HVAC technician. Continuing to run a system exhibiting these signs can turn a moderate repair into a major, expensive failure, and in some cases poses a safety risk.
- Ice or frost visible on the refrigerant lines or evaporator coil — almost always indicates low refrigerant charge or severely restricted airflow, and running the system in this state can damage the compressor.
- A burning, musty, or “hot electrical” smell from the vents or the equipment cabinet, which can indicate an overheating motor, a failing capacitor, or in rare cases a genuine fire risk.
- Frequent short cycling — the system turning on and off every few minutes rather than running full cycles, which accelerates wear on the compressor and can be a sign of an oversized unit, refrigerant issues, or electrical faults.
- A tripped high-limit switch on a furnace, evidenced by the burner shutting off and restarting rapidly, or an error code displayed on the furnace control board.
- Unusual noises — grinding, squealing, banging, or loud clicking that wasn’t present before, which typically points to a failing motor bearing, a loose part, or a electrical relay problem.
- Rising energy bills with no corresponding improvement in comfort, a classic sign of a system working harder than it should to compensate for reduced efficiency.
- Any suspicion of a cracked heat exchanger on a gas furnace, which is a genuine carbon monoxide safety hazard and should never be diagnosed or repaired by anyone other than a certified technician with proper testing equipment.
If you’re seeing any of the symptoms above, it’s worth pausing DIY troubleshooting and scheduling a professional diagnostic visit rather than continuing to run the system while chasing the problem yourself.
Is It Time to Upgrade? Top Recommendations
If your thermostat is over 10 years old, or if you are using a generic builder-grade model, upgrading is the most cost-effective way to solve temperature inconsistencies. Modern sensors are far more accurate.
Here are our top picks based on reliability, ease of use, and features. We have compared many of these head-to-head, such as Honeywell vs. Nest and Ecobee vs. Wyze.

Google Nest Learning Thermostat
Best for those who want “Set it and Forget it.” It learns your schedule to prevent temperature drifts.
Check Price on AmazonRelated: Nest vs Ecobee Comparison
ecobee Smart Thermostat Premium
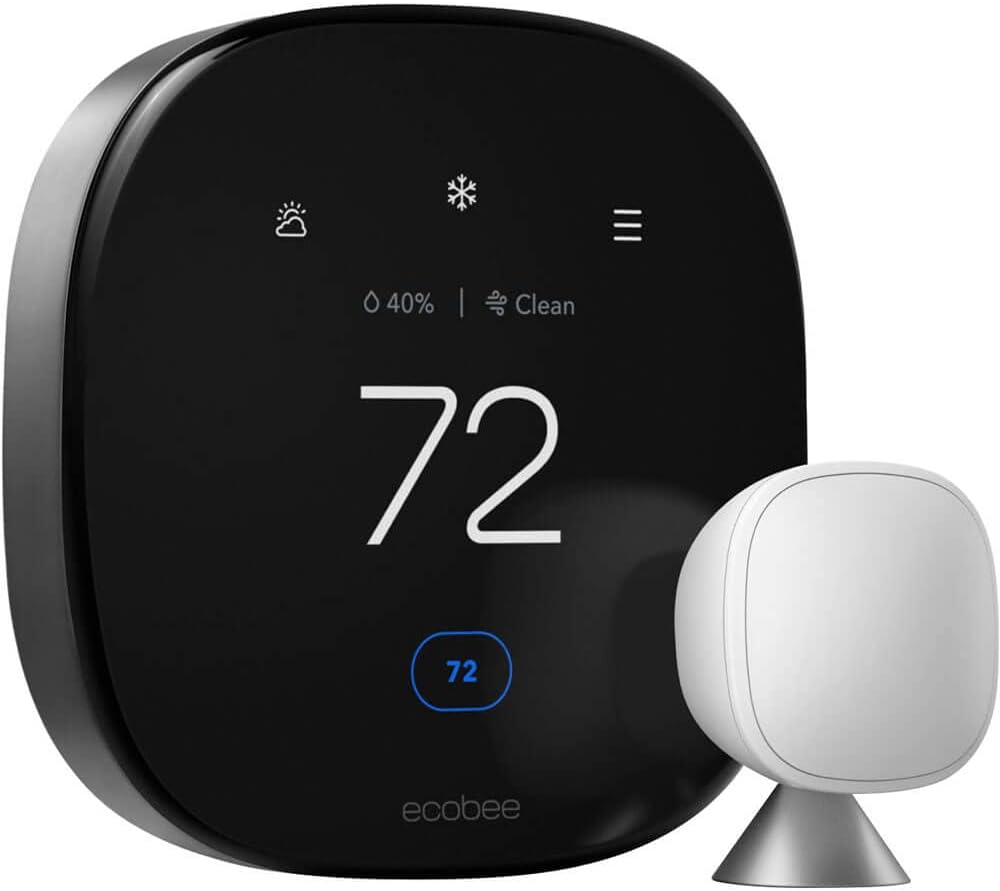
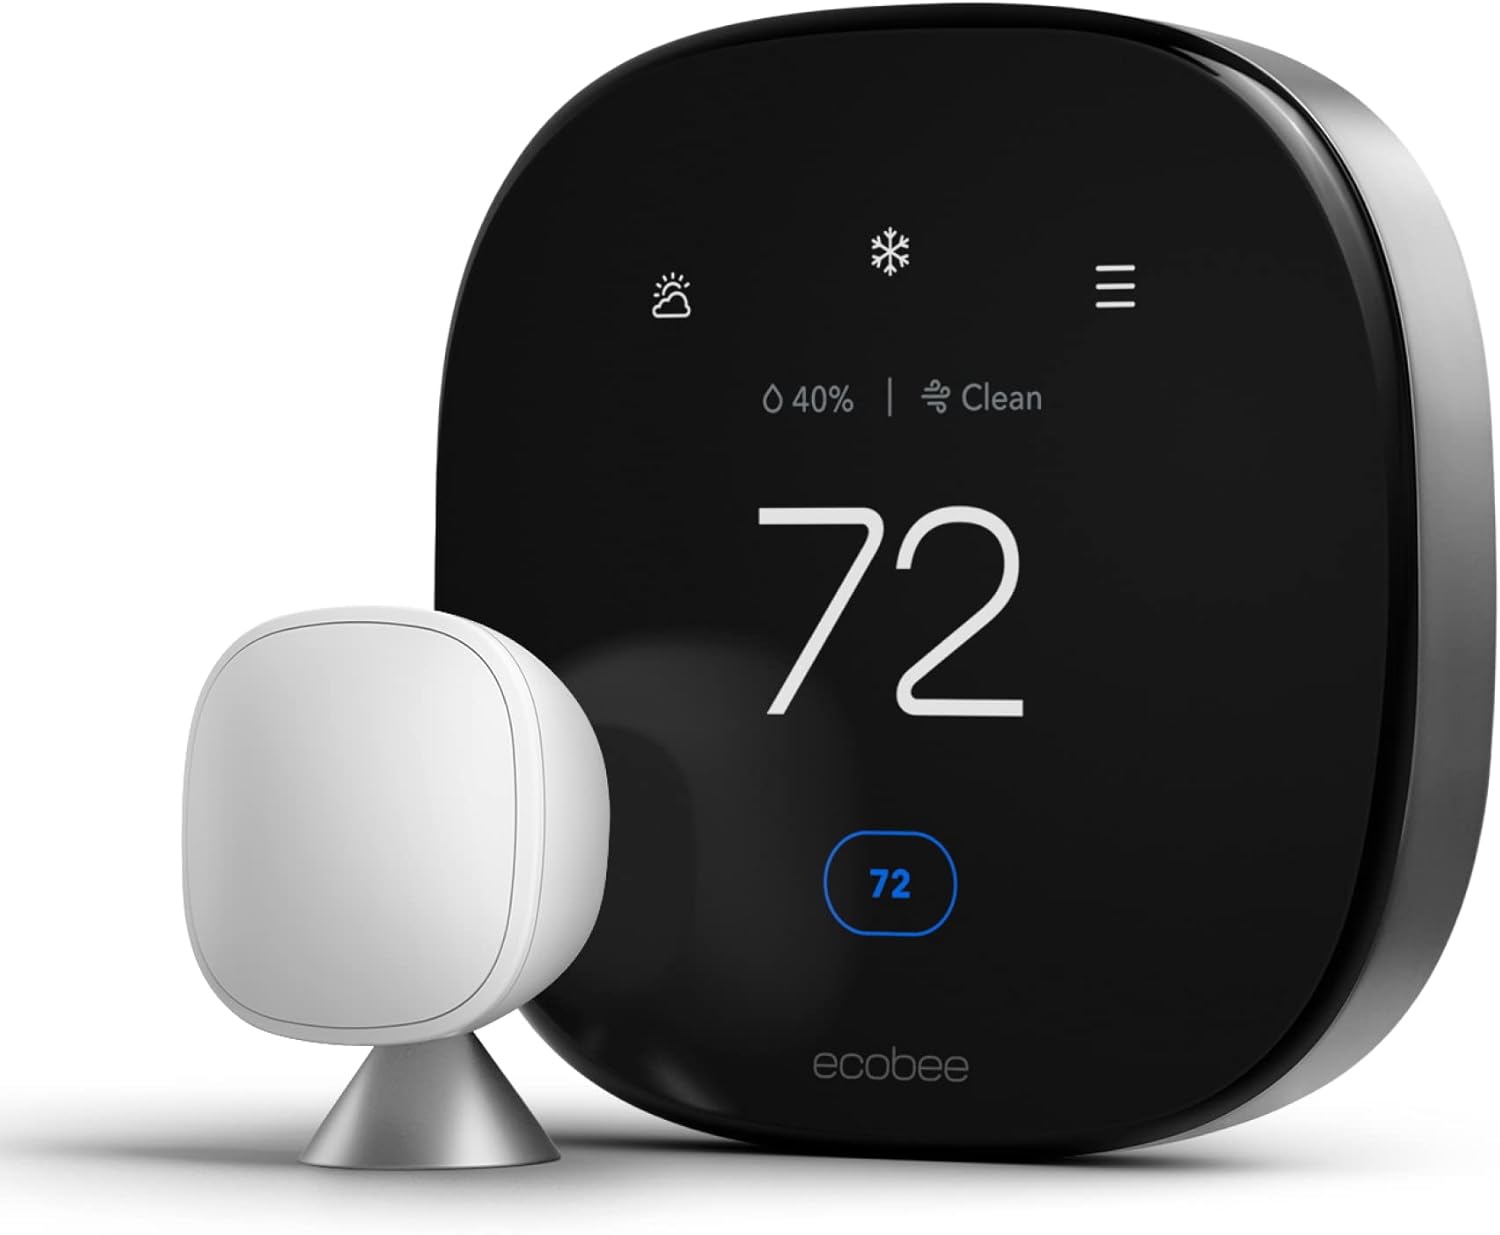
Includes a remote sensor to help reach the set temperature in rooms that are usually cold/hot.
Check Price on AmazonFrequently Asked Questions (FAQ)
Does outdoor temperature affect my thermostat?
Yes. Heat pumps, specifically, struggle when temps drop below freezing. You might need to check your auxiliary heat settings. See 180 vs 195 thermostat differences for engine/hydronic applications, which function similarly regarding thermal thresholds.
Why does my heat pump not reach the set temperature?
Heat pumps release cooler air than gas furnaces (around 90-95°F vs 120°F). It may feel like it’s not working, but it just takes longer. If you have a specific brand, check out our guide on the Best Thermostat for Bosch Heat Pumps.
Should I set a constant temperature or use a schedule?
For energy savings, schedules are better. However, during extreme cold snaps, we recommend a “Permanent Hold” to keep the house mass warm. See: Vacation Settings for Winter.
Why does my house reach the set temperature at night but not during the day?
This pattern almost always points to solar heat gain and outdoor temperature swings rather than a broken thermostat. Overnight, there’s no sun load and outdoor temperatures are typically at their lowest (in summer) or the heating demand is more stable, so the system can easily keep pace with the setpoint. During the afternoon, direct sun through windows, a hotter outdoor peak, and increased indoor activity (cooking, more people home, appliances running) all add heat load simultaneously. If your system is sized close to the minimum required capacity, it will comfortably win the battle at night and lose ground during peak afternoon hours. Solar screens, blinds closed during peak sun, and confirming your system was sized using a proper Manual J load calculation (rather than a rule-of-thumb square footage estimate) are the most effective long-term fixes.
My AC thermostat says 72°F but the room thermometer reads 78°F. What’s wrong?
A gap this large (more than 3-4°F) usually rules out simple calibration drift, which is typically only 1-2°F, and points toward either a sensor problem or a system performance problem. First, run the independent thermometer test described earlier in this guide to confirm the discrepancy is real and not caused by placing the check thermometer in a different microclimate (near a window, in a sunbeam, etc.). If confirmed, check for warm air at the supply registers nearest the thermostat; weak or lukewarm airflow at the vents points to refrigerant, coil, or blower problems covered in the “Advanced Culprits” section above, while strong, cold airflow with a persistent gap points toward a failing or badly miscalibrated sensor inside the thermostat itself.
The furnace runs constantly but the house never gets warm enough. Is that normal?
Occasional long runtimes during extreme cold snaps are normal and expected; furnaces are typically sized to maintain comfort down to a regional “design temperature,” and anything colder than that will stress the system. However, if constant running with no gain in temperature happens in moderate weather, suspect a mismatched or failing anticipator setting, a badly undersized furnace for the home’s actual heat loss, significant duct leakage, or a cracked heat exchanger triggering a high-limit safety shutoff that cycles the burner on and off rapidly without ever building up heat. A high-limit safety trip is also a potential carbon monoxide and safety concern, so if you hear frequent clicking and short burner cycles paired with a furnace that never gets the house warm, a professional inspection is strongly recommended rather than continued DIY troubleshooting.
How long should it actually take to reach the set temperature?
As a rough rule of thumb, a properly sized and functioning system should be able to change the indoor temperature by roughly 1°F every 15-20 minutes under normal (non-extreme) outdoor conditions, meaning a 5°F adjustment might reasonably take an hour to an hour and a half. Extreme setbacks, such as recovering from a vacation hold of 60°F back up to 72°F in the dead of winter, can take considerably longer and may benefit from your thermostat’s built-in “smart recovery” feature, which learns how long your specific system needs and starts the recovery cycle early so you hit the target exactly at your scheduled wake or arrival time rather than starting the countdown at that exact moment.
Do humidity levels affect whether the thermostat “feels” like it reached temperature?
Yes, significantly. Relative humidity has a major effect on perceived comfort independent of the actual air temperature. A room at 75°F with 65% relative humidity will feel noticeably warmer and stickier than the same 75°F room at 45% relative humidity, because high humidity slows the evaporation of sweat from your skin, your body’s primary cooling mechanism. This is why homeowners sometimes report the thermostat “isn’t working” even though it has accurately hit the numeric setpoint; the complaint is really about humidity, not temperature. Running the AC fan on “Auto” rather than “On” helps because continuous fan operation re-evaporates moisture that has already condensed on the cooling coil back into the airstream, undermining dehumidification. A standalone dehumidifier or a thermostat with integrated humidity control can resolve this complaint without any changes to the cooling setpoint at all.
Can altitude or elevation affect how my thermostat performs?
At higher elevations, thinner air reduces both the density of air moving through the ducts and the efficiency of combustion in gas furnaces, since less oxygen is available per cubic foot of air. Manufacturers typically require derating or specific high-altitude conversion kits for furnaces installed above roughly 2,000 feet, adjusting the gas orifice size and blower settings to compensate. A furnace installed without the correct high-altitude kit in a mountain home can underperform consistently, running longer than expected without fully reaching setpoint, particularly during the coldest parts of winter. This is a system sizing and installation issue rather than a thermostat fault, and it’s worth mentioning to your HVAC technician if you live above 5,000 feet and have chronic heating shortfalls.
My ductless mini-split won’t reach the set temperature. Is the cause the same?
Mini-split and multi-split systems share several of the same root causes discussed above, particularly refrigerant charge issues, a dirty indoor blower wheel (which clogs much more easily than a standard air handler blower on ducted systems), and a dirty outdoor condenser coil. Because mini-splits typically lack a central duct system, ductwork leakage isn’t a factor, but incorrect line-set length or too many refrigerant line bends beyond the manufacturer’s rated maximum can starve the system of proper refrigerant flow in exactly the same way a leak would. Mini-splits are also more sensitive to incorrect sizing for the specific room; an undersized unit in a room with a vaulted ceiling or lots of west-facing glass will chronically fall short of its setpoint regardless of how clean and well-charged the system is.
Does radiant floor heating have the same thermostat problems?
Radiant floor systems behave very differently from forced-air systems because the thermal mass of the slab or subfloor responds much more slowly to a thermostat’s call. A radiant system can take several hours, not minutes, to noticeably change room temperature, since the heat has to first warm the mass of the floor before it radiates into the room. Homeowners transitioning from forced air to radiant heat commonly (and incorrectly) assume the thermostat has failed simply because the system doesn’t respond as quickly as they’re used to. Most radiant thermostats include an “outdoor reset” or slab sensor feature specifically designed to anticipate this delay by adjusting water temperature ahead of demand; if your radiant system consistently runs behind, verify this feature is enabled and properly configured rather than assuming a wiring or thermostat fault.
The screen says “Heat On” but I only feel cold or room-temperature air. What’s happening?
On a gas or oil furnace, this typically indicates a genuine ignition failure. Modern furnaces run the blower for a short delay after the burner ignites specifically so the heat exchanger has time to warm up before air is pushed across it; if you feel only room-temperature or cool air well beyond that initial delay (more than 60-90 seconds), the burner likely isn’t lighting even though the thermostat correctly sent the call, which points to a failed igniter, flame sensor, or gas valve. On a heat pump, “cool” air blowing during a heat call in mild-to-moderate outdoor temperatures can indicate the reversing valve is stuck in cooling position (see the O/B terminal discussion above) or, in colder weather, it may simply be the heat pump’s naturally cooler supply air temperature discussed elsewhere in this guide, which is normal heat pump behavior rather than a fault.
Quick Diagnostic Checklist: Recap
With so many possible causes covered in this guide, it helps to have a condensed, ordered checklist you can work through in a single sitting before deciding whether to call a professional. Work through these in order, since each step is roughly ranked from fastest/cheapest to most involved.
- Confirm mode and setpoint — make sure the system is set to Heat or Cool as appropriate and the setpoint is actually different from the current reading.
- Replace the air filter — if it’s been more than 60-90 days, or longer if you have pets, replace it regardless of how it looks.
- Check the fan setting — confirm it’s set to “Auto,” not “On.”
- Look for active holds, away modes, or vacation settings in the thermostat’s app or menu that might be intentionally overriding your setpoint.
- Place an independent thermometer nearby for 20 minutes and compare readings to rule in or out a sensor/calibration problem.
- Inspect thermostat placement for obvious problem spots: direct sun, supply vents, heat-generating electronics, or exterior walls.
- Check the differential/swing setting in the advanced or installer menu if accessible.
- Listen and look at the equipment itself — unusual noises, ice on refrigerant lines, or a burning smell mean it’s time to stop DIY troubleshooting and call a professional.
- Inspect visible ductwork in the attic, basement, or crawlspace for obvious disconnections or crushed flex duct, if accessible and safe to do so.
- Check the condensate drain and float switch near the indoor cooling unit if the AC has stopped running altogether.
- If none of the above resolves it, schedule a professional HVAC diagnostic visit, since remaining causes (refrigerant charge, electrical components, duct sizing, equipment capacity) generally require specialized tools and licensing to safely diagnose and repair.
Working through this list methodically, rather than guessing at a single cause, is the fastest way to either fix the problem yourself or arrive at your technician’s appointment with useful information that can shorten the diagnostic portion of the service call considerably.
Still having trouble? If your wiring is good, your filter is clean, and the thermostat is new, you may have an HVAC sizing issue or a refrigerant leak. In this case, calling a professional is the best route. For more diagnostic guides, visit Thermo Facts.
One last piece of advice worth repeating: don’t let the presence of a smart, Wi-Fi-connected thermostat lull you into assuming the problem must be complicated. The single most common root cause across every category covered in this guide, by a wide margin, remains a dirty air filter restricting airflow. Before opening a faceplate, adjusting a differential setting, or scheduling a technician, it costs nothing and takes five minutes to pull the filter and hold it up to a light. If you can’t see light through it clearly, replace it and give the system a few hours to catch up before troubleshooting anything else. It’s the cheapest test in this entire guide, and it resolves a genuinely surprising share of “won’t reach set temperature” complaints all on its own.
References: SuperTech HVAC




 Home
Home
 Info
Info
 Compare
 Reviews
 Shop
Shop