
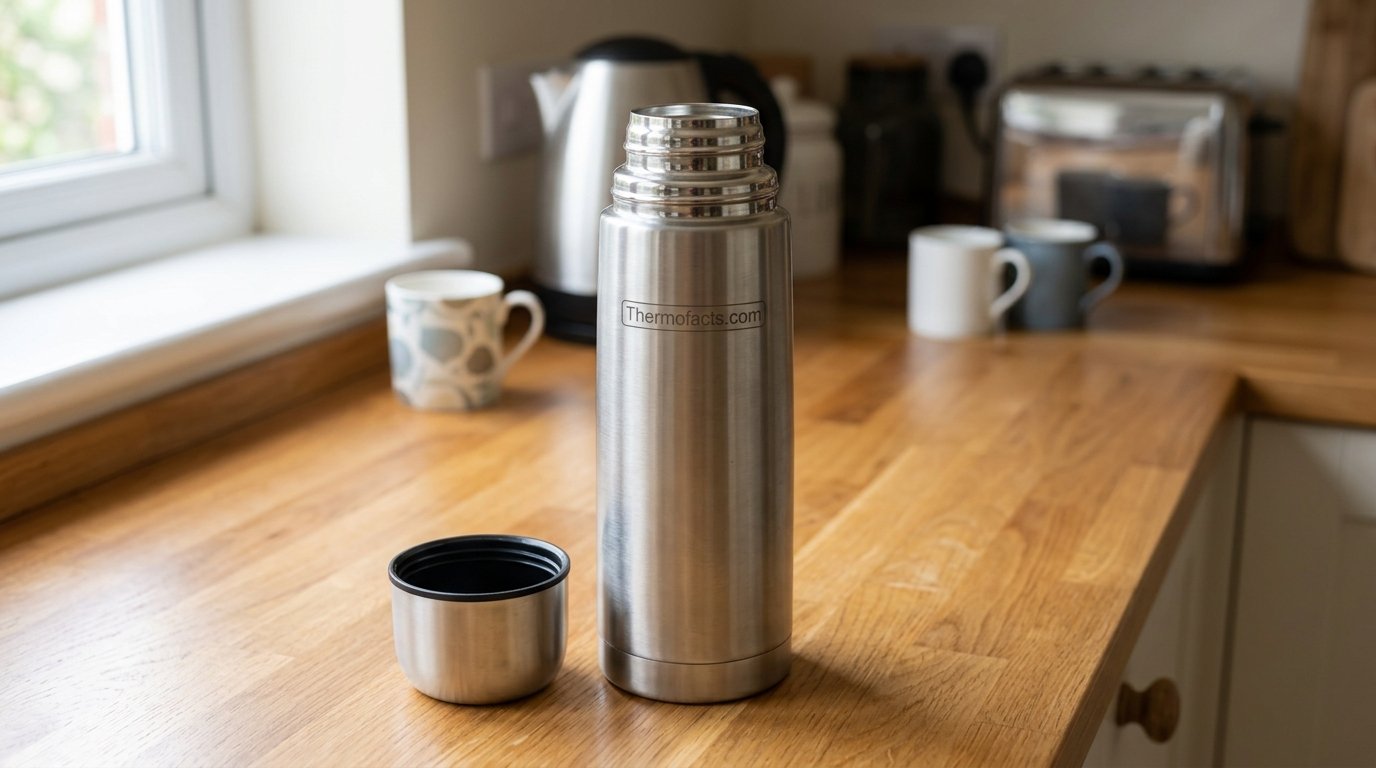
How to Remove Smell From a Thermos: The Complete Odor-Removal Guide
If your thermos smells like yesterday’s soup, last week’s coffee, or something you can’t even identify anymore, you’re not alone. Here’s exactly how to get rid of it — for good.
Why Thermoses Trap Odors in the First Place
A thermos is designed to do one job extremely well: hold temperature. That’s thanks to its vacuum-insulated double-wall construction, which creates a sealed chamber between an inner and outer wall with virtually no air in between. That same airtight design that keeps your coffee hot for ten hours is exactly what traps smells inside the narrow inner chamber once food or drink residue gets into the tiny crevices around the mouth, threads, and base.
Unlike an open bowl or a mug, a thermos never really “airs out” between uses. Moisture, oils, and organic particles from soup, curry, milk-based drinks, or old coffee settle into a warm, damp, dark, low-oxygen environment — which happens to be the exact recipe bacteria and mold love. Within a few hours, that residue starts to break down and release the sulfurous, sour, or musty smell you’re now trying to fight.
This is especially common with food jars used for soups, stews, and curries, since these thicker liquids cling to the walls and lid threads far more stubbornly than water or coffee ever would. If you’ve ever opened a food jar the morning after packing chicken soup and recoiled, this is why.
The good news: none of this means your thermos is ruined. In almost every case, the smell is sitting in a thin biofilm on the interior surface or trapped in the lid’s rubber gasket, and it can be broken down and lifted out with the right combination of chemistry, agitation, and time. Let’s walk through exactly how.
Before You Start: What You’ll Need
You almost certainly already have most of these items in your kitchen. None of the methods below require anything exotic, and most take less than 15 minutes of hands-on effort even though some need hours of soak time.
| Item | Used For | Have It Already? |
|---|---|---|
| Baking soda | Deodorizing, mild abrasive scrub | Most kitchens |
| White vinegar | Cutting through oily film and mineral buildup | Most kitchens |
| Denture tablets or effervescent cleaning tablets | Deep fizzing action in narrow necks | Sometimes |
| Fresh lemon | Natural acid + fresh scent | Most kitchens |
| Coarse salt | Gentle interior scrubbing agent | Most kitchens |
| Uncooked rice | Abrasive agitation tool | Most kitchens |
| Dry mustard powder | Classic odor absorber, especially for milk smells | Occasionally |
| Soft bottle brush | Reaching the base and lid crevices | Recommended purchase |
| Warm (not boiling) water | Base for every soak method | Always |
Method 1: Baking Soda Soak (Best All-Around Method)
Baking soda is a mild alkaline compound that neutralizes acidic odor molecules (the kind produced by sour milk, coffee, and old soup) rather than just masking them. It’s gentle enough for daily use and safe on stainless steel, glass-lined, and most plastic interiors.
Step 1: Fill With Warm Water and Baking Soda
Fill your thermos about three-quarters full with warm water, then add 2–3 tablespoons of baking soda. Screw the lid on loosely (not fully sealed, since a fizzing or expanding reaction can build pressure).
Warm water plus baking soda creates a mild alkaline solution inside the vacuum chamber.
Step 2: Let It Soak
Let the solution sit for at least 4 hours, or overnight for stubborn smells like fish, curry, or old milk. The longer soak time gives the alkaline solution time to break down the biofilm layer coating the interior walls.
A clock icon marks the recommended soak window for a full odor breakdown.
Step 3: Scrub and Rinse Thoroughly
After soaking, use a soft bottle brush to scrub the interior walls and base, paying special attention to the bottom seam where residue collects. Rinse at least three times with clean water, tipping the thermos upside down between rinses to fully drain.
Mechanical scrubbing dislodges residue the soak has already loosened.

Recommended: Long-Handle Bottle Cleaning Brush Set
A dedicated narrow bottle brush reaches the base seam far better than a sponge ever will — essential for any of the methods above.
Check Price on AmazonMethod 2: White Vinegar Soak (Best for Coffee & Mineral Buildup)
White vinegar’s acidity makes it excellent at dissolving the oily, tannin-rich film that coffee and tea leave behind, plus any mineral scale from hard water. It’s a slightly more aggressive method than baking soda, so it works well as a follow-up if the baking soda soak wasn’t quite enough.
Step 1: Mix Equal Parts Vinegar and Warm Water
Fill the thermos halfway with white vinegar and halfway with warm water. For very stubborn coffee residue, you can use undiluted vinegar, but rinse extra thoroughly afterward.
The vinegar layer sits above the water layer before the two mix together.
Step 2: Soak, Swirl, and Rinse
Cap the thermos loosely and let it sit 2–3 hours (vinegar works faster than baking soda). Swirl it every 30 minutes if you’re around. Rinse thoroughly — at least three full rinse cycles — since leftover vinegar smell can linger on plastic gaskets.
Gentle swirling keeps the acidic solution moving against the interior walls.
Method 3: Denture Tablets (Best for Narrow-Neck Bottles)
Effervescent denture or retainer cleaning tablets were designed to fizz their way into hard-to-reach crevices, which makes them surprisingly effective inside a narrow-mouth thermos where a brush can’t fully reach.
Step 1: Drop in 1–2 Tablets With Warm Water
Fill the thermos with warm water and drop in one or two denture cleaning tablets. You’ll see immediate fizzing as the tablet dissolves and releases oxygen bubbles.
The fizzing action agitates residue in spots a brush bristle can’t reach.
Step 2: Wait for the Fizzing to Stop, Then Rinse
Let the tablet fully dissolve (usually 15–20 minutes), then leave the solution to sit another hour for stronger smells. Rinse thoroughly afterward — denture tablets often contain mint flavoring that you don’t want lingering in your coffee.
Full dissolution plus an extended soak gives maximum odor-lifting power.
Method 4: Lemon & Salt Scrub (Best Natural Fresh-Scent Method)
If you want a fully natural option with zero chemical residue risk, lemon and coarse salt form a mild abrasive-acidic combo that both scrubs and deodorizes at the same time.
Step 1: Squeeze Lemon Juice and Add Coarse Salt
Squeeze the juice of half a lemon into the thermos, then add 2 tablespoons of coarse salt (kosher or sea salt works better than fine table salt, since the larger grains provide more scrubbing texture).
Lemon provides acidity while coarse salt grains add gentle abrasive texture.
Step 2: Shake Vigorously, Then Let Sit 30 Minutes
Cap the thermos securely and shake vigorously for 30–60 seconds so the salt scrubs against the interior walls. Let the mixture sit for 30 minutes, then rinse well.
Vigorous shaking maximizes contact between the salt and every interior surface.
Method 5: Rice & Water Agitation (Best for Fragile or Older Thermoses)
If you’re worried about scratching an older or delicate interior lining, dry uncooked rice is a softer abrasive than salt while still providing enough texture to dislodge residue when combined with water and agitation.
Step 1: Add a Handful of Dry Rice and Warm Water
Drop in about 2 tablespoons of uncooked rice along with warm water filling the thermos about halfway.
Rice grains act as a gentle, non-scratching abrasive when agitated in water.
Step 2: Shake, Swirl, and Rinse Out All Grains
Cap and shake for about a minute, then let it rest 10 minutes and shake again. Rinse extremely thoroughly to make sure no rice grains remain lodged near the base — swollen rice left behind can develop its own smell.
Full grain removal is essential — leftover rice will spoil and cause a new smell.
Method 6: Dry Mustard Powder (Best for Milk & Dairy Smells)
This is an old thermos-owner’s trick that specifically targets dairy-based odors — the kind you get from milk, cream-based soups, or protein shakes. Dry mustard powder has natural degreasing and odor-absorbing properties.
Step 1: Mix 1 Tablespoon of Dry Mustard With Warm Water
Stir one tablespoon of dry mustard powder into warm water until it forms a loose, cloudy solution, then pour it into the thermos.
Mustard powder’s natural compounds specifically break down dairy residue.
Step 2: Soak for 1 Hour, Then Scrub and Rinse
Let the solution sit for about an hour, then scrub with a bottle brush and rinse thoroughly — mustard has a strong scent of its own, so plan on at least 3–4 rinse cycles.
Extra rinsing is required since mustard powder carries its own noticeable smell.

If Odors Keep Coming Back, Consider a Wide-Mouth Food Jar
Wide-mouth designs are dramatically easier to scrub by hand and rinse fully, which prevents residue buildup before it ever becomes a smell problem. See our wide-mouth leak-proof food jar picks.
Check Price on AmazonDon’t Forget the Lid, Gasket, and Seal
Here’s the step almost everyone skips: the lid. In most cases, the rubber or silicone gasket ring inside the lid is actually the primary source of lingering smell — not the flask body itself. These gaskets have tiny grooves and folds that trap moisture and residue long after the main chamber has been cleaned.
How to Clean the Lid Properly
- Fully disassemble the lid if it has a removable gasket, stopper, or spout valve — most twist-lock and flip-top lids do.
- Soak the disassembled pieces separately in the same baking soda or vinegar solution you used for the main body.
- Use an old toothbrush to scrub into every groove, thread, and fold of the silicone gasket.
- Allow all pieces to air-dry completely and separately before reassembling — trapped moisture in a reassembled lid is one of the most common causes of a smell “coming back” within a day or two.
Understanding your thermos’s basic care routine also helps here — our guide on how to properly use and care for a thermos covers daily habits that prevent this buildup from happening in the first place.
Method Comparison Table: Which One Should You Use?
| Method | Best For | Soak Time | Effort Level |
|---|---|---|---|
| Baking Soda Soak | General everyday odors | 4–12 hrs | Low |
| White Vinegar Soak | Coffee, tea, mineral buildup | 2–3 hrs | Low |
| Denture Tablets | Narrow-neck bottles | 1–2 hrs | Very Low |
| Lemon & Salt Scrub | Natural, chemical-free freshness | 30 min | Medium |
| Rice & Water Agitation | Fragile or older linings | 15–20 min | Medium |
| Dry Mustard Powder | Milk, dairy, protein shake smells | 1 hr | Low |
Pros of Home Remedies
- Inexpensive, using items already in your kitchen
- Non-toxic and food-safe
- Effective for the vast majority of odor cases
Cons of Home Remedies
- Require repeat treatment for very old, deep-set smells
- Won’t fix physical damage like cracked liners
- Take hours of soak time, not an instant fix
How to Prevent Odor Buildup Going Forward
Removing a smell once is only half the job — the real win is not having to do this every few weeks. A few simple habit changes make an enormous difference.
1. Rinse Immediately After Every Use
Never let a thermos sit with leftover liquid inside for more than an hour or two, especially with dairy, soup, or sugary drinks. Rinse with warm water the moment you’re done.
2. Air-Dry Completely, Lid Off
Store your thermos with the lid off, upside down on a drying rack, until it’s bone dry inside. This single habit prevents the majority of odor complaints.
3. Choose the Right Jar for the Job
If you regularly pack soups, broths, or curries, a thermos specifically designed for soup tends to have a smoother interior finish and wider opening that’s much easier to fully clean than a narrow beverage-only bottle.
4. Deep Clean on a Schedule
Even without an obvious smell, do a baking soda soak once every one to two weeks if you use your thermos daily. Prevention is far less work than a deep odor removal session.
5. Pick Materials That Resist Odor Retention
Not all thermos materials are equal here. Fully stainless-steel interiors resist odor absorption far better than plastic-lined budget models, which can retain smells permanently over time as the plastic microscopically absorbs oils and compounds.
Common Mistakes That Make Thermos Smells Worse
- Using bleach: Bleach can react with stainless steel and cause pitting or corrosion over time, and its residue is difficult to fully rinse from a narrow neck.
- Using a dishwasher on double-wall vacuum flasks: High heat and pressurized water can damage the vacuum seal between the walls, leading to reduced insulation performance in addition to not actually reaching the interior effectively.
- Sealing the lid while damp: As mentioned above, this recreates the exact moist, warm, low-oxygen environment that caused the odor.
- Using abrasive steel wool: This can scratch the interior lining, creating tiny grooves where future residue collects even more easily.
- Ignoring the lid gasket: Cleaning only the main body while skipping the rubber seal means the smell will likely return within days.
When to Replace Your Thermos Instead of Deep-Cleaning It
Sometimes a smell isn’t a cleaning problem — it’s a sign the thermos itself has reached the end of its usable life. Consider replacing rather than continuing to deep-clean if:
- The interior lining is visibly scratched, pitted, or discolored in a way that won’t scrub out.
- The smell returns within a day or two even after a thorough multi-method cleaning and complete air-drying.
- The rubber gasket has become brittle, cracked, or is peeling — it can no longer be fully cleaned or sealed properly.
- You’re using it for kids and want a fresh, easy-to-clean option — see our picks for best thermos lunch kits for kindergarten, most of which use simpler, easier-to-clean designs built for daily wear.
If you’re deciding between two well-known brands for your next purchase, our comparison of Hydro Flask vs. Klean Kanteen for 24-hour ice retention also covers how each brand’s interior finish holds up against odor retention over time.

Ready for a Fresh Start?
If your current thermos just won’t fully de-stink no matter what you try, it might genuinely be time for a replacement rather than another round of soaking.
Check Price on AmazonFrequently Asked Questions
Why does my thermos still smell after I washed it with soap?
Regular dish soap cleans surface residue but doesn’t neutralize the deeper odor compounds trapped in the microscopic pores of plastic linings or lid gaskets. Baking soda or vinegar soaks address the chemistry of the smell itself, not just visible grime.
Can I put my thermos in the dishwasher to remove the smell?
Most vacuum-insulated thermoses should not go in the dishwasher, since the heat and water pressure can damage the vacuum seal between the walls over time. Always check the manufacturer’s instructions, and when in doubt, hand wash.
How long does it take for baking soda to remove thermos odor?
Most everyday smells clear up within 4–8 hours of soaking. Stronger odors like fish, curry, or old milk may need an overnight soak of 10–12 hours, sometimes repeated a second time.
Is it safe to use bleach in a thermos?
It’s generally not recommended. Bleach can react with stainless steel over repeated exposure and is difficult to rinse completely from a narrow-necked bottle, risking a lingering chemical taste in your next drink.
Why does my thermos smell like sulfur or rotten eggs?
This is typically caused by bacterial growth on protein-based residue (milk, eggs, meat-based soups) that’s been sitting in the low-oxygen environment of a sealed thermos. A baking soda or vinegar soak followed by a thorough gasket cleaning almost always resolves this.
Can I use hand sanitizer or rubbing alcohol to clean my thermos?
It’s best to avoid this for food-contact surfaces, since these products aren’t formulated for ingestion-safe rinsing and can leave a lingering chemical taste even after multiple rinses.
How often should I deep clean my thermos to prevent smells?
If you use your thermos daily, a baking soda soak once every one to two weeks is a good preventive schedule, in addition to rinsing and fully air-drying after every single use.
My thermos smells like plastic even though it’s stainless steel — why?
Many “stainless steel” thermoses actually have a plastic lid, straw, or interior sipping mechanism that absorbs odors over time even though the main flask body is metal. Disassemble and soak these plastic components separately.
Will vinegar damage the vacuum seal in my thermos?
No — a diluted vinegar soak in the interior chamber doesn’t affect the sealed vacuum layer between the walls, which is a separate, fully enclosed space that never comes into contact with liquid you pour in.
Can coffee stains alone cause a bad smell even without leftover liquid?
Yes. Coffee’s natural oils leave a thin film on the interior wall that oxidizes and develops a stale, sour smell over time, even if you rinse out the liquid promptly. This is why coffee thermoses benefit specifically from a vinegar soak.
Is it normal for a brand-new thermos to have a smell out of the box?
Yes, a mild plastic or metallic smell from manufacturing and packaging is common. Wash with warm soapy water and let it air dry fully before first use — this alone resolves the vast majority of new-thermos smells.
What’s the fastest method if I need my thermos smell-free today?
Denture tablets work fastest, typically resolving mild-to-moderate odors within 1–2 hours thanks to their fast-acting effervescent action, compared to the longer soak times needed for baking soda or vinegar.
Conclusion: A Smelly Thermos Is Almost Always Fixable
A lingering thermos smell feels frustrating, but in nearly every case it comes down to residue trapped in the vacuum-sealed interior or the lid gasket — both of which respond well to one of the six methods above. Start with a baking soda soak for general everyday smells, reach for vinegar when coffee or tea is the culprit, and don’t forget to give the lid and gasket the same attention as the main body.
Just as important as the fix itself is the follow-through: rinse immediately after each use, air-dry with the lid off, and build in a preventive deep-clean every week or two. Do that consistently, and you’ll rarely need to run through this guide again.
And if you’ve tried everything here and the smell keeps coming back, that’s a sign the thermos itself — not your cleaning routine — is the problem. A fresh, easy-to-clean upgrade might genuinely be the better investment than another round of soaking.

Shop Top-Rated Odor-Resistant Thermoses
Full stainless-steel interiors and wide-mouth designs make future cleanings dramatically easier.
Check Price on Amazon





 Home
Home
 Info
Info
 Compare
 Reviews
 Shop
Shop