
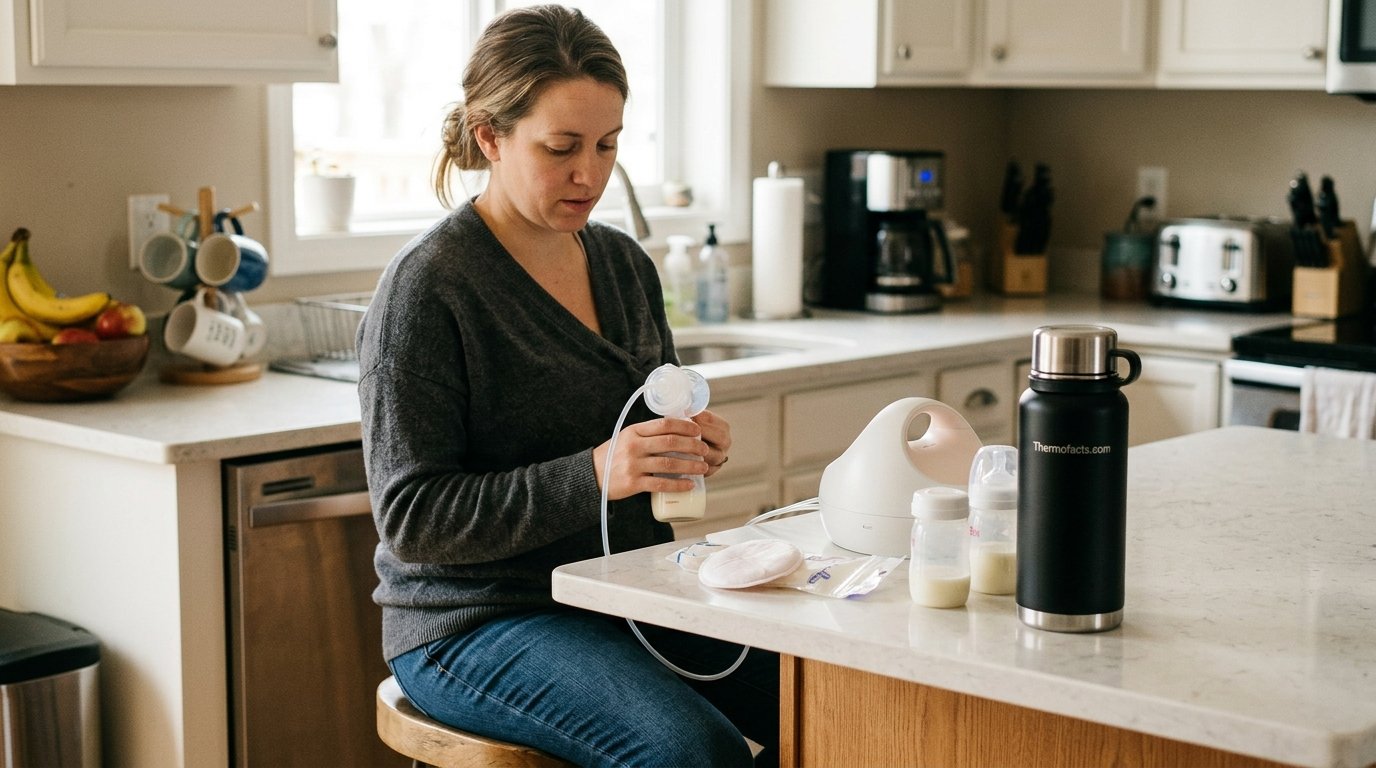
Best Thermos for Breastmilk: 7 Insulated Coolers Every Pumping Mom Should Know About
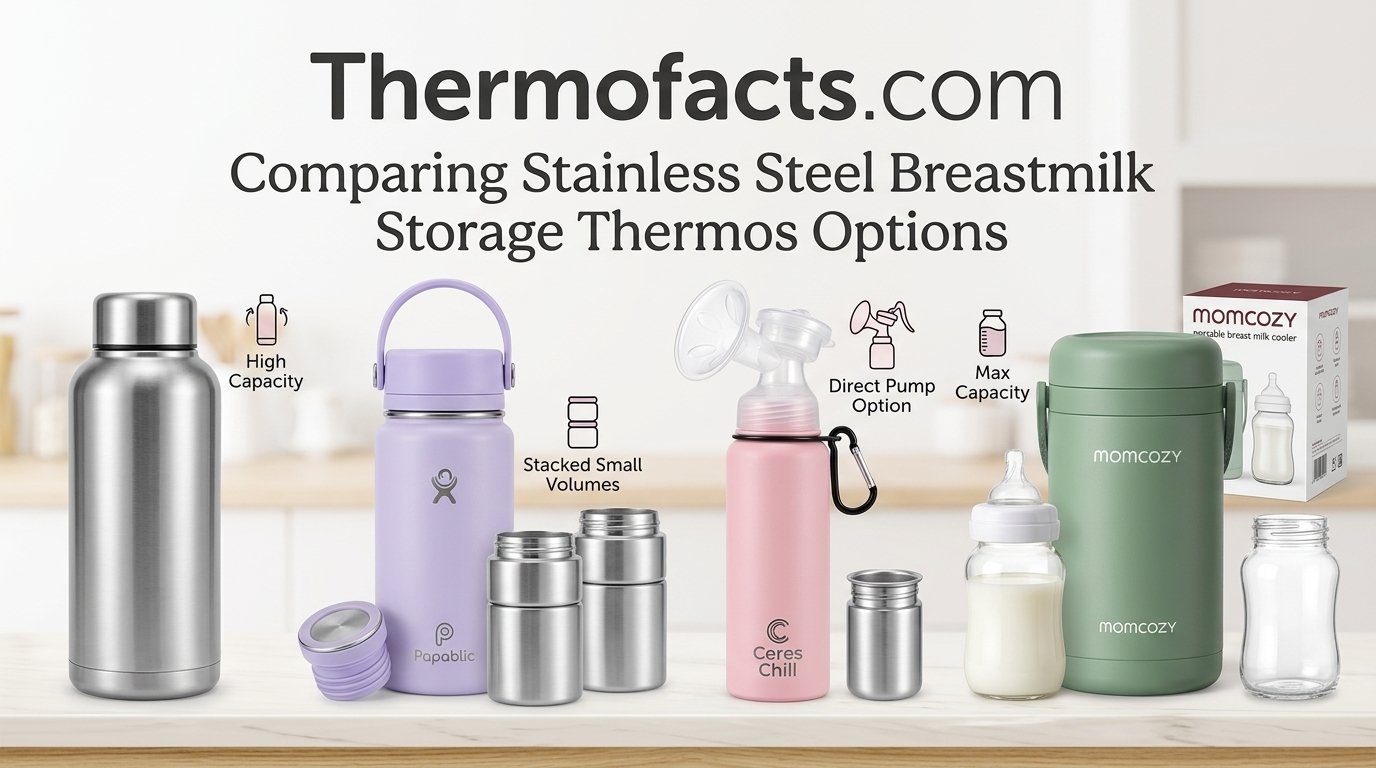
If you’ve ever pumped in a bathroom stall, a parked car, or a supply closet with a sign taped to the door, you already know that breastmilk doesn’t wait for convenient moments. What it does need is a safe, cold, leak-proof place to live until it gets home. A dedicated thermos for breastmilk — whether that’s a purpose-built chiller, a vacuum-insulated cooler, or a repurposed food jar — is the difference between milk that’s still good at bedtime and milk you have to dump down the sink. Below, we’ve broken down the seven best options on the market right now, how they actually perform in daily use, and how to pick the one that fits your pumping routine.
Why Breastmilk Needs a Real Thermos, Not Just Any Bag
Breastmilk is a living fluid, full of antibodies and beneficial bacteria that you’re trying to preserve, not just food you’re trying to keep from spoiling. The CDC and most pediatric guidelines recommend keeping freshly pumped milk cold (below roughly 40°F / 4°C) within about an hour of pumping if you’re not going to use it right away, and it should stay cold continuously until it’s refrigerated or frozen at home. That’s a much stricter standard than “keep my coffee warm for a few hours,” which is what most consumer thermoses are actually designed to do.
This is where the difference between a genuine vacuum-insulated container and a cheap double-wall plastic bottle becomes obvious. A true vacuum flask removes the air between two walls of steel, which stops heat from transferring by conduction or convection almost entirely — the same principle covered in more depth in our breakdown of what vacuum insulation in a thermos actually is. That’s why a well-made stainless flask can hold ice for 20+ hours, while a gel-pack lunch bag starts warming up in three or four.
The seven products below fall into two camps: dedicated breastmilk chillers built specifically for pumping moms, and general-purpose vacuum flasks that pumping parents have adopted because they happen to solve the same problem exceptionally well.
There’s also a practical, everyday reason a real thermos beats a cooler bag: consistency. A soft-sided cooler bag with an ice pack starts warming up the moment you zip it shut, and its performance depends entirely on how cold that particular ice pack was to begin with, how full the bag is, and how many times you open it. A vacuum-insulated steel container performs almost identically every single time, because the physics doing the work — the sealed vacuum layer — doesn’t degrade the way a gel pack’s stored cold does. For a routine you’re repeating multiple times a day, five days a week, for months, that predictability matters more than it sounds like it should. You stop having to guess whether today’s milk is still safe, because the container’s performance isn’t a variable anymore.
It’s also worth separating two related but distinct jobs: chilling milk that’s already been pumped, and warming milk (or water to warm a bottle) later. Several products on this list, like the Tommee Tippee and Stanley entries, are built for the warming half of the equation, not the chilling half. Understanding which job you actually need solved — sometimes both — will save you from buying the wrong tool and being disappointed that a hot-water flask “doesn’t keep milk cold,” which was never its purpose in the first place.
Quick Comparison Table
Here’s how all seven stack up side by side before we dig into the details.
| Product | Capacity | Cold Retention | Best For | Material |
|---|---|---|---|---|
| Ceres Chill Breastmilk Chiller | Up to 27 oz | 20+ hours | Direct pumping-into-container | Stainless steel |
| Momcozy Portable Cooler | 22 oz (2 bottles) | Up to 24 hours | Daily commuters, working moms | Vacuum steel + freezable core |
| Papablic 360 CapsuleChill | 2 x bottles | ~24 hours | Avoiding plastic contact | Food-grade stainless steel |
| Tommee Tippee Travel Warmer | ~9 oz hot water | Keeps water hot for hours | Warming milk, not chilling it | Insulated plastic/steel |
| Thermos Stainless King Food Jar | 16–24 oz | Up to 9 hrs cold food / hours hot water | Ice packing small bottles | Stainless steel |
| Stanley Classic Flask | 20–40 oz | Hot up to 24 hrs | Road-trip bottle warming | Stainless steel |
| Hydro Flask Standard Mouth | 21–32 oz | Ice up to 24 hrs | Storing milk bags on ice | Stainless steel |
How We Evaluated These Thermoses
Every product on this list was assessed against the same core criteria a pumping parent actually cares about in daily use, not just spec-sheet numbers. Here’s what we weighed and why each factor matters in real life, not just in a lab test.
Cold Retention Under Real Conditions
Manufacturer retention claims are usually measured in controlled, sealed conditions — the container is filled once and left untouched. That’s not how pumping parents actually use these things. We factored in how each container performs with realistic interruptions: being opened at a pump session, jostled in a bag on a commute, or sitting in a warm car for a few minutes during a school pickup. Products that lose cold quickly after the first lid-open dropped in our rankings, even if their sealed-test numbers looked impressive on paper.
Ease of Cleaning
Because breastmilk residue sours quickly and unevenly coats interior surfaces, a container that’s a pain to clean will get cleaned less thoroughly over time — and that’s how odors and bacteria build up. Wide-mouth designs that a hand or a bottle brush can actually reach scored higher than narrow-necked designs that trap residue in corners a brush can’t reach.
Compatibility With Existing Pumping Gear
A container that requires you to buy an entirely new set of bottles, or that doesn’t play nicely with your specific pump’s flange size, adds friction to a routine that’s already demanding. We looked at how well each product integrates with standard pump equipment rather than forcing a closed ecosystem.
Portability and Daily Wear
A container that performs beautifully on a countertop but doesn’t survive being tossed in a diaper bag, dropped on a tile floor, or squeezed into a crowded fridge shelf isn’t actually useful for the way most parents live. We factored in build quality, dent resistance, and how well the exterior finish holds up to months of daily handling.
1. Ceres Chill Breastmilk Chiller
The Ceres Chill is, without much competition, the closest thing the pumping world has to a purpose-built gold standard. Instead of pumping into a bottle and then transferring milk into a cooler afterward — a step that adds handling, spills, and extra dishes — you pump directly into the chiller itself. The dual-chamber design keeps a separate reservoir of ice and water sealed away from the milk chamber, so cold radiates inward through the double-walled stainless steel without any risk of contamination.
What sets it apart from a standard food jar is that it’s engineered around the specific problem of pumping: the wide opening accepts most breast pump flanges directly, so you can pump straight from your flange into the chiller and skip individual bottles entirely if you’re going to combine and pour into storage bags later. That single design decision saves an enormous amount of dishwashing for exclusive pumpers.
Pros
- Pump directly into it — no bottle transfer needed
- 20+ hours of verified cold retention
- Dishwasher-safe, BPA-free stainless construction
- Doubles as a travel cooler for daycare drop-off
Cons
- Premium price compared to a basic cooler bag
- Bulkier than a slim bottle for a diaper bag side pocket
Who it’s best for: exclusive or near-exclusive pumpers doing several sessions a day, especially if you’re combining milk from multiple sessions into a single storage container. If your routine already involves washing pump parts several times a day, folding the chiller into that same cleanup pass — instead of adding a separate cooler bag and ice pack to manage — is where this product earns back its higher price tag over the first few months of ownership.
2. Momcozy Portable Breast Milk Cooler (22 oz)
Momcozy built its name on affordable, well-designed pumping accessories, and this cooler follows the same formula. Rather than the dual-chamber approach of the Ceres Chill, it uses a freezable cooling core — essentially a slim ice pack shaped like a tube — that slides down the center of a vacuum-insulated steel body. Two included bottles sit around that core, and the whole thing seals with a locking lid.
It’s a strong pick for working moms who pump at the office and need something that survives a full commute plus an eight-hour shift in a shared fridge (or no fridge at all). Because the core needs to be frozen ahead of time, it does require a little planning — you can’t grab it cold on your way out the door if the core is sitting at room temperature. Once you build the habit of freezing it overnight, though, it’s genuinely one of the most reliable coolers in this category, and it sits comfortably alongside the picks in our roundup of the best insulated lunch kits for families juggling both pumped milk and older kids’ lunches.
Pros
- Full 24-hour cold retention with the core frozen
- Two bottles included, ready to use out of the box
- Slim enough for most breast pump bag pockets
Cons
- Cooling core must be pre-frozen — no last-minute grabs
- Only fits two standard bottles, not larger storage volumes
Who it’s best for: parents commuting to and from an office job who pump once or twice during the workday and need the milk to survive the trip home. Because it’s slimmer and lighter than the Ceres Chill, it also travels well as a secondary bag for daycare drop-offs, where you’re only carrying a bottle or two rather than a full day’s output.
3. Papablic 360 CapsuleChill Cooler
If avoiding plastic-milk contact is a priority for you, the Papablic 360 CapsuleChill is built around exactly that concern. Instead of plastic bottles nested around an ice core, this system uses food-grade stainless steel bottles from the start, so pumped milk never touches anything but glass-like, inert steel and your pump flange. The central cooling core works on the same principle as the Momcozy — freeze it ahead of time, then slot it into the housing.
The tradeoff is that stainless bottles aren’t compatible with every nipple or feeding system the way standard plastic bottles are, so if you’re planning to feed directly from the bottle rather than transferring to a storage bag, double-check thread compatibility first. For pure transport and short-term storage, though, it’s one of the most durable options on this list — the same durability logic that shows up in our guide to the best stainless steel thermos and lunch containers.
Pros
- Zero plastic contact with milk
- Extremely durable, dishwasher-safe steel bottles
- ~24-hour chill window with the core frozen
Cons
- Steel bottles may not fit every nipple brand
- Heavier in-hand than an equivalent plastic set
Who it’s best for: parents who’ve already decided they want to minimize plastic anywhere near their baby’s food, and who are comfortable transferring milk from steel bottles into storage bags at home rather than feeding directly from them. It’s less ideal if you’re looking for a one-step, feed-straight-from-the-bottle solution.
4. Tommee Tippee Travel Bottle & Food Warmer
This one flips the whole premise: instead of keeping milk cold, the Tommee Tippee warmer keeps water hot, so you can warm a bottle of already-stored milk anywhere — a parking lot, a stroller walk, a grandparent’s house without a bottle warmer. You fill the insulated flask with boiling water before you leave, and when it’s feeding time, you pour that hot water into the included frosted beaker and stand the bottle in it for a few minutes.
It’s not a substitute for any of the coolers above — you still need cold storage for the milk itself, following the standards covered in what a thermos food jar is actually designed to hold safely. But paired with any of them, it solves the other half of the pumping-parent equation: getting stored milk to feeding temperature without a microwave (which pediatricians generally advise against for breastmilk anyway, since it can create hot spots and degrade some nutrients).
Pros
- Solves the “how do I warm a bottle away from home” problem
- No electricity or microwave needed
- Compact and easy to toss in a diaper bag
Cons
- Does not chill milk — needs to be paired with a cooler
- Hot water needs refilling for a full day out
Who it’s best for: parents of a bottle-fed baby (breastmilk or formula) who are frequently out of the house at feeding time — think stroller walks, long car rides, or visits to relatives without baby gear on hand. It’s less relevant if your baby feeds directly at the breast most of the time and you’re only occasionally warming a backup bottle.
5. Thermos Stainless King Vacuum Insulated Food Jar
The Stainless King wasn’t designed with pumping parents in mind at all — it’s a food jar meant for soup and stew — but it has quietly become a favorite improvised breastmilk carrier for exactly the reasons covered in our guide to the best thermos for soup: heavy-duty vacuum insulation, a wide mouth for easy loading, and genuinely excellent temperature retention in either direction.
Parents pack it with crushed or cubed ice, nestle a small storage bottle or two inside, and use it exactly like a mini cooler for the ride home from daycare drop-off or an outing. Because it’s a genuine food jar rather than a novelty bottle, the wide mouth also makes it dramatically easier to clean thoroughly between uses — a detail that matters enormously when you’re dealing with a fluid as delicate as breastmilk, and one echoed in our comparison of the best wide-mouth, leak-proof food jars.
Pros
- Wide mouth makes loading and cleaning simple
- Heavy-duty build that survives years of daily use
- Doubles as an actual food jar for parents, not just milk
Cons
- Not purpose-built — you’re improvising the ice-pack setup
- Doesn’t accept a pump flange like the Ceres Chill
Who it’s best for: budget-conscious parents who already own one, or who want a container that pulls double duty as an actual food jar once pumping season is over. It’s a smart pick if you’d rather buy one versatile item than a baby-specific product you’ll eventually retire.
6. Stanley Classic Vacuum Insulated Flask
The Stanley Classic is the road-trip answer to the Tommee Tippee warmer above, just scaled up. It holds boiling water hot for up to 24 hours, which means one fill in the morning can realistically get a family through an entire day of stops — rest areas, hotel rooms, a relative’s house with no working microwave — while still having enough heat left to warm a bottle at 8 p.m.
It’s worth pointing out that this isn’t a milk-storage container at all — it’s purely a heat source for warming bottles on the move, so pair it with any of the cold-storage options above rather than expecting it to chill anything. If you’re weighing it against similar heavy-duty flasks, our head-to-head on Stanley vs. Hydro Flask vs. Yeti thermoses breaks down exactly how the retention numbers compare.
Pros
- Exceptional 24-hour heat retention for road trips
- Large capacity means multiple bottle warmings per fill
- Nearly indestructible, backed by a lifetime warranty
Cons
- Bulky for daily commuting or a diaper bag
- Warming, not chilling — still need separate cold storage
Who it’s best for: families who travel frequently with a baby — road trips, camping, flights with layovers — and need a heat source that doesn’t depend on finding an outlet or a working microwave. Less useful for a daily commute where a smaller warming solution would be less to carry.
7. Hydro Flask Standard Mouth Water Bottle
This is the “off-label” pick, and honestly one of the most practical hacks in this whole list. A Hydro Flask standard mouth bottle is wide enough that rolled breastmilk storage bags slide right in, and its TempShield insulation is strong enough to hold ice for a full 24 hours. Pack it with crushed ice, drop in one or two sealed storage bags, and you’ve got a cooler that fits in a purse side pocket.
The obvious upside is that it’s not a single-purpose baby item — once you’re done pumping, it goes right back to being a regular water bottle, unlike a dedicated chiller that eventually sits unused in a cabinet. If you’re comparing it against other popular steel bottles for exactly this kind of ice-retention performance, see how it stacks up in our Hydro Flask vs. Klean Kanteen 24-hour ice retention test.
Pros
- Doubles as a normal water bottle after weaning/pumping ends
- 24-hour ice retention rivals dedicated chillers
- Wide mouth fits rolled storage bags easily
Cons
- Not designed for direct pumping or bottle storage
- You supply your own ice and manage bag placement
Who it’s best for: parents who don’t want to buy a single-purpose baby product, or who already own a Hydro Flask and want to test the waters (literally) before committing to something dedicated. It’s also a smart backup to keep in the car for unplanned outings, since it requires no pre-freezing beyond regular ice cubes.
How to Choose the Right Thermos for Breastmilk
Not every pumping routine looks the same, so the “best” pick genuinely depends on how, where, and how often you’re pumping. A few factors matter more than brand name.
1. Direct-Pump vs. Transfer-Only
If you’re an exclusive pumper doing four or five sessions a day, a container you can pump directly into — like the Ceres Chill — saves a meaningful amount of time and dishwashing over a full week. If you’re an occasional pumper, that convenience matters less, and a simpler cooler like the Momcozy or a repurposed Hydro Flask is perfectly adequate.
2. Capacity vs. Portability
Bigger isn’t automatically better. A 27 oz chiller is great for a single long session or an all-day trip, but it’s overkill and unwieldy if you’re just carrying two 4 oz bottles to daycare. Match capacity to your actual daily output rather than buying for a worst-case scenario you’ll rarely hit.
3. Material and Cleanability
Stainless steel is the clear winner for anything touching milk directly, since it doesn’t absorb odors or retain bacteria in scratches the way some plastics can over time. Wide-mouth designs — like the Papablic bottles or the Stainless King jar — are dramatically easier to scrub by hand or load into a dishwasher than narrow-necked bottles, which is worth prioritizing if you’re already stretched for time between feeds.
4. Cold Retention Duration
Match retention time to your actual gap between pumping and refrigeration. A daycare drop-off five minutes from home doesn’t need 24-hour retention; a full workday with a long commute absolutely does. Overbuying retention rarely hurts, but underbuying it risks spoiled milk.
5. Budget vs. Long-Term Value
A basic food jar or a general-purpose steel bottle will run you noticeably less upfront than a dedicated chiller, but it’s worth weighing that against how long you’ll actually be pumping. If you’re planning to pump for a year or more, a purpose-built product that saves you a few minutes of handling per session adds up to real time saved across hundreds of pump sessions — often justifying the higher initial cost. If you’re closer to the end of your pumping journey, or pumping only occasionally, a repurposed bottle you already own is the more sensible spend.
| Your Situation | Best Match | Why |
|---|---|---|
| Exclusive pumper, multiple sessions/day | Ceres Chill | Direct-pump saves handling time |
| Office commuter, 1–2 sessions/day | Momcozy Cooler | Slim, portable, 24-hr retention |
| Minimizing plastic contact | Papablic 360 | All-steel bottle construction |
| Frequently out with baby, needs warm bottles | Tommee Tippee Warmer | Portable hot water, no outlet needed |
| Budget-conscious, wants dual-purpose item | Thermos Stainless King | Doubles as a real food jar |
| Frequent road trips or travel | Stanley Classic Flask | 24-hr heat retention, large capacity |
| Already owns one, wants zero extra spend | Hydro Flask | Repurposed bottle, 24-hr ice retention |
Breastmilk Storage Temperature Guidelines
Whatever container you choose, it only works as intended if you’re following safe storage windows. These are general guidelines based on widely cited pediatric recommendations — always confirm with your pediatrician for guidance specific to your baby, especially if they were born premature or have particular health needs.
| Storage Location | Freshly Pumped Milk | Previously Frozen, Thawed Milk |
|---|---|---|
| Room temperature (up to ~77°F) | Up to 4 hours | 1–2 hours |
| Insulated cooler with ice packs | Up to 24 hours | Not recommended |
| Refrigerator | Up to 4 days | Up to 24 hours |
| Freezer (standard) | Up to 6–9 months | Do not refreeze |
Notice where the insulated-cooler column sits: it’s meant as a bridge between pumping and refrigeration, not a long-term storage solution on its own. The moment you get home or back to a fridge, milk from your thermos should go straight into the refrigerator or freezer rather than staying in the cooler “just in case.”
It’s also worth noting that these windows are meant as general safety ceilings, not targets to aim for. Milk that’s been sitting at the edge of the “up to 4 hours at room temperature” guideline isn’t necessarily spoiled, but it’s also not the freshest it will ever be, and quality can start to decline before it becomes unsafe. Where possible, treat these numbers as a hard limit you’re trying to stay well under, rather than a deadline you’re racing toward — refrigerating milk within the first hour or two after pumping, whenever your day allows for it, gives your baby the best possible version of what you’ve worked to provide.
Matching Container Capacity to Your Pumping Schedule
One detail that’s easy to overlook when shopping is that your ideal capacity has almost nothing to do with the biggest number on the box and everything to do with your actual daily volume. It helps to think through your specific schedule before you buy, rather than assuming more ounces is automatically safer.
Exclusive Pumpers (6–8+ sessions/day)
If you’re pumping around the clock to build a full milk supply without direct nursing, your output per session can vary widely, but total daily volume often lands somewhere between 20 and 40 ounces. A larger dedicated chiller, or a plan to empty and re-chill a smaller container multiple times throughout the day, makes more sense here than trying to fit an entire day’s output into one 22 oz cooler.
Working Parents Pumping at the Office (1–3 sessions/day)
This is the most common scenario, and it’s also the one most of the products on this list are optimized for. A single trip home carrying the output of one to three sessions — typically 8 to 15 ounces — fits comfortably into a 22–24 oz cooler like the Momcozy or Papablic, with room to spare for an ice pack or frozen core.
Occasional or Backup Pumpers
If you’re mostly nursing directly and only pumping occasionally for date nights, appointments, or an emergency backup supply, you likely don’t need a dedicated product at all. A repurposed Hydro Flask or a small food jar you already own, packed with ice for the rare occasion you need it, covers this use case without adding another single-purpose item to your kitchen cabinet.
Daycare Drop-Off Logistics
Daycare providers typically ask for milk in individual, labeled bottles or bags rather than one large communal container, so even if you pump into something like the Ceres Chill, plan on portioning milk into your daycare’s required bottles before drop-off. Many parents keep a smaller secondary cooler, like the Hydro Flask hack or a compact food jar, specifically for the drop-off leg of the day, reserving the larger chiller for home and office use.
Common Mistakes to Avoid When Storing Pumped Milk
Even with a great container, a few habits can undermine everything it’s designed to do. These are the mistakes we see trip up new pumping parents most often.
- Combining warm, freshly pumped milk with already-cold milk in the same container. Let milk cool briefly before adding it to a cold container, or you’ll raise the overall temperature of everything already inside.
- Overpacking the container so ice can’t circulate. Ice or a frozen core needs contact with the surrounding air and container walls to do its job — cramming in too many bottles insulates them from the cold source rather than surrounding them with it.
- Leaving the lid open longer than necessary. Every time you open an insulated container, you lose accumulated cold. Quick, purposeful openings preserve retention far better than leaving it cracked open while you sort bottles.
- Assuming “insulated” always means “vacuum-insulated.” Plenty of budget cooler bags and bottles use foam or air-gap insulation that performs nowhere near as well as true vacuum-sealed steel — read product descriptions carefully rather than assuming all insulated products perform equally.
- Forgetting to pre-freeze a cooling core the night before. Products like the Momcozy and Papablic rely on a frozen core to work at all; grabbing one straight from a warm drawer defeats the entire design.
Cleaning, Odor Prevention, and Avoiding Leaks
Any of these containers will only perform as well as the care you put into them. Because breastmilk leaves behind fats and proteins that can go sour quickly, a few habits make a real difference:
- Wash immediately after every use — don’t let milk residue sit in a sealed, insulated space, which is the fastest route to a lingering smell. Our full walkthrough on how to properly use a thermos covers the basic rinse-and-dry routine that prevents most odor buildup before it starts.
- Air-dry fully with the lid off — trapping moisture inside a vacuum-sealed container is exactly how odors get locked in for good.
- If a smell does develop, don’t just rinse and hope — a proper deep clean with baking soda or diluted vinegar solves most cases, and our dedicated guide on how to remove smell from a thermos walks through the exact steps.
- Check seals regularly — a gasket that’s worn, twisted, or missing is the most common cause of a thermos that suddenly starts leaking in a diaper bag. If yours has started dripping, our troubleshooting piece on why a thermos leaks covers how to diagnose and fix it.
If you’ve cycled through the same container for months and it consistently smells sour no matter how well you clean it, that’s often a sign the interior lining has started to degrade — at which point it’s genuinely more hygienic to replace it than keep fighting the smell.
It’s also worth building a simple end-of-day habit rather than relying on memory in the moment. Many pumping parents keep a small drying rack dedicated to pump parts and milk containers near the sink, so nothing sits soaking in a closed dishwasher or drawer overnight while still slightly damp. Trapped moisture combined with residual milk proteins is the single biggest contributor to the kind of stubborn odor that no amount of vinegar can fully undo once it’s set in. A five-minute rinse-and-air-dry routine, done consistently, will do more for your container’s long-term smell than any deep-clean session done occasionally after the fact.
Traveling With Pumped Milk: What to Know Before You Go
Whether it’s a weekend trip, a business flight, or a long car ride to see family, traveling adds a layer of unpredictability that your normal at-home routine doesn’t have. A few extra precautions go a long way toward keeping stored milk safe when you’re outside your usual setup.
Driving
A hot car is one of the fastest ways to undo hours of careful cold retention, so keep your cooler out of direct sun and, if possible, in the climate-controlled cabin rather than the trunk. For longer drives, a container like the Stanley Classic filled with ice water (rather than hot water) can serve as a secondary cold source to refresh a smaller chiller partway through the trip.
Flying
Breastmilk is generally treated separately from the standard liquid limits at security checkpoints, but ice packs, gel cores, and frozen cooling elements used to keep it cold are subject to screening and may need to be partially thawed for inspection. Bring a printed copy of current TSA guidance if you’re worried about a less experienced agent at the checkpoint, and build in extra time for the additional screening these items sometimes require.
Visiting Family or Staying in a Hotel
Not every guest room or relative’s house has reliable freezer space you can count on, so it’s worth calling ahead to confirm what’s available, or packing a container with strong enough retention (24 hours or more) to bridge the gap between arrival and finding proper storage. A hotel mini-fridge is rarely cold enough on its own for extended frozen storage, so treat it as short-term refrigeration rather than a freezer substitute.
Frequently Asked Questions
Can I pump directly into a regular thermos?
Only if it has an opening wide enough to accept your pump flange and a food-safe interior. Most standard thermos food jars work fine as a receiving container after you’ve pumped into a bottle, but only a handful of purpose-built products, like the Ceres Chill, are actually designed for the flange to attach directly.
How long does breastmilk stay good in an insulated cooler?
With ice packs or a frozen core, most quality insulated coolers keep milk safely cold for the CDC-recommended window of up to 24 hours away from a refrigerator, though performance depends heavily on ambient temperature and how often the lid is opened.
Is stainless steel safer than plastic for storing breastmilk?
Stainless steel doesn’t leach chemicals the way some lower-quality plastics can over repeated freeze-thaw cycles, and it resists odor absorption far better. Many BPA-free plastic bottles are still perfectly safe, but steel is the more conservative choice if you’re minimizing plastic contact entirely.
Do I need ice packs if I’m using a vacuum-insulated thermos?
Yes, in almost every case. Vacuum insulation slows heat transfer, but it doesn’t generate cold on its own — you still need ice, a frozen gel core, or pre-chilled contents to actually keep milk at a safe temperature for hours.
Can I warm breastmilk directly in a thermos?
It’s not recommended to warm milk inside the storage container itself. Instead, use a separate hot-water warmer (like the Tommee Tippee option above) or a bowl of warm water, and never microwave breastmilk directly, since it can create uneven hot spots.
How do I stop my breastmilk thermos from smelling sour?
Wash it after every single use, air-dry it fully with the lid off, and do a periodic deep clean with baking soda or a diluted vinegar rinse if odor starts to build up. Persistent smell despite cleaning usually means it’s time to replace the container.
Is a bigger capacity always better for pumping storage?
No. Match capacity to your actual daily pumping volume and how long you’re away from a fridge. Oversized containers are heavier to carry and often take longer to fully chill their contents.
Can toddlers or older kids use the same thermos for milk or food later?
Many of these, especially the food jars and stainless bottles, transition well into general kid lunch duty once pumping is done — just give them a thorough deep clean first.
What’s the difference between a breastmilk chiller and a regular cooler bag?
A vacuum-insulated chiller uses a sealed air gap between steel walls to block heat transfer almost entirely, while a soft cooler bag relies on external ice packs and foam insulation, which typically loses effectiveness much faster, especially in hot weather.
Are these thermoses safe to put in a dishwasher?
Most stainless steel options in this list, including the Ceres Chill, Papablic bottles, and Thermos Stainless King, are dishwasher safe. Always check the manufacturer’s specific care instructions, since some lids or seals hold up better with hand-washing.
Can I take a breastmilk thermos through airport security?
Breastmilk is generally exempt from standard liquid restrictions at TSA checkpoints in the amounts a parent would realistically carry, but ice packs and gel cores used to keep it cold may need to be screened separately, so check current guidelines before you fly.
Should I choose a wide-mouth or narrow-mouth container for pumped milk?
Wide-mouth containers are almost always the better choice for breastmilk. They’re easier to fill without spilling, far simpler to scrub clean by hand, and better at accepting ice cubes or a bottle directly, whereas narrow necks tend to trap residue in spots a standard brush can’t fully reach.
How often should I replace a breastmilk thermos or cooler?
As long as the seal stays intact, the interior shows no lingering odor after a proper clean, and there’s no visible denting or cracking that could harbor bacteria, a well-made stainless steel container can reasonably last for an entire pumping journey and beyond. Replace it sooner if you notice persistent smell, a failing gasket, or reduced cold retention compared to when it was new.
Final Verdict
If you want a single container that does everything — direct pumping, hours of reliable cold, and dishwasher-safe cleanup — the Ceres Chill Breastmilk Chiller earns its reputation as the category’s best all-around pick. Working moms who need something slimmer for a daily commute will do just as well with the Momcozy Portable Cooler, and anyone who already owns a Hydro Flask has a surprisingly capable backup sitting in their cabinet right now. Whichever you choose, pairing it with good cleaning habits and a properly checked seal will keep it performing reliably for years, not just months.




 Home
Home
 Info
Info
 Compare
 Reviews
 Shop
Shop