
DIY Guide: How to Upgrade Your Honeywell HZ311 to an Ecobee Smart Thermostat
Your Honeywell HZ311 TrueZONE system has likely been a reliable workhorse, dutifully managing the different temperature zones in your home. It’s a solid piece of equipment. But in an age of smart homes and soaring energy costs, “reliable” is no longer enough. You want smart, efficient, and convenient. You want to adjust your home’s temperature from your phone, save money automatically, and integrate your HVAC system with the rest of your connected life. It’s time for an upgrade.
This is where Ecobee comes in. Transitioning from a basic zone thermostat to a feature-rich Ecobee smart thermostat might seem daunting, especially with a zone control panel in the mix. But here’s the good news: it’s absolutely a DIY project you can tackle. This comprehensive guide will walk you through every step of the process, from choosing the right Ecobee to connecting the last wire — and, unlike most tutorials on this topic, we’ll also cover the wiring quirks, shared-wire conflicts, and configuration settings that are unique to zoned systems like the HZ311, since these are exactly the details that trip up even experienced DIYers.
The single biggest hesitation homeowners have with this upgrade is the wiring. They see the zone panel and think it’s too complex. But the reality is, the HZ311 panel makes this job *easier*. It provides a clear, central hub for all your wiring. With a little patience and a clear guide, you can unlock a whole new level of control and savings for your home.
Why Bother Upgrading from a Functional HZ311 System?
If it ain’t broke, don’t fix it? Not quite. While your old thermostats work, they’re leaving a significant amount of money and convenience on the table. An Ecobee isn’t just a thermostat; it’s a home energy command center.
- Substantial Energy Savings: This is the big one. Ecobee thermostats are ENERGY STAR® certified and can save you up to 26% on your annual heating and cooling costs. They use smart algorithms, local weather data, and room sensors to heat and cool your home far more efficiently than a basic programmable thermostat. If you’re looking for the best smart thermostat for energy savings, Ecobee is consistently at the top of the list.
- Remote Control from Anywhere: Left for vacation and forgot to adjust the temperature? Want to pre-cool the house before you get home from work? With the Ecobee app, you have full control over every zone in your house from anywhere in the world.
- Smart Home Integration: Ecobee plays nice with all the major smart home ecosystems. Control your temperature with your voice using Amazon Alexa, Google Assistant, or Apple HomeKit. Create routines like “Good Morning” that adjust the temperature, turn on the lights, and start your coffee maker.
- Advanced Diagnostics and Alerts: Ecobee monitors your HVAC system’s performance. It can send you alerts if it detects a problem, like a furnace failing to ignite, potentially saving you from a costly emergency repair. It can help you figure out complex issues, like why your thermostat is clicking but not turning on, by providing real-time data.
- Intelligent Comfort with SmartSensors: Ecobee’s signature feature is its room sensors. These small wireless pods measure temperature and occupancy in different rooms, allowing the thermostat to make smarter decisions and eliminate hot or cold spots.
First, Understand Your HZ311 Zone Control Board
Before you touch a single wire, it’s crucial to understand what your Honeywell HZ311 TrueZONE panel does. This panel, usually located near your furnace or air handler, is the brain of your zoned HVAC system. It receives signals from each of your thermostats (one for each “zone”) and then opens or closes dampers in your ductwork to direct conditioned air only to the zones that need it.
For this upgrade, you aren’t replacing the HZ311 panel itself—you are only replacing the individual thermostats in each zone that are connected *to* the panel. This is a key distinction. The Ecobee will become the new, smarter input device for your existing, perfectly functional zone control system.
Pro Tip: One Zone at a Time
If you have multiple zones (e.g., upstairs and downstairs), we highly recommend upgrading them one at a time. Complete the entire installation for Zone 1, get it working perfectly, and then move on to Zone 2. This prevents confusion and makes troubleshooting much easier.
How the HZ311’s Terminals Actually Work
Most thermostat wiring diagrams assume a single-zone system: one thermostat, one set of wires, one furnace or air handler. The HZ311 changes that picture slightly, because every zone thermostat plugs into its own labeled terminal block on the panel, but several of those terminals are internally tied together. Understanding which ones are shared and which ones are independent is the single most useful piece of knowledge you can bring into this project, because it explains almost every “weird” symptom you might run into during and after installation.
On a typical HZ311, each zone gets its own R, W, G, Y, and sometimes O/B terminals on the panel, but the panel itself only has one connection back to the furnace or air handler for each of those functions. In other words, the panel is acting as a traffic cop: it takes the call for heat, cool, or fan from whichever zone is asking for it, and routes that single call to the furnace while simultaneously opening the correct zone’s damper. The C (common) terminal, in almost every HZ311 installation, is shared across all zones because it’s simply a return path for 24-volt power, not a signal.
| Terminal | Function | Shared Across Zones on HZ311? |
|---|---|---|
| R | 24VAC power from transformer | Yes — one transformer feeds the whole panel |
| C | Common / return path for 24VAC | Yes — this is what powers your Ecobee’s screen |
| W | Call for heat | Routed per-zone, but only one heat call reaches the furnace at a time in most configurations |
| Y | Call for cooling (compressor) | Routed per-zone, but the compressor itself is a single shared piece of equipment |
| G | Fan / blower control | Often shares a single physical terminal across zones — this is the wire most likely to cause conflicts |
| O/B | Reversing valve (heat pump systems only) | Shared, since there is only one heat pump compressor |
Why does any of this matter for an Ecobee install? Because Ecobee, unlike a purely mechanical thermostat, actively checks for certain wires during setup and can behave unexpectedly if a wire it expects to control exclusively is secretly being shared with another zone. The most common example is the G (fan) terminal, which we’ll cover in detail in a moment, because it’s responsible for more “my new Ecobee won’t turn on the AC” support calls than any other wire in a zoned system.
Step 1: Gather Your Tools and Your New Ecobee
Having everything ready before you start will make the process smooth and frustration-free. Here’s what you’ll need.
Essential Tools & Recommended Gear
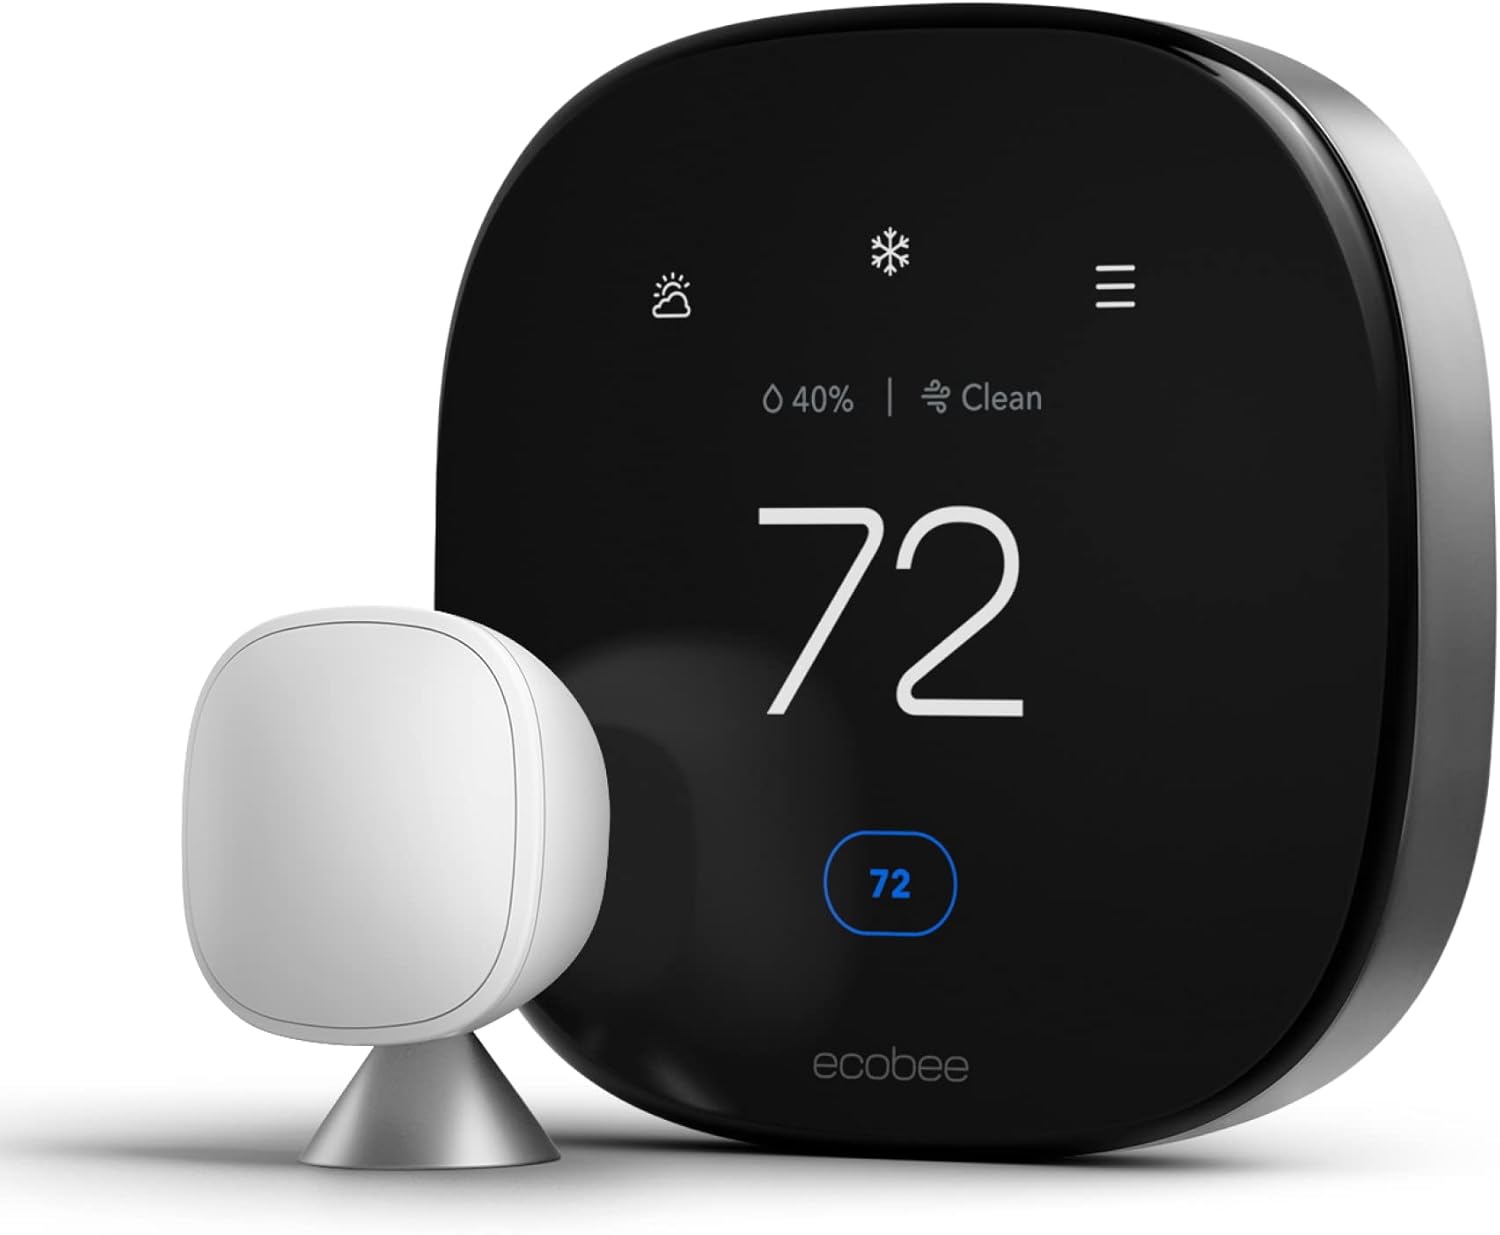
Ecobee Smart Thermostat Premium
The top-of-the-line model. Includes a SmartSensor, built-in Alexa, and an air quality monitor. Its premium build and full feature set make it the ultimate upgrade.
Check Price on Amazon
Universal Thermostat Wall Plate
Your old thermostat likely has a larger footprint. This wall plate will cover any unpainted areas or old screw holes for a clean, professional-looking installation.
Check Price on Amazon
Precision Screwdriver Set
Thermostat screws are tiny. A good set with both Phillips and flathead bits is essential. A magnetic tip is a huge plus for preventing lost screws.
Check Price on AmazonYou’ll also need:
- Smartphone or Tablet: For taking a picture of the wiring and for the Ecobee app setup.
- Needle-nose Pliers: For handling and straightening wires.
- Wire Stripper: Unlikely you’ll need it, but good to have just in case.
- Small Level: To ensure your new thermostat isn’t crooked.
- Pencil: For marking screw holes.
As an Amazon Associate, we earn from qualifying purchases. The product recommendations above are based on our expert opinion and real-world installation experience.
Step 2: The Step-by-Step Installation Process
Alright, let’s get to the main event. Follow these steps carefully, and you’ll have your Ecobee up and running in no time. We’ll start with Zone 1.
1. SAFETY FIRST: Turn Off Power to Your HVAC System!
This is the most important step. Go to your home’s main circuit breaker panel. Find the breaker that controls your furnace or air handler (it’s often labeled “HVAC,” “Furnace,” “Air Cond,” or something similar). Flip it to the **OFF** position. To confirm the power is off, try to change the temperature on your old thermostat. The screen should be blank or unresponsive. Do not skip this step!
Warning: Risk of Damage
Working with thermostat wires while the power is on can short-circuit your HVAC system’s control board, leading to a very expensive repair. Double-check that the power is off before proceeding.
2. Remove Your Old Thermostat Faceplate
Most old thermostat faceplates simply pull straight off the wall mount. Some may have a small button or tab on the bottom you need to press. Once it’s off, you’ll see the wall plate with the wiring terminals.
3. The CRITICAL Step: Photograph and Label Your Wires
Before you disconnect a single wire, pull out your smartphone and take a clear, well-lit picture of the existing wiring. Make sure you can clearly see which color wire goes into which lettered terminal (e.g., Red wire in ‘R’, White wire in ‘W’). This photo is your ultimate backup plan.
Your Ecobee comes with a set of small wire label stickers. Use them! For each wire connected to your old thermostat, place the corresponding sticker on it. If a wire is in the ‘Y’ terminal, put the ‘Y’ sticker on that wire. This simple act prevents 99% of installation headaches.
4. Disconnect Wires and Remove the Old Wall Plate
With the wires labeled, carefully unscrew the terminals and disconnect each wire. Gently straighten them out if needed. Then, unscrew the old wall plate from the wall and remove it completely. You may want to use this opportunity to clean the wall or install the new, larger wall plate to cover old paint marks.
5. Mount the New Ecobee Backplate
Gently feed the bundle of wires through the center opening of the Ecobee backplate. Place the backplate on the wall, use your small level to make sure it’s straight, and use a pencil to mark where the new screws will go. If you can’t hit a stud, use the included drywall anchors for a secure fit. Screw the backplate firmly to the wall.
6. Connect the Wires to the Ecobee
This is the moment of truth. The Ecobee backplate has easy-to-use push-in connectors. Simply match the label on your wire to the corresponding terminal on the backplate and push the copper end in until it clicks securely.
A Note on the C-Wire (Common Wire)
Ecobee thermostats require a C-wire to get continuous power. Unlike some battery operated thermostats, smart thermostats need this constant 24V supply. The good news? Because you have an HZ311 zone panel, you are almost guaranteed to have a C-wire already running to your thermostat. It provides the power for the zone panel’s electronics. If you see a wire connected to the ‘C’ terminal on your old thermostat, you’re all set! If for some reason you don’t, your Ecobee comes with a Power Extender Kit (PEK) that is installed at the zone panel, but this is very unlikely for your setup.
Once all wires are connected, gently push any excess wiring back into the wall for a clean fit. Attach the Ecobee faceplate—it should click on satisfyingly.
7. Power Up and Complete the Setup
Head back to your circuit breaker and flip the HVAC power back **ON**. Your new Ecobee should power on and greet you. The on-screen guide will walk you through the initial setup, including:
- Connecting to your Wi-Fi network.
- Configuring your HVAC equipment (it should auto-detect this).
- Setting your temperature preferences.
You’ll also be prompted to download the Ecobee app and register your device. This is how you’ll enable remote control and all the other smart features. Be sure to follow all the thermostat instructions for homeowners provided by Ecobee for the best results.
The Shared-Wire Problem: Why Multi-Zone Ecobee Installs Sometimes Fail
If you’ve searched around HVAC forums before landing here, you’ve probably seen homeowners describing a frustrating scenario: they installed an Ecobee perfectly on Zone 1, it worked great, and then the moment they installed a second Ecobee on Zone 2, one or both thermostats started behaving strangely — the AC won’t turn on in one zone, the fan runs constantly, or one thermostat simply won’t power up at all. This isn’t a coincidence, and it isn’t a defective unit. It’s almost always the shared-wire issue, and it’s worth understanding in detail before you get to Zone 2, even if Zone 1 goes perfectly.
Remember from the wiring table above that the G (fan) terminal, and sometimes the C (common) terminal, can be physically shared across zones inside the HZ311 panel rather than being fully independent per zone. A conventional mechanical thermostat doesn’t care about this, because it’s just a dumb switch — it closes a circuit and doesn’t “think” about what else might be happening on that wire. An Ecobee, on the other hand, actively monitors its terminals and makes decisions based on what it detects. When two Ecobees (or an Ecobee and another smart thermostat) are both trying to control a wire that’s actually shared hardware, you get conflicts: one thermostat’s fan call can override or blank out the other’s, or a compressor lockout can be triggered because the system thinks two contradictory calls arrived at once.
Symptoms That Point to a Shared-Wire Conflict
- One zone’s Ecobee works fine on its own, but starts acting up only after the second zone’s Ecobee is installed and powered on.
- The AC compressor won’t engage in one zone even though the thermostat clearly shows “Cooling,” while the fan runs.
- One thermostat loses power intermittently, especially when the other zone’s HVAC call is active.
- The fan runs continuously in a zone that isn’t calling for heat or cooling, because a shared G wire from another zone is energizing it.
- Ecobee’s equipment configuration screen shows an unexpected wire detected, or refuses to let you disable a wire you know isn’t actually connected to that zone.
Quick Fix to Try First: Set Fan Operation to “HVAC”
Before assuming you need new hardware, open your Ecobee’s equipment settings and look for the Fan menu. Many zoned-system conflicts disappear when you set the fan operation mode to “HVAC” instead of “On” or a custom schedule. This tells the thermostat to only energize the G wire when it’s actively calling for heat or cool, rather than trying to independently manage a fan circuit that’s shared with another zone. It’s a five-minute change and it resolves a surprising number of the “my AC won’t run in zone 2” complaints reported in HVAC forums.
When You Need an Isolation Relay
If adjusting the fan settings doesn’t fully resolve the conflict, the next step up is an isolation relay (sometimes sold as a switching relay). This is a small device, typically installed at the zone panel rather than at the thermostat, that electrically separates the signal coming from each zone’s thermostat so that one zone’s call can’t “leak” onto another zone’s wire. HVAC professionals often install these proactively on any zoned system that’s getting smart thermostats in more than one zone, precisely because they’ve seen this failure mode so often.
If you only have a single Ecobee controlling a single zone, and the rest of your zones are still on their original mechanical thermostats, you are far less likely to run into this issue, since there’s no second smart device competing for the same shared terminal. The risk goes up specifically when two or more zones are both being controlled by thermostats that actively read and manage their wires, which is exactly what happens when you upgrade multiple zones to Ecobee.
Decoding Your HZ311’s LED Status Lights
One feature of the HZ311 panel that often gets overlooked during a thermostat upgrade is its built-in LED diagnostic system. Each zone has its own indicator light on the panel, and the color and blink pattern of that light tells you exactly what the zone damper is doing at any given moment. Learning to read these lights before and after your Ecobee installation gives you an enormously useful troubleshooting tool, because it lets you separate “the thermostat isn’t sending a signal” from “the panel isn’t acting on the signal it received.”
| LED Behavior | What It Means |
|---|---|
| Solid Green | Zone is calling for conditioning and the damper is open normally. |
| Solid Red | Zone is satisfied (no call) and the damper is closed, which is normal when that zone isn’t asking for heat or cool. |
| Blinking Amber | The panel has detected a damper or thermostat short circuit — often a sign of a pinched wire, a failed damper motor, or a wiring mistake made during your thermostat swap. |
| All Zones Red, Whole House Not Conditioning | Usually points to an issue upstream of the zones themselves, such as the equipment interface or a tripped safety on the furnace/air handler, rather than a single thermostat problem. |
If, immediately after installing your Ecobee, you notice an amber blink on the zone you just worked on, don’t panic — it doesn’t necessarily mean anything is broken. It’s far more likely that a wire came loose during the wall-plate swap, or that a wire landed in the wrong push-in terminal. Pull the Ecobee faceplate, visually confirm each wire is fully seated and matches your reference photo, and reseat any that look questionable. In the vast majority of cases, this single check resolves an amber light that appears right after installation.
Troubleshooting Common Post-Installation Issues
Even a careful, by-the-book installation can run into a hiccup or two, especially on a zoned system where more moving parts are involved than on a simple single-zone furnace. Below are the issues homeowners most frequently report after swapping an HZ311-connected thermostat for an Ecobee, along with the most likely causes and fixes for each.
The Zone Won’t Open (Stuck Closed)
If a zone’s damper won’t open even though the thermostat clearly shows an active call for heat or cool, start by checking the LED for that zone on the HZ311 panel. A steady red light while the thermostat is calling for conditioning suggests the panel isn’t receiving the signal at all — recheck your W/Y/G wiring at the Ecobee backplate. If the LED is blinking amber, the damper motor itself may have failed, which is unrelated to your new thermostat and would need to be addressed at the panel or ductwork level.
The Zone Won’t Close (Stuck Open)
A damper that won’t fully close, even when its zone is satisfied, is often a mechanical issue with the damper motor or its linkage rather than anything to do with your Ecobee. However, before assuming a hardware failure, double-check that you haven’t accidentally set a permanent “hold” temperature on the Ecobee that’s keeping that zone in a constant call state. Reviewing your schedule and any active holds in the Ecobee app is a quick way to rule this out.
The Compressor Won’t Engage for Cooling
This is almost always either a shared-Y-wire conflict (see the section above on shared wires) or a compressor “minimum off time” delay that’s built into many Ecobee models to protect the compressor from short-cycling. If you just changed the temperature and the AC hasn’t kicked on within about five minutes, wait it out — this delay is normal and by design. If it persists well beyond that, revisit your wiring against your reference photo.
The Thermostat Screen Is Blank or Won’t Power On
This points to a power delivery problem — either the C-wire isn’t making a solid connection, the shared R/C circuit at the panel has a loose terminal, or (in rare cases on older HZ311 installations) the panel’s internal transformer is being asked to power more smart thermostats than it was originally sized for. If you’ve confirmed the wiring is correct and the thermostat still won’t power up, a licensed technician can quickly check the transformer’s output voltage to rule out a capacity issue.
Uneven Heating or Cooling Between Rooms Within the Same Zone
This isn’t a wiring problem at all — it’s exactly the kind of issue Ecobee’s SmartSensors are designed to solve. A single thermostat, no matter how smart, can only measure the temperature at its own location. If one room in a zone runs hotter or colder than the rest, placing a SmartSensor in that room and including it in the zone’s temperature average will usually correct the imbalance without touching a single wire.
Configuring Ecobee’s Equipment Settings for a Zoned System
The Ecobee setup wizard does a good job auto-detecting your equipment type in most homes, but zoned systems benefit from a quick manual review of a few settings that aren’t always obvious from the wizard alone.
Fan Operation Mode
As mentioned above, setting the fan to operate strictly alongside heating and cooling calls (rather than on an independent schedule) avoids most of the shared-G-wire headaches that show up on multi-zone HZ311 systems. You can always revisit this later if your specific setup handles an independent fan schedule without issue, but starting conservative is the safer approach during your first week with the new thermostat.
Compressor Protection Settings
Ecobee includes settings for minimum cycle times and compressor protection delays. On a zoned system, where the compressor is shared hardware being called by multiple thermostats at different times, leaving these protections at their default values (rather than shortening them to make the system feel more “responsive”) helps prevent the short-cycling that can shorten compressor life.
Heat Pump and Dual-Fuel Settings, If Applicable
If your HZ311 system is paired with a heat pump rather than a standard furnace, you’ll see additional configuration options for auxiliary heat, balance points, and compressor minimum outdoor temperatures during setup. Because the O/B (reversing valve) call is shared hardware just like the compressor, the same shared-wire cautions apply here: if you’re running heat pump zones through multiple Ecobees, keep an eye out for the same kinds of conflicts described earlier, and consider an isolation relay if you notice one zone’s mode switching affecting another zone’s behavior.
Ecobee vs. Nest vs. Sensi: Which Smart Thermostat Handles Zoning Best?
Ecobee isn’t the only smart thermostat homeowners consider for an HZ311 upgrade, and it’s worth understanding why it tends to be the recommended choice specifically for zoned systems, rather than just a generally popular smart thermostat.
Ecobee
Ecobee’s equipment configuration menu gives you more granular manual control over fan behavior, compressor protection, and auxiliary heat settings than most competitors, which matters a great deal on a zoned system where you may need to fine-tune these settings to work around shared wiring. Its SmartSensor ecosystem is also purpose-built for exactly the kind of room-to-room temperature variation that shows up within a single HZ311 zone.
Google Nest
Nest thermostats are a popular alternative, but homeowners running multi-zone HZ311 systems have reported more friction around the shared G-wire and transformer-conflict issues discussed above. Nest’s auto-detection is excellent for simple single-zone homes, but its manual equipment configuration options are more limited, which can make it harder to work around zoning-specific wiring quirks without professional help.
Sensi and Other Budget Options
Budget smart thermostats can work on a zoned system, but they generally lack both the manual equipment configuration depth and the room-sensor ecosystem that make troubleshooting and fine-tuning a zoned installation manageable for a DIYer. If cost is the primary driver, a budget thermostat on a single, simple zone can be a reasonable choice — but for a full multi-zone HZ311 upgrade, the extra configuration flexibility Ecobee offers tends to save homeowners a support call or a truck roll down the line.
Multiple Transformers and the Power Extender Kit: A Closer Look
We touched on the C-wire and the Power Extender Kit (PEK) earlier, but zoned systems introduce one more wrinkle worth understanding: transformer conflicts. Some HZ311 installations, particularly larger or older ones, may have more than one 24-volt transformer in the system — for example, one dedicated to the zone panel’s electronics and another serving an air handler or a secondary piece of equipment. When two Ecobees end up drawing power from two different transformers that aren’t perfectly in phase with each other, you can see symptoms like flickering relays, intermittent power loss at one thermostat, or a thermostat that reboots when the other zone’s equipment cycles on.
If you suspect this is happening — usually because the symptoms only appear when both zones are active at once, and disappear when only one zone’s equipment is running — the fix is usually one of two things: powering both thermostats from the same transformer if the wiring allows it, or installing an isolation relay that lets each zone’s thermostat operate independently of the other’s transformer phase. This is a more advanced diagnosis than most DIY guides cover, but it’s worth knowing about so you don’t spend hours re-checking wire labels when the actual cause is a transformer-phase mismatch.
When to Call a Professional
Transformer-phase conflicts and isolation-relay installation both involve working inside the zone panel itself, not just at the thermostat wall plate. If you’ve ruled out simple wiring mistakes and fan-setting conflicts and you’re still seeing intermittent power or compressor issues across multiple zones, this is a reasonable point to bring in a licensed HVAC technician rather than continuing to troubleshoot blind.
DIY vs. Professional Installation: A Cost and Time Comparison
One of the most common questions homeowners ask before starting this project is whether it’s really worth doing themselves versus paying for a professional install. Here’s a realistic breakdown to help you decide.
Doing It Yourself
A single-zone Ecobee swap typically takes a patient DIYer 30 to 60 minutes once the tools are on hand, and a full multi-zone HZ311 upgrade — following the one-zone-at-a-time approach recommended earlier — might take an afternoon. Your only real cost is the thermostat itself, plus any small accessories like a wall plate or wire labels. If your installation goes smoothly, this is by far the most cost-effective route.
Hiring a Professional
A licensed HVAC technician will typically charge a flat service call fee plus labor for a thermostat installation, and that cost tends to rise for each additional zone, especially if any diagnostic work (like tracing a suspected transformer conflict or installing an isolation relay) is required. The upside is that a professional will immediately recognize shared-wire and transformer issues that might take a DIYer several frustrating hours to diagnose, and most offer a workmanship guarantee on the install itself.
A Reasonable Middle Ground
Many homeowners split the difference: they install the first zone themselves, since it’s the simplest and lowest-risk step, and only call in a professional if they hit one of the more advanced issues covered in this guide — a persistent shared-wire conflict, a suspected transformer mismatch, or a damper motor that needs replacing. This approach keeps costs down while still giving you a professional safety net for the trickier zoned-system issues.
Where to Place Your SmartSensors in a Zoned Home
Because a single Ecobee thermostat in a zoned system is still only measuring temperature at its own wall location, thoughtful SmartSensor placement matters even more in a zoned home than in a simple single-thermostat house. A few placement principles consistently produce the best results.
- Avoid direct sunlight and drafts. A sensor placed near a window can report misleadingly high or low readings that throw off the whole zone’s average.
- Prioritize the rooms people actually spend time in. A sensor in a rarely used guest room won’t tell you much; one in the room where the family spends every evening will meaningfully improve comfort where it counts.
- Place at least one sensor in the room farthest from the thermostat itself. Rooms at the far end of a duct run are the most likely to run noticeably hotter or colder than the thermostat’s own location, and this is exactly the imbalance SmartSensors are built to correct.
- Use occupancy detection to your advantage. Ecobee can weight its temperature averaging toward occupied rooms during the day and shift priorities at night, which is especially useful in a zone that covers both a living area and bedrooms.
Long-Term Maintenance Checklist for Your Upgraded System
Once your Ecobee is installed and running smoothly, a small amount of ongoing maintenance keeps both the thermostat and your existing HZ311 hardware working well together for years to come.
- Periodically glance at each zone’s LED on the HZ311 panel during normal operation, just to build a mental baseline for what “normal” looks like on your system, which makes it much easier to spot a real problem early.
- Check SmartSensor batteries every few months through the Ecobee app, since a dead sensor battery will silently drop that room out of the temperature average without any obvious alert on the thermostat itself.
- Review your equipment settings after any HVAC service call, since a technician working on the furnace or air handler may occasionally need to adjust a wire at the panel, and it’s worth confirming your equipment configuration still matches reality afterward.
- Keep your reference wiring photo somewhere easy to find — a cloud photo album or a note in your phone — in case you ever need to troubleshoot again, add a new zone, or hand the information to a technician.
- Update the Ecobee firmware when prompted in the app, since Ecobee periodically improves its equipment-detection and fan-handling logic in ways that specifically benefit zoned-system installations like this one.
Frequently Asked Questions (FAQ)
Do I need to replace the HZ311 Zone Control Panel itself?
No, absolutely not. The Ecobee thermostat is designed to work with standard HVAC systems and zone control panels like the HZ311. You are only replacing the “dumb” thermostats on the wall, not the “brain” by your furnace.
What if I don’t have a C-wire at the thermostat?
While highly unlikely with an HZ311 system, if you don’t have a C-wire, you must use the included Power Extender Kit (PEK). This small adapter is installed at the zone control board (not the thermostat) and uses your existing wires to create a “virtual” C-wire. The Ecobee app provides excellent, step-by-step instructions for installing the PEK.
My Ecobee isn’t turning on after installation. What should I do?
First, double-check that you turned the circuit breaker back on. Second, gently pull the Ecobee faceplate off and ensure all wires have a solid connection in their terminals. Third, make sure your R (Power) and C (Common) wires are in the correct terminals. If problems persist, it might be an issue with your HVAC system itself. Sometimes, an issue like a Sensi thermostat not working can have similar root causes related to the HVAC system’s power.
Can I use just one Ecobee for multiple zones?
No. A zoned system requires one thermostat for each zone. To get the full benefit of zoning, you will need to replace the thermostat in each zone you wish to control with a smart thermostat. You can mix and match (e.g., an Ecobee downstairs and keep the old one upstairs), but for a true smart home experience, upgrading all zones is recommended.
Why did my AC stop working in one zone right after I installed a second Ecobee?
This is almost always the shared-wire conflict described earlier in this guide, most often involving the G (fan) terminal. Start by setting each Ecobee’s fan operation to “HVAC” mode rather than an independent schedule. If the issue persists, an isolation relay installed at the zone panel will fully separate each zone’s signals and resolve the conflict.
What does a blinking amber light on the HZ311 panel mean?
A blinking amber LED on any zone indicates the panel has detected a short circuit involving that zone’s damper or thermostat wiring. Right after a thermostat swap, this is most often caused by a wire that isn’t fully seated in its push-in terminal. Pull the faceplate, check every wire against your reference photo, and reseat anything that looks loose.
Should I set the fan to “On” or “Auto” on a zoned Ecobee?
On most HZ311 installations, especially multi-zone ones, setting fan operation to follow your heating and cooling calls (rather than running continuously or on an independent schedule) avoids the shared-wire conflicts covered above. You can experiment with other fan modes later once you’ve confirmed your specific system handles them without issue.
Is it normal for the AC to take a few minutes to start after I raise the cooling demand?
Yes. Most Ecobee models include a built-in compressor protection delay of a few minutes to prevent short-cycling, which is especially important to leave in place on a zoned system where the compressor is shared equipment being called by multiple thermostats.
Do I need an isolation relay for every HZ311 upgrade?
No. If you’re only upgrading a single zone and leaving the rest of your zones on their original mechanical thermostats, you’re unlikely to encounter a shared-wire conflict, since there’s no second smart device competing for the same terminal. Isolation relays become relevant specifically when two or more zones are controlled by smart thermostats at the same time.
Can uneven temperatures within a single zone be fixed without touching the wiring?
Yes. Uneven comfort within one zone is a sensing problem, not a wiring problem, and it’s exactly what Ecobee’s SmartSensors are designed to solve. Placing a sensor in the room that consistently runs hotter or colder and including it in that zone’s temperature average will typically correct the imbalance.
Understanding the HZ311’s Role in a Multi-Stage or Variable-Speed System
Many homes running an HZ311 panel also have furnaces or air handlers that support multiple stages of heating or variable-speed blower operation. This adds another layer worth understanding before you finish your Ecobee rollout across every zone, because it changes how the panel decides which equipment to run and how hard to run it.
On a single-stage system, the panel’s job is simple: if any zone calls for heat, open that zone’s damper and turn the furnace on at its one and only heating level. On a two-stage or variable-speed system, the HZ311 (or the equipment it’s paired with) can modulate output based on how many zones are calling at once and how large a percentage of the home’s total duct area those zones represent. A single small zone calling for heat on a cold morning might only trigger low-stage heat, while three zones all calling simultaneously might push the system into high stage. This matters for your Ecobee setup because the equipment configuration screen needs to accurately reflect whether you have single-stage, two-stage, or variable-speed heating and cooling — an incorrect setting here can cause the system to run in the wrong stage, leading to longer cycle times, more noticeable temperature swings, or higher energy bills than you’d otherwise see.
If you aren’t sure whether your system is single-stage or multi-stage, the nameplate on your furnace or air handler will typically say so, and it’s worth checking before you finalize the equipment configuration on each Ecobee. Getting this one setting right is a small detail with an outsized impact on how smoothly your zoned system runs after the upgrade.
What Changes (and What Doesn’t) When You Add a Fourth or Fifth Zone
The HZ311 is rated for up to three zones out of the box, but some households discover their ductwork was later expanded, or that a previous owner upgraded to a larger panel like the HZ322 or HZ432 to accommodate more zones. If you’re working with a larger panel, almost everything in this guide still applies directly — the wiring principles, the shared-terminal cautions, and the Ecobee configuration advice all carry over. The main practical difference is that with more zones sharing the same equipment, the odds of encountering a shared-wire conflict when multiple zones are upgraded to smart thermostats go up correspondingly, simply because there are more devices potentially competing for the same physical terminal.
If you’re planning a four- or five-zone rollout, it’s worth budgeting a little extra time for the later zones specifically because you’ll have more opportunities to hit the fan-conflict or transformer-conflict issues described earlier. Many homeowners in this situation choose to install an isolation relay proactively once they get to the third or fourth zone, rather than waiting to see whether a conflict appears, since the cost of the relay is modest compared to the time spent troubleshooting an intermittent, hard-to-reproduce issue after the fact.
How This Upgrade Affects Your Home’s Overall Energy Reporting
One underrated benefit of moving an entire zoned system over to Ecobee, rather than leaving a mix of old and new thermostats, is what happens to your energy reporting once every zone is reporting data. Ecobee’s app can show you runtime broken down by zone once all thermostats in the system are Ecobee units, which is something a mixed system with only one smart thermostat simply can’t offer. This lets you see, for example, that your upstairs zone is running the compressor far more than the downstairs zone during summer afternoons, which is often a useful diagnostic signal in its own right — it might point to insulation gaps, duct leakage, or a damper that isn’t fully opening, well before any of those issues become obvious through comfort complaints alone.
If your long-term plan is to upgrade every zone eventually, it’s worth keeping this reporting benefit in mind as motivation to finish the rollout rather than stopping after the first zone. The per-zone runtime data becomes meaningfully more useful once you have a complete picture across the whole house rather than just one zone’s numbers in isolation.
A Note on Warranty and Insurance Considerations
Because this is a DIY-friendly project, it’s worth a brief word on warranty and insurance implications before you get started. Most HVAC equipment manufacturers, including Honeywell, don’t void a furnace or air handler’s warranty simply because a homeowner replaced the thermostat controlling it — the thermostat is considered a separate, field-replaceable accessory rather than part of the core equipment warranty. That said, if your original installation included a service contract or extended warranty from an HVAC company that explicitly covers thermostat troubleshooting, it’s worth a quick call to confirm how a self-installed third-party thermostat is treated under that specific contract, since terms vary by provider.
On the insurance side, this project doesn’t involve any structural, gas line, or high-voltage electrical work — you’re working exclusively with low-voltage (24V) control wiring, the same category of wiring used for doorbells and simple household electronics. This is a meaningfully different risk category from line-voltage electrical work, which is part of why this project is broadly considered appropriate for a careful DIYer rather than requiring a licensed electrician.
Bringing It All Together: A Realistic Timeline for a Full-House Upgrade
If you’re planning to upgrade every zone in your HZ311 system rather than just one, it helps to have a realistic sense of how the project tends to unfold in practice, based on the patterns covered throughout this guide.
- Zone 1: Expect this to take the longest, even though it’s the simplest zone, simply because you’re learning the process, taking reference photos, and getting comfortable with the Ecobee app for the first time. Budget an hour and don’t rush it.
- Zone 2: This is where you’re most likely to encounter a shared-wire conflict for the first time, since it’s the point at which two smart thermostats are active simultaneously. Budget extra time here specifically to test fan settings and watch for the symptoms described earlier, rather than assuming everything will go as smoothly as Zone 1 did.
- Zone 3 and beyond: By this point you’ll know whether your system needs an isolation relay, and subsequent zones typically go quickly since you’re repeating a process you now understand well.
- The following week: This is a good time to revisit SmartSensor placement based on a few days of real living-with-it experience, and to fine-tune schedules once you’ve seen how the system behaves across a full day-night cycle.
Spreading the project across a weekend, rather than trying to finish every zone in a single evening, gives you the flexibility to pause and troubleshoot without pressure if you do hit one of the zoned-system quirks covered in this guide — and it means that if you do need to call in a professional for one tricky zone, the rest of your house is already enjoying the benefits of the upgrade while you sort it out.
Conclusion: Welcome to a Smarter, More Efficient Home
Congratulations! By replacing your old thermostats with Ecobee smart thermostats, you’ve taken a massive step toward a more comfortable, convenient, and energy-efficient home. You’ve bridged the gap between a robust, traditional HVAC zone system and modern smart home technology.
Now, take some time to explore the Ecobee app, set up schedules, and look at the detailed energy reports. You’ll quickly see how your smart investment is paying off, giving you precise control over your comfort and your energy bills. Enjoy the upgrade—you’ve earned it!




 Home
Home
 Info
Info
 Compare
 Reviews
 Shop
Shop