
Best Thermostats That Work with Apple HomeKit: The Ultimate Guide
For years, Apple HomeKit users felt like second-class citizens in the smart home world. While Alexa and Google Assistant users had hundreds of cheap thermostat options, HomeKit’s strict security protocols and encryption requirements limited the playing field.
That era is over. Today, some of the most advanced, beautifully designed, and energy-efficient thermostats on the market are built with Apple HomeKit as a priority, not an afterthought. Whether you want to control your temperature via Siri on your Apple Watch, set up complex geofencing automations in the Home app, or simply want a device that respects your data privacy, you have excellent choices.
In this extensive review, we are breaking down the absolute best thermostats that work natively with Apple HomeKit. We will compare the heavy hitters like Ecobee and Honeywell Home, and explore specialized options for electric baseboard heating like Mysa.
Jump to a section:
How HomeKit Thermostats Actually Work
HVAC System Compatibility Guide
Step-by-Step Installation & Pairing
Energy Savings, Rebates & Payback Time
Privacy & Security in Apple Home
Troubleshooting Common Pairing Problems
Building Automations Around Your Thermostat
How to Choose the Right Model for Your Home
True Cost: DIY vs. Professional Install
Multi-Zone & Multiple Thermostats
Quick Comparison: Top HomeKit Thermostats
If you are in a rush, here is how the top contenders stack up against one another in the Apple ecosystem.
| Model | Best For | Siri Voice Control? | Room Sensors | C-Wire Needed? |
|---|---|---|---|---|
| Ecobee Premium | Overall Best | Yes (Built-in) | Included | Yes (PEK inc.) |
| Ecobee3 Lite | Budget Value | No | Compatible | Yes (PEK inc.) |
| Emerson Sensi Touch 2 | Reliability & Privacy | No | Compatible | Yes |
| Honeywell Home T9 | Range/Connectivity | No | Included | Yes (Adapter inc.) |
| Mysa V2 | High Voltage/Baseboards | No | No | Yes (L1/L2) |
1. Ecobee Smart Thermostat Premium: The King of HomeKit

The Ultimate Siri-Integrated Experience
Verdict: If budget isn’t your primary concern, this is the best smart thermostat for Apple users, period.
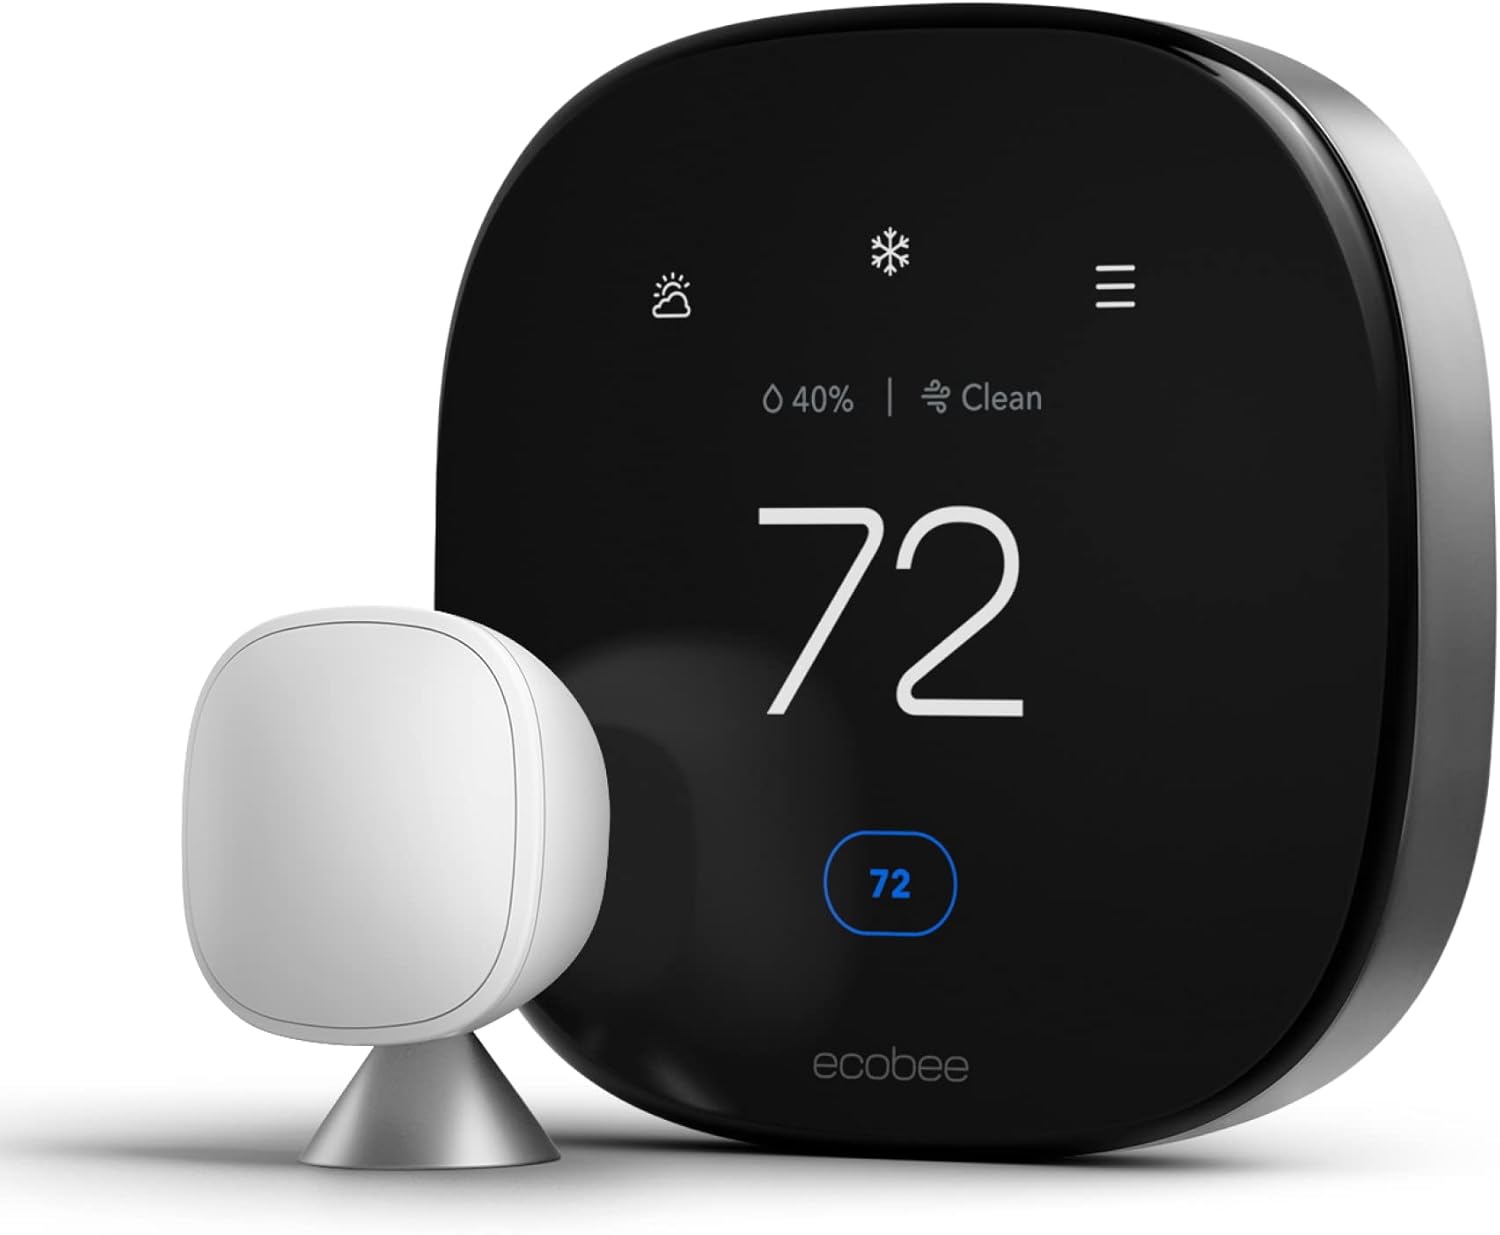
Check Price on AmazonThe Ecobee Smart Thermostat Premium is not just a thermostat; it’s a piece of high-end hardware designed to look like it came out of Cupertino itself. With a glass face, zinc body, and a radar sensor for occupancy detection, it feels premium.
Why It Wins for Apple Users
Ecobee has always been “Apple first.” This is the only thermostat on the market that can act as a Siri speaker. If you have a HomePod mini or Apple TV in the house, you can talk to Siri directly through the thermostat to set timers, ask for the weather, or control other HomeKit accessories.
Furthermore, the UI in the Apple Home app is flawless. It exposes not just temperature, but also humidity and occupancy sensors to HomeKit, allowing you to trigger other automations (like turning on lights when you walk into the hallway where the thermostat is located).
For a detailed breakdown of its features, read our full Ecobee Smart Thermostat Premium review.
Pros
- Built-in microphone/speaker for Siri.
- Includes a SmartSensor for hot/cold spots.
- Radar technology detects presence instantly.
- Air quality monitor built-in.
Cons
- Expensive premium price point.
- Requires a HomePod/Apple TV to enable Siri voice.
- Installation can be tricky for beginners.
2. Emerson Sensi Touch 2: The Reliable Workhorse

Privacy-Focused and Traditional
Verdict: The best choice for users who want a smart thermostat that acts like a traditional one.
Check Price on AmazonWhile Ecobee looks like a gadget from the future, the Emerson Sensi Touch 2 looks like a refined version of the thermostats we grew up with. It prioritizes privacy and stability over flashy features.
HomeKit Integration
Emerson (now Copland) was one of the first to embrace HomeKit. The Sensi Touch 2 pairs effortlessly via the QR code on the screen. It is incredibly responsive in the Home app. Unlike some cloud-dependent devices, Sensi works well locally. If your internet goes down, your HomeKit local control (via Home Hub) remains robust.
If you are debating between Sensi and other brands, check out our comparison: Sensi Thermostat vs Ecobee.
Pros
- Does not require a dedicated brand hub.
- Privacy-focused (doesn’t sell data).
- Standard footprint covers old paint marks.
- Very simple DIY installation.
Cons
- Requires a C-wire (unlike older Sensi models).
- No built-in voice assistant.
- Looks less “modern” than Ecobee or Nest.
3. Honeywell Home T9: The Range Master

Best Room Sensors for Large Homes
Verdict: Perfect for larger homes where signal range for sensors is a concern.
Check Price on AmazonHoneywell Home (Resideo) is a legacy name in HVAC. The T9 (and the pro-install version T10) brings that reliability to HomeKit. While early versions of the T9 lacked HomeKit support, firmware updates and newer hardware revisions have solidified its place in the Apple ecosystem.
Sensor Superiority
The T9 shines with its room sensors. Unlike Ecobee’s sensors which have a shorter range, Honeywell’s sensors use a proprietary frequency that penetrates walls better, covering up to 200 feet. You can ask Siri: “What is the temperature in the Baby’s Room?” and the T9 will pull data specifically from that sensor.
For a detailed comparison of models, read our full review of the Honeywell Home T9 or see how it stacks up in Honeywell T9 vs T10 Pro.
Pros
- Excellent sensor range (200 ft).
- Prioritizes rooms based on occupancy.
- Simple, utilitarian interface.
- Includes C-wire adapter in the box.
Cons
- Not as aesthetically pleasing as Ecobee.
- App interface can feel clunky.
- No built-in voice assistant capabilities.
4. Mysa Smart Thermostat (V2): The High-Voltage Hero

Best for Electric Baseboard Heating
Verdict: The only real choice for Apple users with high-voltage heating systems.
Check Price on AmazonMost smart thermostats (Ecobee, Nest, Honeywell) only work with low-voltage (24V) central furnace systems. If you have electric baseboard heaters, fan-forced heaters, or in-floor electric heating, those won’t work. You need a line-voltage thermostat.
Enter Mysa. Designed in Canada, Mysa is built specifically for high-voltage heating and works flawlessly with Apple HomeKit. You can group five different baseboards in your living room into one “Zone” in the Home app and control them as a single entity with Siri.
We have covered this device extensively. Read our Mysa Smart Thermostat Review or see how it compares to competitors in Mysa vs Sinope.
Pros
- Native HomeKit support for high voltage.
- Modern, minimalist LED display.
- Detailed energy charting in the app.
- Silent TRIAC switching (no clicking sounds).
Cons
- Large physical footprint on the wall.
- Requires Neutral wire (4-wire setup usually).
- More expensive per unit than low-voltage stats.
The “Elephant in the Room”: Does Google Nest Work with HomeKit?
For years, the answer was a hard “No.” Google Nest and Apple HomeKit were rivals. However, the landscape changed with the introduction of Matter.
Matter is a new smart home standard that allows devices to talk to any platform. The newest Nest Learning Thermostat (4th Gen) and the 2020 Nest Thermostat are Matter-compatible. This means you can add them to Apple HomeKit, but there are caveats:
- You need a Matter controller (like a newer Apple TV 4K or HomePod 2nd Gen).
- You will not get the native Siri integration that Ecobee offers.
- Some advanced features may still be locked to the Google Home app.
If you are determined to use a Nest device (perhaps for its learning algorithms), read our guide on Nest Learning Thermostat 4th Gen features. However, for a pure Apple experience, Ecobee remains superior.
Comparing the big two?
Check out our head-to-head analysis: Nest vs. Ecobee Thermostat.
Budget Pick: Ecobee3 Lite
Not everyone needs an air quality monitor or a zinc body. If you want the HomeKit connectivity of the Premium model but want to save $80-$100, the Ecobee3 Lite is the answer.
It strips away the built-in Siri speaker, the occupancy radar (using a standard PIR sensor instead), and the accessory terminal (for humidifiers). But the core heating and cooling logic—and the flawless HomeKit integration—remain identical. You can still use remote sensors with it, too.
For a detailed breakdown of what you lose by going “Lite,” read our Ecobee3 Lite vs Google Nest comparison.

How HomeKit Thermostats Actually Work Under the Hood
Most buying guides tell you which thermostat to purchase without explaining why HomeKit compatibility is such a technical hurdle in the first place. Understanding the mechanics helps you make a smarter purchase and troubleshoot problems later, so let’s pull back the curtain.
The HomeKit Accessory Protocol (HAP)
Every genuine HomeKit thermostat communicates using Apple’s HomeKit Accessory Protocol, commonly abbreviated as HAP. This is not the same as a device simply having Wi-Fi or a companion app. HAP defines exactly how a device announces itself on your network, how it encrypts every message it sends, and how it exposes “characteristics” — individual controllable properties like target temperature, current temperature, humidity, or heating/cooling mode — to the Home app.
Because HAP is end-to-end encrypted using a pairing process similar to what’s used for Bluetooth Secure Connections, a thermostat cannot simply claim HomeKit support through a firmware update without Apple’s certification. This is why some budget thermostats you’ll see advertised as “smart” or “Wi-Fi enabled” are conspicuously absent from official HomeKit compatibility lists — they were never built with the protocol in mind, and retrofitting it typically requires new hardware, not just software.
Local Control vs. Cloud Dependency
One of the most overlooked benefits of a certified HomeKit thermostat is that a huge portion of its functionality runs locally on your network rather than through a manufacturer’s cloud servers. When you ask Siri to set the temperature and you have a Home Hub (an Apple TV, HomePod, or HomePod mini) on your network, that command can be processed entirely on your local Wi-Fi, without ever leaving your house. Compare this to many Alexa- or Google-only thermostats, which route almost every command — even ones issued from a device on the same Wi-Fi network — through the manufacturer’s servers.
This distinction matters in two very concrete ways. First, latency: local commands tend to feel snappier because there’s no round trip to a data center. Second, resilience: if your internet goes down but your local network and Home Hub are still up, a HomeKit thermostat with local control can often still respond to commands and continue running any scheduled automations, whereas a cloud-only thermostat may become entirely unresponsive.
What a “Home Hub” Actually Does
A lot of confusion around HomeKit thermostats stems from people not realizing they need a Home Hub for full functionality. Without one, HomeKit accessories like your thermostat only work while your iPhone is on the same Wi-Fi network as the device. The moment you leave the house, remote control disappears, and so do automations that are supposed to run while you’re away, like a geofencing scene that lowers the heat when everyone leaves.
A Home Hub — any HomePod, HomePod mini, or Apple TV — sits on your network permanently and acts as the always-on relay that lets your Home app reach your thermostat from anywhere in the world, runs scheduled automations even when your phone is asleep, and keeps a rolling log of sensor history if you have HomeKit Secure Video or sensor accessories. If you’ve purchased a HomeKit thermostat and are frustrated that remote temperature adjustments aren’t working, a missing Home Hub is the single most common cause.
HVAC System Compatibility: Will It Actually Work With Your Furnace?
The single biggest reason smart thermostat purchases get returned is incompatibility with the buyer’s actual heating and cooling equipment. HomeKit support tells you nothing about whether a thermostat can run your specific system, so it’s worth understanding the categories before you buy.
Standard Forced-Air Systems (Gas, Oil, Electric Furnace)
This is the most common residential setup in North America, and virtually every thermostat in this guide — Ecobee, Sensi, and Honeywell T9 — supports single-stage and multi-stage forced-air furnaces without issue. These systems typically use low-voltage (24V) wiring with wires labeled R, C, W, Y, and G, which is exactly what these thermostats are designed around.
Heat Pumps and Auxiliary/Emergency Heat
Heat pumps are more particular. If you have a heat pump, you’ll see additional wires labeled O/B (reversing valve) and possibly E (emergency heat) or Aux. Ecobee and Honeywell both handle heat pumps well, including dual-fuel systems that pair a heat pump with a gas furnace as backup, but during setup you must correctly tell the thermostat’s configuration wizard that you have a heat pump — selecting the wrong system type is a leading cause of a furnace short-cycling or failing to heat properly after installation.
Multi-Stage and Variable-Speed Systems
Higher-end HVAC equipment, particularly two-stage or variable-speed compressors and furnaces, needs a thermostat that can send multiple distinct signals rather than a simple on/off command. The Ecobee Premium and Honeywell T9/T10 support multi-stage configurations, but budget thermostats sometimes cap out at single-stage control, which can prevent your system from ever reaching its higher, more efficient stages.
Boilers and Radiant Heat
Homes with hot water boilers or steam radiators use a different wiring scheme entirely, often with just two wires (R and W) and no C-wire present at all. Most of the thermostats here can run a boiler in this configuration, but because there’s frequently no C-wire, you’ll almost always need the included power adapter kit to keep the Wi-Fi radio powered.
High-Voltage Electric Baseboard and In-Floor Heat
This is where the distinction matters most. Low-voltage thermostats like Ecobee, Sensi, and the T9 are built for 24V control wiring and cannot be connected to 120V or 240V baseboard heaters, fan-forced wall heaters, or electric in-floor heating without risking serious damage or fire hazard. These systems require a line-voltage thermostat such as Mysa, which is engineered to handle the higher voltage safely while still integrating with HomeKit.
| System Type | Typical Wiring | Recommended Model |
|---|---|---|
| Standard forced-air (gas/oil/electric) | R, C, W, Y, G | Ecobee Premium, Sensi Touch 2 |
| Heat pump (single-stage) | R, C, O/B, Y, G | Ecobee Premium, Honeywell T9 |
| Heat pump with aux/emergency heat | R, C, O/B, Y, G, E/Aux | Ecobee Premium, Honeywell T10 |
| Multi-stage / variable-speed | R, C, W1/W2, Y1/Y2, G | Honeywell T9/T10, Ecobee Premium |
| Boiler / steam radiator | R, W (often no C) | Sensi Touch 2 (with PEK), Honeywell T9 |
| Electric baseboard / in-floor (line voltage) | L1, L2, sometimes Neutral | Mysa V2 |
Step-by-Step: Installing and Pairing Your HomeKit Thermostat
Even seasoned DIYers run into snags during their first smart thermostat install, usually around wiring labels or the HomeKit pairing handshake. Here’s the process from start to finish.
Step 1: Shut Off Power and Document the Old Wiring
Turn off power to your HVAC system at the breaker, not just the thermostat’s small on/off switch, since some systems still carry current to the wallplate. Before disconnecting anything, take a well-lit photo of the wire terminals and label each wire with the included stickers or tape, matching the letter printed next to its terminal.
Step 2: Check for a C-Wire and Prepare a Power Solution
If you see a wire connected to a terminal labeled C, you have a common wire and can skip straight to mounting. If not, locate the power extender kit (PEK) that came in the box — Ecobee, Honeywell, and Sensi all include one — and follow its diagram, which typically involves running an extra pair of wires from the PEK, installed inline at your furnace’s control board, back to the new thermostat.
Step 3: Mount the Baseplate and Connect Wires
Use the thermostat’s baseplate as a template to mark and drill new anchor holes if needed, especially if you’re moving from a smaller old unit to a larger new one. Insert each labeled wire into its matching terminal on the new baseplate, making sure each wire is fully seated and the screw is snug — a loose wire is the most common cause of a thermostat randomly losing power after installation.
Step 4: Restore Power and Run the On-Device Setup
Snap the thermostat face onto the baseplate, restore power at the breaker, and follow the on-screen prompts to select your language, Wi-Fi network, and HVAC system type. This is the step where correctly identifying “heat pump” versus “conventional furnace” versus “boiler” matters most.
Step 5: Pair With Apple Home
Open the Home app on your iPhone or iPad, tap the plus icon, and choose “Add Accessory.” Point your camera at the HomeKit setup code printed on the thermostat itself, on a card in the box, or displayed on the thermostat’s screen during setup. Once scanned, assign the thermostat to a room, and it will appear immediately in your Home app and any HomeKit-enabled Apple Watch complications.
Step 6: Confirm Remote Access Through a Home Hub
Finally, verify that a Home Hub is active by opening Settings on your iPhone, tapping your name, then Home, and checking that a HomePod or Apple TV appears as your hub. Without this step, your thermostat will work only while you’re connected to your home Wi-Fi.
Energy Savings, Utility Rebates, and Real Payback Time
A frequent question we get is whether a $200+ smart thermostat is actually worth it compared to a $30 programmable model. The honest answer depends heavily on your climate, your current habits, and whether you take advantage of rebate programs.
Where the Savings Actually Come From
The bulk of real-world savings from a HomeKit thermostat doesn’t come from any single “smart” feature, but from the combination of geofencing (automatically setting back the temperature when everyone leaves and recovering it before anyone returns), occupancy and room sensors preventing you from heating or cooling empty rooms, and simply having accurate scheduling that a household actually sticks to, unlike a manual programmable thermostat that often gets left on a single static setting out of convenience.
ENERGY STAR Certification and Rebate Eligibility
Ecobee’s Premium and Lite lines, the Honeywell T9, and the Sensi Touch 2 all carry ENERGY STAR certification, which is the qualifying credential most utility companies require before issuing an instant rebate or mail-in rebate for a smart thermostat purchase. These rebates commonly range from $25 to $150 depending on your utility provider and region, and many utilities allow you to check eligibility by simply entering your zip code and the thermostat’s model number on their rebate portal before you buy, so it’s worth checking before you commit to a specific model.
Estimating Your Own Payback Period
A simple way to estimate payback time is to compare your last twelve months of heating and cooling costs against the typical 10–15% HVAC savings that ENERGY STAR-certified smart thermostats report for households that previously used manual setbacks inconsistently. For a household spending $150 a month on heating and cooling, a 10% reduction is roughly $180 a year, which means a $250 thermostat after a $100 rebate can pay for itself in well under a year, even before accounting for the convenience of Siri and remote control.
Room Sensors Explained: Why They Matter More Than the Thermostat Itself
One of the most misunderstood upgrades in the smart thermostat world is the remote room sensor, a small battery-powered puck that measures temperature and occupancy in a room away from the thermostat itself.
The Problem Room Sensors Solve
A traditional thermostat only knows the temperature at its own location, usually a hallway. If your bedroom runs five degrees colder than the hallway at night, the thermostat has no way of knowing that unless you tell it to prioritize a sensor placed in the bedroom instead. This single feature is often the difference between a house that “feels” evenly comfortable and one with persistent hot and cold spots.
How Ecobee’s SmartSensor Works
Ecobee’s included and add-on SmartSensors report both temperature and motion back to the thermostat over a proprietary low-power wireless connection. In the Ecobee app, you can set a schedule so that, for example, the living room sensor is prioritized during the day and the bedroom sensors take over at night, effectively letting one thermostat “chase” comfort around the house on a schedule rather than heating or cooling the whole home based on a single static point.
Honeywell’s Longer-Range Sensor Network
As covered in our review above, Honeywell’s room sensors use a proprietary frequency with substantially better wall penetration and range than Ecobee’s, which matters a great deal in larger homes, homes with plaster or brick interior walls, or multi-story houses where a sensor upstairs needs to reliably reach a thermostat installed on the main floor.
Do You Actually Need Extra Sensors?
If you live in a smaller single-story home or apartment with an open floor plan, a single thermostat is often sufficient. Sensors earn their cost in larger homes, homes with rooms that get significant direct sun exposure, finished basements, or bonus rooms over a garage — any space that tends to run noticeably warmer or colder than the rest of the house.
Privacy and Security: What HomeKit Actually Protects You From
Privacy is one of the most searched, and least explained, reasons people specifically seek out HomeKit-compatible thermostats rather than a generic Wi-Fi model.
End-to-End Encryption by Design
Every command sent to a HomeKit accessory, including your thermostat, is encrypted end-to-end between your Apple device and the accessory itself. Apple’s servers never see the contents of these commands, even when you’re controlling your thermostat remotely through iCloud — the encrypted traffic simply passes through Apple’s relay infrastructure without being readable by Apple or anyone intercepting it in transit.
On-Device Processing for Siri Requests
When you ask Siri to adjust the temperature through a HomePod or the Ecobee’s built-in speaker, much of the request processing happens on-device or within your local network rather than being shipped wholesale to a cloud server for interpretation, which is a meaningfully different privacy model from assistants that route every voice interaction through a centralized cloud pipeline by default.
What Data Manufacturers Still Collect
It’s worth being clear-eyed that HomeKit certification governs how a device talks to Apple’s ecosystem, not what a manufacturer’s own app or cloud backend does with your data outside of that. Ecobee, Honeywell, and Sensi all maintain their own companion apps and cloud accounts for features like energy reports and remote firmware updates, and their respective privacy policies — not HomeKit’s protocol — govern how that usage and diagnostic data is stored and used. Sensi has built its brand reputation specifically around minimizing this kind of data collection, which is why privacy-conscious buyers often gravitate toward it.
Troubleshooting Common HomeKit Thermostat Pairing Problems
Even reliable hardware runs into setup hiccups. Here are the issues our readers report most often, and how to resolve them.
“Accessory Not Found” During Setup
This almost always means your iPhone is on a different Wi-Fi band than the thermostat is broadcasting on during pairing mode. Most HomeKit thermostats set up over a 2.4GHz connection specifically; if your router broadcasts a combined SSID that’s currently steering your phone to 5GHz, temporarily split your network into separate 2.4GHz and 5GHz names, connect your phone to the 2.4GHz network, and retry setup.
Thermostat Shows Online in the Manufacturer App but Not in Apple Home
This typically indicates the initial HomeKit pairing handshake was interrupted, often by the app being backgrounded mid-setup. Remove the accessory from the Home app if it’s showing as “no response,” then restart the pairing process by holding the reset button on the thermostat (check your model’s manual for the exact combination) to regenerate a fresh setup code.
Remote Control Works Sometimes But Not Reliably
Intermittent remote access is the classic symptom of an unstable or absent Home Hub. Confirm your HomePod or Apple TV is connected to a strong Wi-Fi signal and not experiencing its own connectivity drops, and avoid placing your Apple TV or HomePod on a mesh Wi-Fi node far from your router if your mesh system has known backhaul issues.
Siri Says “Accessory Is Not Responding”
Check first whether the thermostat itself has lost Wi-Fi, which is visible directly on its screen for Ecobee, Honeywell, and Sensi models. If the thermostat’s own display shows it’s connected, the more likely culprit is your Home Hub losing track of the accessory after a router reboot; toggling Wi-Fi off and on on the Home Hub device usually re-establishes the connection.
Firmware Update Loop
Occasionally a thermostat will repeatedly prompt for the same firmware update without completing it. This is usually caused by an unstable internet connection during the download; connecting the thermostat closer to your router temporarily, or moving a Wi-Fi extender closer to the thermostat’s location, typically resolves it.
Building Smart Automations Around Your Thermostat
Buying a HomeKit thermostat is only half the story — the real value shows up once you start building automations in the Home app that react to your life instead of a fixed clock.
Geofencing: Temperature That Follows You Home
In the Home app, under Automation, you can create a “People Arriving” or “People Leaving” trigger tied to your iPhone’s location. A common setup is to have the heat or air conditioning set back automatically when the last person’s iPhone leaves a defined radius around your home, and recover to your preferred comfort temperature when the first person’s iPhone crosses back into that radius, so the house is already comfortable by the time you walk in the door.
Time-of-Day and Sunset/Sunrise Scenes
Beyond simple schedules, you can tie thermostat scenes to sunrise or sunset rather than a fixed clock time, which naturally adjusts through the seasons. A “Good Night” scene, for instance, can simultaneously lower the temperature a few degrees, lock connected smart locks, and dim connected lights, all triggered by a single Siri phrase or automatically at a set time each night.
Sensor-Triggered Automations
If your thermostat’s room sensors are exposed to HomeKit as occupancy sensors, as Ecobee’s SmartSensors are, you can chain them into automations well beyond climate control — for example, triggering a hallway light automatically when the sensor detects motion at night, since the same hardware powering your room-priority heating logic can double as a basic presence sensor for other parts of your smart home.
Combining Multiple Accessories Into One Scene
The real payoff of HomeKit’s ecosystem approach is combining your thermostat with other accessories into a single named scene — for example, an “Away” scene that sets the thermostat back, turns off all lights, and arms any connected security cameras with one tap or one Siri command, rather than manually adjusting each device individually every time you leave the house.
How to Choose the Right Model for Your Specific Home
With five strong options covered in this guide, the “best” choice really comes down to matching the thermostat to your home, not just picking the highest-rated model.
If You Live in a Small Apartment or Condo
The Ecobee3 Lite is usually the sweet spot here. You’re unlikely to need remote room sensors in a smaller footprint, and the savings versus the Premium model are significant without sacrificing the reliability of HomeKit integration.
If You Have a Large, Multi-Story Home
The Honeywell Home T9’s superior sensor range makes it a strong pick for homes where a bedroom sensor upstairs needs to reliably communicate with a thermostat installed on the main floor, though the Ecobee Premium remains competitive if you’re willing to add extra SmartSensors to bridge distance.
If You Want the Deepest Apple Integration
Nothing beats the Ecobee Premium if built-in Siri access and the most polished Home app experience are priorities, particularly for households that don’t already have a HomePod in every room and want the thermostat itself to double as a voice assistant endpoint.
If Privacy Is Your Top Priority
The Emerson Sensi Touch 2 is the clear choice for buyers who want smart scheduling and remote access without a company built around occupancy radar and always-listening microphones, while still getting rock-solid HomeKit reliability.
If You Have Electric Baseboard or In-Floor Heat
There’s effectively only one right answer here: Mysa. None of the low-voltage thermostats in this guide are rated for line-voltage heating systems, and attempting to force one to work is a genuine safety hazard.
Long-Term Care and Maintenance for Your Smart Thermostat
A HomeKit thermostat is a set-and-forget device for the most part, but a few habits will keep it running accurately for years.
Keep Firmware Up to Date
Manufacturers regularly push firmware updates that patch security vulnerabilities, improve HomeKit stability, and occasionally add entirely new features, such as support for new automation triggers. Enable automatic updates in the manufacturer’s companion app rather than manually checking, since HomeKit-relevant fixes are often bundled into routine updates.
Room Sensor Batteries
Remote room sensors from Ecobee and Honeywell typically run on a single coin-cell or AAA battery and will send a low-battery notification to your phone through the manufacturer’s app well before they die, but it’s worth proactively replacing batteries once a year as routine maintenance rather than waiting for the first alert, particularly for sensors in rooms you rely on heavily for room-priority scheduling.
Clean the Sensor and Display
Dust accumulation on a thermostat’s built-in temperature or humidity sensor can cause it to report inaccurate readings over time. A soft, dry microfiber cloth wiped across the vents on the back or sides of the unit every few months is usually enough to keep readings accurate.
Re-Pair After a Router Replacement
If you replace your home router or mesh Wi-Fi system, your HomeKit thermostat will often need to be manually reconnected to the new network name and password through the manufacturer’s app, even if the network name itself stays the same, since some routers generate a new underlying network identifier during a factory reset or firmware migration.
Seasonal Calibration Checks
Twice a year, when you switch between heating and cooling seasons, it’s worth spending five minutes verifying that your thermostat’s reported temperature matches a separate, independent thermometer placed nearby. Small discrepancies of a degree or two are common and usually harmless, but a sensor drifting three or more degrees off can be a sign the unit needs to be reseated on its baseplate or, in rare cases, warranty-serviced.
Multi-Zone and Multiple-Thermostat Homes
Larger homes, especially those with separate HVAC systems for upstairs and downstairs, or a detached guest suite, need a slightly different approach than a single-thermostat install, and this is an area where a lot of buying guides fall short.
True Multi-Zone HVAC vs. Multiple Independent Systems
It’s worth distinguishing between a home with one HVAC system split into zoned ductwork controlled by dampers, and a home with two or more entirely separate furnaces or heat pumps, each serving its own portion of the house. In a true zoned system, you typically need a single “master” thermostat wired to a zone control panel, and not every smart thermostat is compatible with every zone panel brand, so it’s worth checking your zone panel’s documentation for explicitly listed compatible thermostats before buying. In a home with fully independent systems, by contrast, you simply install one HomeKit thermostat per system, and each shows up as its own separate accessory in the Home app.
Managing Multiple Thermostats in One Home App
Apple Home handles multiple thermostats gracefully by letting you assign each one to its own room, such as “Upstairs” and “Downstairs,” and you can ask Siri to target a specific one directly, for example “Set the upstairs thermostat to 68,” rather than issuing a generic command that might apply to the wrong zone. You can also build automations that treat zones differently, such as keeping a rarely used guest suite thermostat set back further than the main living areas by default, only recovering to a comfortable temperature when a calendar event or a manual toggle indicates guests are staying over.
Mixing Brands Across Zones
Because HomeKit is a standardized protocol, there is no requirement that every thermostat in your home be the same brand. It’s entirely reasonable to run an Ecobee Premium on your main-floor forced-air system and a Mysa on a baseboard-heated bonus room above the garage, and both will appear side by side in the same Home app, respond to the same “Good Night” scene, and follow the same geofencing triggers, without any special configuration to bridge the two ecosystems.
Full Cost Breakdown: Hardware, Installation, and Hidden Extras
The sticker price on the box is rarely the full cost of upgrading your thermostat, so it helps to know what else to budget for before you check out.
Base Hardware Pricing Tiers
Across the models in this guide, pricing generally falls into three tiers: budget-friendly options like the Ecobee3 Lite and entry-level Sensi models that sit at the lower end of the market, mid-range options like the Sensi Touch 2 and standard Honeywell T9 configurations, and premium options like the Ecobee Premium and Honeywell T10 Pro that command a noticeably higher price for their extra sensors, radar occupancy detection, and built-in Siri hardware.
Optional Add-On Sensors
If your chosen thermostat doesn’t ship with room sensors included, or you want more than the one or two that come in the box, both Ecobee and Honeywell sell additional sensors individually. Budgeting for two or three extra sensors is common in larger homes, and it’s worth factoring that add-on cost into your total budget rather than treating the thermostat’s sticker price as the final number.
Professional Installation vs. DIY
Most of the thermostats in this guide are designed for confident DIY installation and typically take less than 30 minutes once the power is off and wires are labeled. That said, homes with unusual wiring configurations, a confirmed missing C-wire that the included PEK can’t easily resolve, or heat pump systems with non-standard terminal labeling are good candidates for a licensed HVAC technician, who will typically charge a flat service call fee on top of the thermostat’s own price.
Power Extender Kits and Wiring Accessories
Most C-wire power extender kits ship in the box with Ecobee, Honeywell, and Sensi products at no extra charge, but if yours is lost, damaged, or you need a longer run of wire than what’s included, replacement PEKs and 18-gauge thermostat wire spools are inexpensive and widely available, and it’s worth having a spare on hand if you’re installing multiple thermostats in an older home.
Warranty Coverage and Manufacturer Support Compared
Warranty length and support quality rarely make it into buying guides, but they matter for a device that’s wired directly into your HVAC system and expected to last a decade or more.
Standard Warranty Terms
Ecobee, Honeywell, Sensi, and Mysa all back their thermostats with a limited warranty covering manufacturing defects for a set period from the date of purchase, and all four brands allow you to register your product through their companion app shortly after setup, which is worth doing immediately since a registered warranty claim is typically processed faster than one requiring a purchase receipt to be tracked down later.
Extended Warranty Through Professional Installation
If you have your thermostat professionally installed by an HVAC contractor rather than doing it yourself, ask whether the installer offers an extended labor warranty on top of the manufacturer’s hardware warranty. This can cover the cost of a return visit if the thermostat needs to be rewired or replaced due to an installation issue, which the manufacturer’s own warranty typically does not cover.
Getting Help When Something Goes Wrong
Ecobee and Honeywell both offer in-app chat support and phone support during business hours, while Sensi leans more heavily on an online knowledge base and email support, consistent with its smaller, privacy-focused footprint. If you run into a HomeKit-specific pairing issue rather than a hardware problem, Apple’s own support documentation and the Home app’s built-in troubleshooting flow can often resolve it faster than contacting the thermostat manufacturer directly, since HomeKit pairing issues are frequently on the Apple side of the handshake rather than the thermostat’s firmware.
Accessibility Features Worth Knowing About
For households with elderly residents or family members with visual, motor, or cognitive differences, a few accessibility-related features are worth weighing alongside the usual comparison points.
Voice Control as an Accessibility Tool
Siri control through the Ecobee Premium’s built-in speaker, or through any HomePod paired with a different HomeKit thermostat, can be genuinely valuable for household members who find a touchscreen difficult to operate precisely, whether due to limited dexterity or low vision. Being able to say “Hey Siri, make it warmer” removes the need to read small on-screen text or tap a precise touch target.
VoiceOver and Large-Text Support in the Home App
Because control ultimately happens through Apple’s own Home app rather than a manufacturer’s separate app, all of these thermostats inherit iOS’s system-wide accessibility features, including VoiceOver screen reading, larger dynamic text sizes, and increased contrast modes, without any special configuration on the thermostat’s part.
Remote Monitoring for Caregivers
Family members caring for an aging parent or relative in a separate residence can use the Home app’s remote access, combined with a Home Hub at the relative’s home, to check and adjust the temperature remotely, and in some cases receive notifications if the temperature in the home drifts outside a safe range, which can be an early warning sign of a failed furnace during a cold snap.
Matter Explained: The Standard Reshaping HomeKit Compatibility
Matter comes up constantly in HomeKit thermostat discussions, but most buying guides mention it only in passing when talking about Nest. It deserves a closer look, because it’s quietly changing which thermostats you can consider at all.
What Matter Actually Is
Matter is an industry-wide smart home standard backed jointly by Apple, Google, Amazon, and the Connectivity Standards Alliance, designed so a single certified device can work natively across HomeKit, Google Home, and Amazon Alexa without the manufacturer building three separate integrations. Instead of a company like Nest needing to reverse-engineer or negotiate direct HomeKit support, they simply certify a device against the shared Matter specification once, and compatibility with all three major ecosystems follows automatically.
Matter vs. Native HomeKit: What’s the Real Difference?
On paper, a Matter-certified thermostat and a natively HomeKit-certified thermostat both show up in your Home app and both respond to Siri. In practice, native HomeKit devices from brands like Ecobee tend to expose a richer set of characteristics — occupancy data, humidity, air quality, and remote sensor priority, for example — because those features were built around HomeKit’s specification from day one. Matter’s initial thermostat specification is comparably leaner, covering core functions like setpoint temperature and mode, so early Matter thermostats sometimes feel slightly less capable inside the Home app even though the basic “change the temperature with Siri” experience works fine.
Do You Need a Thread Border Router?
Many Matter devices, including some thermostats, communicate over Thread, a low-power mesh networking protocol rather than traditional Wi-Fi. To use a Thread-based Matter thermostat, you need a Thread border router on your network, which newer HomePod minis, HomePod (2nd generation), and recent Apple TV 4K models already include. If your Home Hub predates these models, you may need to upgrade it purely to unlock Thread-based Matter accessories, which is a detail many shoppers miss until their new thermostat won’t fully connect.
Should You Wait for More Matter Options?
If you’re deciding between a natively HomeKit-certified thermostat like Ecobee today versus waiting for a wider selection of Matter thermostats, the practical answer is that native HomeKit models remain the safer, more feature-complete choice right now. Matter is expanding quickly and is worth watching, but the thermostats built specifically for HomeKit still offer the deepest sensor integration and the most mature Siri experience as of this guide.
True Cost Breakdown: DIY vs. Professional Installation
The sticker price on the box is rarely the full cost of getting a smart thermostat up and running. Here’s what to actually budget for.
DIY Installation Costs
For most standard forced-air or heat pump systems with an existing C-wire, DIY installation costs nothing beyond the thermostat itself, since the process covered earlier in this guide typically takes 30 to 60 minutes with a screwdriver and the included mounting hardware. If you don’t have a C-wire, the included power extender kit adds no extra material cost, just additional wiring time, usually another 20 to 30 minutes.
When Professional Installation Makes Sense
Professional installation, typically running $75 to $200 depending on your region and the complexity of your system, is worth considering if your existing wiring is unlabeled or clearly non-standard, if you have a multi-stage heat pump or dual-fuel system where a misconfiguration could damage expensive equipment, or if your breaker panel and furnace control board are difficult to safely access on your own. Some utility rebate programs specifically require professional installation to qualify for the largest rebate tiers, so it’s worth checking your local program’s fine print before deciding.
Hidden Ongoing Costs
Most HomeKit thermostats have no subscription fee for core functionality, but a few premium features live behind optional paid tiers. Ecobee, for instance, offers an optional subscription for extended energy reporting history and priority customer support, though the core scheduling, Siri control, and HomeKit integration remain free. Room sensor batteries, typically CR2032 coin cells or standard AAAs costing a few dollars a year per sensor, are the only recurring hardware cost most owners will encounter.
| Cost Category | Typical Range | Applies To |
|---|---|---|
| Thermostat hardware | $80–$250 | All models |
| Professional installation | $75–$200 | Complex wiring, warranty requirements |
| Extra room sensors | $40–$80 each | Ecobee, Honeywell |
| Sensor batteries (annual) | $5–$15/year total | Homes using multiple sensors |
| Optional app subscription | $0–$5/month | Ecobee extended reporting only |
Running Multiple Thermostats: Zoning and Multi-Unit Homes
Larger homes and properties with more than one HVAC system raise a different set of questions that single-thermostat buying guides rarely address.
True HVAC Zoning vs. Multiple Independent Thermostats
It’s important to distinguish between a home with a professionally installed zoning system — where a single furnace or air handler serves multiple ductwork zones through motorized dampers, each controlled by its own thermostat — and a home that simply has two entirely separate HVAC systems, such as a furnace for the main floor and a separate unit for a finished basement or addition. Ecobee, Honeywell, and Sensi all support true zoning setups when paired with a compatible zone control panel, and each zone’s thermostat pairs to HomeKit independently, appearing as its own accessory that you can name, automate, and control separately.
Naming and Organizing Multiple Thermostats in Apple Home
When you have more than one thermostat, take the time to assign each one to the correct room in the Home app, such as “Upstairs Thermostat” and “Basement Thermostat,” rather than leaving them with generic default names. This makes voice commands far more reliable, since you can say “Hey Siri, set the basement to 68” and have Siri correctly target the right accessory instead of asking you to disambiguate every time.
Automations Across Multiple Zones
Multi-thermostat homes get real value from room-specific automations, such as lowering only the basement zone’s temperature during the day if it’s rarely used, while keeping the main floor on a normal schedule. You can also build a single “Away” scene that adjusts every thermostat in the house simultaneously, so leaving home doesn’t require manually setting back two or three separate zones one at a time.
HomeKit vs. Alexa vs. Google Home: Does Your Choice of Thermostat Lock You In?
A common concern among shoppers is whether buying a “HomeKit thermostat” limits their options if they later want to add Alexa or Google Assistant devices too.
The Good News: Most Models Are Multi-Platform
Ecobee, Honeywell Home, and Sensi are not HomeKit-exclusive devices. All three simultaneously support Alexa and Google Assistant alongside HomeKit, meaning you can control the exact same thermostat by saying “Hey Siri,” “Alexa,” or “Hey Google,” depending on which smart speaker happens to be in the room, without needing to choose a single ecosystem for your whole home.
Where Platform Choice Still Matters
The meaningful differences show up in the details rather than basic on/off compatibility. Ecobee’s built-in Siri speaker, for example, only functions through Apple’s ecosystem — you can’t use it as an Alexa speaker even though the thermostat itself works with Alexa for climate control. Similarly, some advanced automation logic, like HomeKit’s geofencing based on iPhone location, doesn’t carry over one-to-one if you later switch to Google’s or Amazon’s geofencing systems, since each platform tracks location and triggers automations somewhat differently.
Mysa Is the Exception
Unlike the other thermostats in this guide, Mysa’s HomeKit support historically required more careful checking model-by-model, since not every Mysa variant ships with HomeKit compatibility out of the box. If cross-platform flexibility matters to you and you have baseboard heat, confirm the specific Mysa model and firmware version supports HomeKit before purchasing, rather than assuming all Mysa products are identical.
Common Mistakes Buyers Make When Choosing a HomeKit Thermostat
After years of covering this category, a handful of avoidable mistakes account for the majority of return requests and frustrated support tickets.
Assuming “Smart” Automatically Means “HomeKit Compatible”
Plenty of well-reviewed smart thermostats work beautifully with Alexa or Google Assistant but were never certified for HomeKit at all. Always check for the explicit “Works with Apple Home” badge on the product listing rather than assuming broad smart home support includes Apple’s ecosystem.
Not Checking System Type Before Buying
As covered in the HVAC compatibility section above, buying a low-voltage thermostat for a line-voltage baseboard system, or vice versa, is one of the most common and most expensive mistakes. Confirm your wiring and system type before adding anything to your cart.
Skipping the Home Hub Requirement
Many one-star reviews for otherwise excellent thermostats stem from buyers not realizing that remote access and automations require a Home Hub. If you don’t already own a HomePod, HomePod mini, or Apple TV, factor that into your total budget.
Underestimating Sensor Needs in Larger Homes
Buyers in larger or multi-story homes sometimes purchase the base thermostat without sensors, then find that a single fixed sensing point leaves parts of the house perpetually too warm or too cold. If your home is over roughly 2,000 square feet or has more than one story, budget for at least one additional room sensor from the start.
Ignoring Warranty and Support Differences
Warranty length and support quality vary more than people expect. Ecobee backs its Premium line with a longer standard warranty than its budget Lite model, Honeywell’s warranty terms can differ between DIY and professionally installed units, and Sensi’s support is generally regarded as more responsive given its smaller, more focused product lineup. Check current warranty terms directly on the manufacturer’s site before purchasing, since these policies do change over time.
Quick Glossary: HomeKit Thermostat Terms Explained
| Term | What It Means |
|---|---|
| HAP | HomeKit Accessory Protocol — Apple’s encrypted communication standard that certified accessories must implement. |
| Home Hub | A HomePod, HomePod mini, or Apple TV that enables remote access and automations when you’re away from home. |
| C-Wire | The “common” wire that provides continuous low-voltage power to a smart thermostat’s Wi-Fi radio and screen. |
| PEK | Power Extender Kit — an included adapter that creates a virtual C-wire connection at the furnace control board when none exists. |
| Matter | A cross-platform smart home standard letting one certified device work with HomeKit, Google Home, and Alexa simultaneously. |
| Thread | A low-power mesh networking protocol used by many newer Matter devices instead of standard Wi-Fi. |
| Geofencing | Location-based automation that triggers thermostat changes when your iPhone enters or leaves a defined radius around your home. |
| Line Voltage | 120V/240V household electrical current used by baseboard and in-floor electric heaters, requiring a specially rated thermostat like Mysa. |
| Dual-Fuel System | An HVAC setup pairing a heat pump with a gas furnace as backup heat during extreme cold. |
Frequently Asked Questions
Does Google Nest work with Apple HomeKit?
Natively, no. Older Nest thermostats require a ‘Starling Home Hub’ to work with HomeKit. However, the new Nest Thermostat (2020) and the Nest Learning Thermostat (4th Gen) support ‘Matter’, which allows them to connect to Apple HomeKit directly if you have a Matter controller.
Why is Ecobee considered the best for HomeKit?
Ecobee has deeply integrated with Apple’s ecosystem for years. The Ecobee Smart Thermostat Premium even allows you to use Siri directly on the thermostat itself (via a HomePod), a feature no other competitor offers.
Do I need a C-wire for HomeKit thermostats?
Generally, yes. HomeKit requires a constant Wi-Fi connection to remain responsive in the Home app. Without a C-wire (Common wire), the Wi-Fi radio would drain batteries too quickly. Most HomeKit thermostats, like Ecobee and Honeywell T9, include a power adapter kit (PEK) if you lack a C-wire.
Can I use HomeKit automations with these thermostats?
Absolutely. You can create ‘Geofence’ automations (turning heat down when the last person leaves home) or ‘Scene’ automations (setting temperature to sleep mode when you say ‘Hey Siri, Goodnight’).
What HVAC systems work with HomeKit thermostats?
Most HomeKit thermostats support standard gas, oil, and electric forced-air furnaces, heat pumps with auxiliary or emergency heat, and multi-stage systems. High-voltage electric baseboards require a line-voltage model like Mysa instead of a standard low-voltage thermostat.
Will a HomeKit thermostat actually lower my energy bill?
Most owners see meaningful savings from geofencing, scheduling, and occupancy sensing, and many utilities offer instant rebates for buying an ENERGY STAR certified smart thermostat, which further improves the payback period.
Can I run two different thermostat brands in the same Apple Home?
Yes. Because HomeKit is a standardized protocol, an Ecobee on one HVAC zone and a Mysa on an electric baseboard zone will both appear in the same Home app and can be controlled by the same automations and Siri commands without any special setup.
Do I need professional installation, or can I do it myself?
Most homes with standard forced-air or heat pump wiring and an accessible C-wire can be handled as a straightforward DIY install in under 30 minutes. Homes with unusual wiring, missing C-wires the included adapter can’t resolve, or complex multi-stage systems are better suited to a licensed HVAC technician.
Final Verdict: Which HomeKit Thermostat Should You Buy?
Choosing the right thermostat for your Apple smart home comes down to your budget and your specific heating setup.
- The “Money is No Object” Choice: Get the Ecobee Smart Thermostat Premium. It is the only device that truly feels like an extension of the Apple ecosystem, with its glass finish and built-in Siri capabilities.
- The “Value” Choice: The Ecobee3 Lite offers 95% of the functionality for a fraction of the price.
- The “Privacy & Traditional” Choice: The Emerson Sensi Touch 2 is robust, private, and easy for anyone to use, even if they aren’t tech-savvy.
- The “High Voltage” Choice: If you have baseboard heaters, Mysa is your only reliable option for HomeKit.
Upgrading your thermostat is one of the best ROI improvements you can make for your home’s energy efficiency. With HomeKit, it becomes effortless.



 Home
Home
 Info
Info
 Compare
 Reviews
 Shop
Shop