
Hiking Hydration Gear: The Ultimate Guide to Staying Hydrated on Any Trail
Dehydration is the #1 performance killer on the trail. This guide cuts through the clutter to show you the exact gear and strategies to drink smarter, hike stronger, and stay safe.
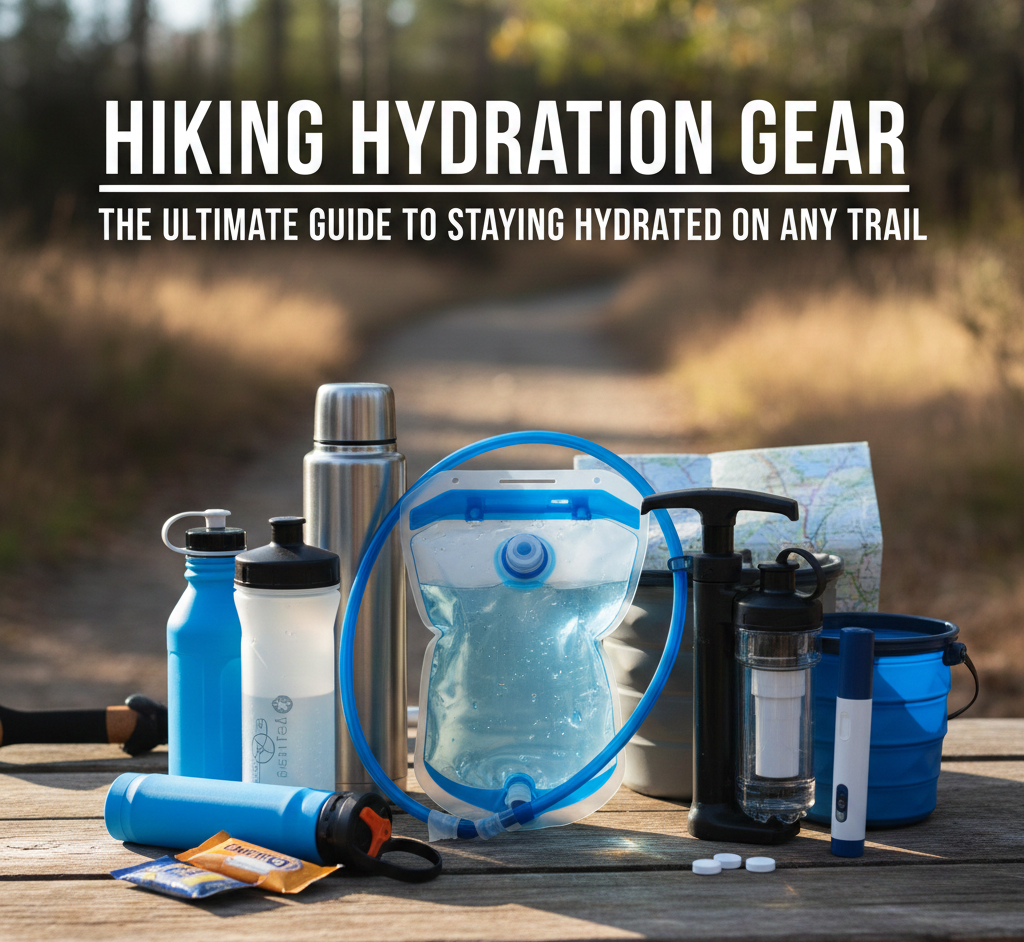
1. Why Hydration is Critical: More Than Just Thirst
Water regulates body temperature, lubricates joints, transports nutrients, and removes waste. On the trail, even mild dehydration (1-2% body weight loss) reduces endurance, impairs decision-making, and increases fatigue. Severe dehydration leads to heat exhaustion, cramps, and dangerous situations. Proper hydration isn’t a convenience—it’s a safety protocol for every hike.
The Science: Your body loses water through sweat, respiration, and urine. At high altitude or in dry climates, respiratory loss increases dramatically. Understanding vacuum insulation technology can help you choose gear that keeps your water at the ideal temperature, encouraging you to drink more.
2. Calculate Your Water Needs: A Simple Formula
A generic “drink lots” isn’t a plan. A solid baseline is 0.5 to 1 liter of water per hour of moderate activity. Adjust for: Heat & Sun: Add 0.5-1L extra per day. Altitude: Add 1-2L extra per day. Personal Sweat Rate: Weigh yourself before and after a training hike; each pound lost is ~16oz of fluid to replace. Always plan to carry more than you think you’ll need.
3. Hydration Bladder Systems: Hands-Free Drinking
Hydration bladders (reservoirs) like those from CamelBak, Osprey, or Platypus are ideal for consistent sipping. They fit in your pack’s dedicated sleeve, with a tube routed over your shoulder. Look for features: Quick-Connect Tubes for easy refilling, Bite Valves that don’t leak, and Wide-Mouth Openings for easy cleaning and adding ice. Capacities range from 1.5L (short hikes) to 3L+ (all-day adventures).

4. Insulated Water Bottles: Temperature Control
For day hikes where you want cold water or hot tea, a double-wall vacuum-insulated bottle is key. Brands like Hydro Flask, Klean Kanteen, and Yeti keep liquids cold for 24+ hours. A wide-mouth bottle is easier to fill, clean, and add ice to. A narrow-mouth bottle is better for drinking while moving. For a deep comparison, see our analysis of Hydro Flask vs Klean Kanteen for 24-hour ice retention.
🛒 Shop Insulated Bottles5. Water Filters & Purifiers: Sourcing from Nature
For long hikes or backpacking, carrying all your water is impossible. A reliable water filter or purifier is essential safety gear. Pump Filters are powerful but slower. Gravity Filters (like Platypus GravityWorks) are great for groups. Squeeze Filters (Sawyer Squeeze) are lightweight and popular. UV Purifiers (SteriPEN) kill viruses but don’t remove sediment. Know the water sources on your route.
6. Electrolyte Management: Replenish What You Lose
Sweat loses salt (sodium, potassium). Drinking only plain water on long, sweaty hikes can lead to hyponatremia (dangerously low sodium). Integrate electrolytes: use drink mixes (Liquid IV, Nuun), electrolyte tablets, or salty snacks. A good rule: if you’re hiking for over 2 hours or sweating heavily, add electrolytes to at least one liter of your water.
7. Pack Integration & Access: Drink Without Stopping
Your hydration system must work seamlessly with your pack. For bladders, ensure your pack has a dedicated internal sleeve and a port for the tube. Route the tube under your pack strap for secure, easy access. For bottles, use side pockets that you can reach without taking your pack off. Practice grabbing and replacing your bottle while walking before you hit a tricky section of trail.
8. Cold Weather Hydration: The Freeze Factor
In freezing temps, hydration systems can freeze. Tricks: Insulate the Tube: Use an insulated tube cover or make your own with foam. Bladder Placement: Keep the bladder inside your pack, close to your body to use your body heat. Use an Insulated Bottle: Carry a vacuum-insulated bottle with a wide mouth—it won’t freeze shut like a narrow thread. Drink Warm Fluids: Start with warm water or tea. An insulated bottle is critical here; learn about what vacuum insulation in a thermos really means for performance.
9. Desert & Hot Weather Tips: Extreme Conditions
In arid environments, water is scarce and sweat evaporates instantly, masking fluid loss. Carry a Massive Capacity: Use a 3L bladder plus two 1L bottles. Pre-Hydrate: Drink 1L of water in the hours before your hike. Cover Up: Wear light, long layers to reduce evaporative loss. Know Your Sources: Cache water or know reliable springs. Plan to drink 1 liter per hour during peak heat.
10. Multi-Day Trek Systems: Capacity & Redundancy
For backpacking trips, you need a hybrid system: a high-capacity bladder (3L) for camp water, a water filter for refills, and a durable, lightweight bottle (like a Smartwater bottle) for mixing electrolytes and as a backup. Never rely on a single container; redundancy is safety. A reliable thermos for camping can also be invaluable for hot meals and drinks that boost morale.
11. Cleaning & Maintenance: Prevent Mold & Funky Taste
Hydration gear gets nasty if neglected. After every hike: empty all water, detach tubes, and let everything air dry completely. Monthly, clean with a bottle brush and a solution of baking soda, vinegar, or dedicated cleaning tablets (e.g., CamelBak Cleanz). Store your bladder and bottles dry and with lids off. A clean system tastes better and is safer.
12. Essential Hiking Hydration Gear Checklist
For Day Hikes: 2-3L Hydration Bladder OR two 1L insulated bottles. Electrolyte packets. Optional: Collapsible cup.
For Long/Remote Day Hikes: 3L Bladder, 1L Insulated Bottle, Water Filter, Electrolytes.
For Backpacking: 3L Bladder, 1-2 Lightweight Bottles, Water Filter/Purifier, Electrolytes, Repair Kit for bladder.
All Conditions: Knowledge of your route’s water sources.
Final Thought: The best hiking hydration gear is the system you’ll actually use consistently. Test your setup on short local trails before a big adventure. Staying hydrated is the simplest way to ensure every hike is a great one. For keeping more than just water at the perfect temp, explore the best options for soup on the trail.
13. Water Purification Methods Compared: Tablets, Boiling, and UV-C
Filters and purifiers aren’t the only way to make backcountry water safe. Each method has trade-offs in weight, speed, taste, and what threats it actually neutralizes, so most experienced hikers carry a primary method and a lightweight backup.
Chemical Tablets (Iodine & Chlorine Dioxide): Featherweight and reliable, tablets like Katadyn Micropur or Potable Aqua kill bacteria, viruses, and most protozoa. The catch is time—chlorine dioxide needs 30 minutes for bacteria and up to 4 hours for cryptosporidium, and iodine leaves a metallic aftertaste some hikers can’t stand. Tablets shine as an emergency backup when a filter clogs or freezes.
Boiling: The gold standard for killing every pathogen, boiling requires no gear beyond a pot and fuel. A rolling boil for one minute (three minutes above 6,500 feet) is sufficient. It’s slow and fuel-intensive for large volumes, so it’s best reserved for camp water rather than mid-hike refills.
UV-C Purifier Bottles: Self-cleaning bottles with a built-in UV-C light, such as LARQ or GRAYL’s electric line, neutralize viruses and bacteria in 60-80 seconds with the push of a button. They’re excellent for international travel and areas with viral contamination risk, but batteries add a failure point in cold weather, so they work best as a convenience layer, not your only plan.
Layered Strategy: Many thru-hikers carry a squeeze filter for daily use plus a handful of chemical tablets as an ultralight backup. That combination covers mechanical failure without adding real pack weight.
14. Trail Running Hydration Vests vs. Hiking Backpacks
Not all hydration carriers are built the same, and choosing between a running vest and a traditional hiking pack changes how you move on the trail. A hydration vest (Salomon, Nathan, UltrAspire) hugs the torso with a snug, low-bounce fit, front-mounted soft flasks for quick sips without breaking stride, and minimal storage—ideal for trail running, fastpacking, and long day hikes where speed matters.
A hiking backpack with a bladder sleeve trades that snug fit for capacity: room for layers, food, a first-aid kit, and navigation tools alongside 2-3 liters of water. The hip belt transfers weight to your hips rather than your shoulders, which matters once you’re carrying more than 15 pounds.
The deciding factors are pace, distance, and cargo. Under 90 minutes at a running pace, a vest with two 500ml soft flasks is plenty. For a 6-hour day hike with gear, a 20-30L pack with a dedicated bladder sleeve is the better call. Fastpackers often land in between, choosing a running-vest-style pack with a slightly larger frame to bridge both worlds.
Quick Fit Check
A hydration vest should sit close enough that it doesn’t bounce when you jog in place, but not so tight it restricts your breathing. A hiking pack’s hip belt should carry roughly 80% of the load, with shoulder straps stabilizing rather than bearing weight.
15. Bottle Materials Explained: Titanium, Stainless Steel, and Plastic
The material your bottle is made from affects weight, durability, taste, and price more than most hikers realize.
Titanium: The lightest metal option and highly corrosion-resistant, titanium bottles and cups are popular with ultralight backpackers who also cook over a flame directly in the vessel. The trade-off is cost—titanium runs significantly more than steel or plastic for the same capacity.
Stainless Steel: Heavier but nearly indestructible, double-wall stainless steel (18/8 food-grade) is the standard for insulated bottles like Hydro Flask and Klean Kanteen. It won’t retain flavors or leach chemicals, and it shrugs off drops onto rock without denting through.
Plastic (Tritan & HDPE): The lightest and cheapest option, BPA-free Tritan plastic (used in Nalgene bottles) is nearly unbreakable and won’t hold odors the way older plastics did. HDPE is what disposable Smartwater and Aquafina bottles use—thin, ultralight, and popular with thru-hikers who prioritize grams over durability and simply replace bottles periodically.
For most day hikers, stainless steel offers the best balance of durability and temperature retention. Ounce-counting backpackers gravitate toward titanium or repurposed plastic bottles, while budget-conscious hikers do perfectly well with a basic Nalgene.
16. Hiking with Kids and Pets: Hydration for the Whole Crew
Hydration planning doesn’t stop with the adult carrying the pack. Kids and dogs dehydrate faster than adults relative to their body size and often don’t recognize or communicate thirst until they’re already behind.
Kids: Give children their own small, easy-to-use bottle (a soft flask or a bite-valve bladder with a short tube works well for younger hikers) so they can self-serve without needing help. Build in mandatory water breaks every 20-30 minutes rather than waiting for a request—by the time a child says they’re thirsty, mild dehydration has often already set in. Flavored electrolyte drinks can encourage reluctant drinkers.
Dogs: A collapsible silicone bowl paired with an extra liter of water per 20 pounds of dog on hot days covers most day hikes. Dog-specific hydration packs let larger breeds carry their own water. Watch for excessive panting, dry gums, or lethargy—early signs your dog needs a break and water, not just a slower pace.
Family Rule of Thumb: Pack roughly 25% more water than your per-person calculation when hiking with kids or dogs. The extra margin covers both higher relative fluid loss and the water that inevitably gets spilled at a trailside break.
17. Pre-Hike, Mid-Hike, and Recovery Hydration Protocol
When you drink matters almost as much as how much. Treating hydration as a single mid-hike task instead of a three-phase protocol is one of the most common mistakes even experienced hikers make.
Pre-Hike (2-3 hours before): Drink 500-750ml of water steadily rather than chugging it right before you start, which just sends you to the trailhead bathroom. Add a pinch of electrolytes if you’ll be sweating heavily.
Mid-Hike: Sip consistently rather than drinking in large, infrequent gulps. Small, frequent intake absorbs more efficiently and avoids the sloshing discomfort of downing 500ml at once. On hikes over two hours, alternate plain water with an electrolyte mix roughly every other liter.
Recovery (Post-Hike): Rehydration doesn’t end at the trailhead. Aim to replace 125-150% of your estimated fluid loss over the following hours, since your body continues losing water through sweat and respiration even after you stop moving. Pairing recovery fluids with a snack containing sodium helps your body actually retain the water instead of flushing it straight through.
18. Water Weight and Pack Planning: The Math Behind Carrying Water
Water is heavy—one liter weighs about 2.2 pounds (1 kilogram), which means a 3-liter bladder alone adds nearly 6.6 pounds before you’ve packed anything else. Understanding this math prevents both the danger of under-packing and the fatigue of over-packing.
A simple planning formula: multiply your hourly hydration target (0.5-1L) by expected hiking hours, then add your climate and altitude buffers from Section 2. For a 4-hour hike in moderate heat, that’s roughly 2-4L of carried water, or 4.4-8.8 pounds just in fluid weight.
Where water sources exist on your route, carrying a filter and only 1-1.5L at a time can meaningfully cut your base pack weight—often the single biggest lightweight-backpacking win available, since no other gear swap saves multiple pounds at once. Where sources are unreliable or absent, that math flips: you carry every drop you’ll need, full stop, and accept the added weight as the cost of a safe route.
Weight-vs-Safety Tradeoff
Never cut water weight below your calculated minimum to save pack weight on a route without confirmed water sources. Underestimating water is one of the few gear mistakes that can become a genuine emergency.
19. Finding and Treating Water in the Backcountry
Knowing how to locate and evaluate a water source is a core backcountry skill, especially on multi-day routes where you can’t carry everything from the trailhead.
Good Sources: Flowing streams and rivers, especially fast-moving and cold, generally carry less sediment and bacterial load than stagnant water. Water higher in a drainage, closer to the source, is typically cleaner than water that’s passed grazing land or a trail camp downstream.
Sources to Avoid or Treat Carefully: Stagnant ponds, water near livestock or heavy trail traffic, and anything visibly cloudy or algae-covered should be treated as higher risk—filter and purify, don’t just filter. Snowmelt is often assumed to be pristine but can still carry giardia from upstream animal activity; treat it like any other natural source.
Pre-Filtering: For silty or sediment-heavy water, pre-filter through a bandana or coffee filter before running it through your primary filter. This single step dramatically extends the life of a squeeze or pump filter’s cartridge, which is otherwise one of the most common gear failures on long treks.
Always cross-reference a route’s water sources before you leave—ranger stations, trail apps, and recent trip reports often flag seasonal creeks that run dry by midsummer, which can turn a “known” water source into a dry gap you didn’t plan for.
21. Smart Bottles and Hydration Tracking Technology
A growing category of connected hydration gear aims to solve the “forgot to drink” problem that even disciplined hikers run into on long days. Smart bottles like HidrateSpark use a sensor in the base to track intake and glow or vibrate as a reminder when you’ve gone too long without a sip, syncing totals to a companion app.
For hikers who struggle to build a consistent drinking habit, or who want hard data on how their intake compares to sweat loss on training hikes, this kind of tracking can be genuinely useful for dialing in the personal sweat-rate formula from Section 2. The trade-offs are added weight, a battery to keep charged, and one more electronic component that can fail in extreme cold or after a hard drop.
For most hikers, a simple phone timer or a habit of sipping at every trail junction achieves the same behavioral result without the extra gear. Smart bottles are best viewed as a training and data tool for base-camp or day-hike use rather than core backcountry gear for multi-day routes.
22. Sustainable Hydration: Reducing Plastic Waste on the Trail
Single-use plastic bottles remain common on the trail, but a reusable system pays for itself quickly while cutting waste in fragile environments. A durable stainless steel or titanium bottle paired with a quality filter eliminates the need to buy bottled water at trailheads and resupply points entirely.
For thru-hikers who do rely on lightweight disposable bottles (like repurposed Smartwater bottles) for their minimal weight, reusing the same bottle across an entire trip—refilling and treating water in it rather than replacing it—captures most of the weight benefit without the ongoing waste of constant replacement.
Leave No Trace principles extend to water sources too: always treat water rather than assuming a clear stream is safe, and never wash dishes, sunscreen, or soap-covered skin directly in a water source, even a biodegradable soap—carry water at least 200 feet away from the source for washing to protect it for other hikers and wildlife.
23. Thru-Hiking and Long-Distance Water Caching Strategies
On long-distance trails like the PCT, AT, or CDT, some sections run 20+ miles between reliable water sources, especially in desert stretches. Long-distance hikers plan around this with a few established strategies.
Water Caching: Volunteers and trail angels sometimes maintain water caches at trailhead access points in notoriously dry sections—but relying entirely on a cache that may be empty, contaminated, or removed is a documented risk on trails like the PCT’s desert sections. Always carry a self-sufficient backup capacity and treat caches as a bonus, not a plan.
Camel Up and Carry Dry: Before a known dry stretch, hikers “camel up”—drinking a liter or more at the last reliable source before departing—then carry only what’s calculated for the distance ahead, refilling to capacity again at the next confirmed source.
Data Books and Apps: Trail-specific water reports (Guthook/FarOut app comments, trail data books) get updated by hikers in real time and are far more current than any printed guide, since seasonal sources can dry up or reappear within the same week. Cross-checking recent comments before a dry stretch is standard practice among experienced thru-hikers.
24. Common Hydration Mistakes (Even Experienced Hikers Make)
Waiting for Thirst: Thirst is a lagging indicator—by the time you feel it, you’re often already 1-2% dehydrated. Drink on a schedule, not a sensation.
Ignoring Electrolytes on Long Days: Drinking large volumes of plain water without replacing sodium on hot, sweaty, multi-hour hikes can dilute blood sodium levels and cause hyponatremia—a real risk that’s sometimes more dangerous than mild dehydration itself.
Testing New Gear on Race or Summit Day: A new bite valve, an unfamiliar filter, or a bladder you haven’t broken in can leak, clog, or fail exactly when you need it most. Test every new hydration item on a short local hike first.
Underestimating Altitude and Dry Air Losses: Respiratory water loss increases significantly at altitude and in dry climates, even when you’re not visibly sweating. Hikers moving from humid, low-elevation environments to dry mountain air consistently underestimate this hidden fluid loss.
Letting a Bladder Sit Unused Between Trips: A bladder stored damp grows mold; one stored bone dry for months can develop a stale plastic taste. Store clean and fully dry, and give any bladder that’s sat unused a rinse-and-inspect before its next trip.
Bottom Line: Most hydration failures on the trail are planning failures, not gear failures. The right bottle or bladder only pays off when paired with a consistent drinking habit and a realistic water budget for the route.
25. Altitude Hydration and Acute Mountain Sickness
Hydration and altitude sickness are closely linked, though water alone won’t prevent AMS. At elevation, you breathe faster and lose more moisture through respiration than at sea level, while the dry mountain air accelerates evaporative loss even when you’re not sweating heavily. Combined, these factors can double your baseline fluid needs above roughly 8,000 feet.
Dehydration doesn’t cause altitude sickness, but it sharpens nearly every symptom—headache, nausea, and fatigue all worsen when you’re also short on fluids, making it harder to tell where dehydration ends and AMS begins. Staying ahead of your water intake from the moment you start gaining elevation, rather than catching up after a headache sets in, is the more effective approach.
Avoid overcorrecting, too. Drinking excessive volumes of plain water at altitude without replacing electrolytes can itself cause dangerously low sodium, mimicking or worsening AMS symptoms. The same steady, electrolyte-balanced approach from Section 6 applies at elevation, just with a higher overall volume target.
Rule of Ascent: Increase your baseline hydration target by roughly 15-20% for every 3,000 feet gained above 8,000 feet, and pair it with a gradual ascent pace to give your body time to adjust.
26. Choosing the Right Reservoir Capacity for Your Pack and Trip Type
Bladder capacity should match both your pack size and your trip length, not just be maxed out by default. Carrying a 3L reservoir on a 90-minute local trail loop adds unnecessary weight, while a 1.5L bladder on an all-day summit push leaves you short.
1.5-2L Bladders: Best for hikes under 3 hours, trail running, or any trip where you’ll pass a refill point roughly every hour. Fits comfortably in small daypacks and running vests.
2-3L Bladders: The most versatile size for standard day hikes of 3-6 hours in moderate conditions. This range covers the vast majority of weekend hikers without excess weight.
3L+ Bladders: Reserved for all-day treks, hot-climate hikes, or as the primary camp-water container on backpacking trips where refill sources are infrequent. Pair a 3L bladder with a lightweight backup bottle rather than relying on the bladder alone, since a punctured reservoir with no backup leaves you with zero water capacity.
Match your pack’s sleeve dimensions before buying a new bladder—an oversized reservoir stuffed into an undersized sleeve creates pressure points against your back and can accelerate wear on the bladder’s seams.
27. Best Times of Day to Hike in Hot Climates
Timing your hike around the heat of the day is as much a hydration strategy as any piece of gear. In desert and high-summer conditions, starting at first light and finishing before the midday peak can cut your total water needs substantially compared to a midday start, simply by avoiding the hours of most intense evaporative loss.
Dawn Starts: Beginning 30-60 minutes before sunrise takes advantage of cooler air and lower UV exposure, letting you cover the most exposed sections of a route before temperatures peak in early-to-mid afternoon.
Midday Rest Blocks: On multi-day desert routes, some hikers build in a shaded midday rest block—hiking dawn to late morning, resting through peak heat, then resuming in late afternoon. This splits mileage around the hottest hours rather than pushing through them.
Night Hiking: For extreme desert conditions, some experienced hikers shift key mileage to early night hours with a headlamp, when temperatures drop and evaporative water loss slows dramatically. This requires strong route familiarity and isn’t a fit for unfamiliar or technical terrain.
28. DIY Electrolyte Mixes: A Lightweight, Budget Alternative
Commercial electrolyte products are convenient, but a simple homemade mix can replicate most of the functional benefit at a fraction of the cost, and it’s easy to portion into small bags for a multi-day trip.
A basic trailside mix combines a small amount of salt (sodium), a sweetener for palatability and quick carbohydrate energy, and a splash of citrus for flavor and a touch of potassium. Portioned into single-serving bags before a trip, this approach avoids carrying a bulky canister of commercial powder and lets you adjust saltiness to taste and sweat rate.
The main advantage of commercial mixes is consistency and a broader mineral profile (magnesium, calcium) that a simple DIY version won’t fully replicate. For short-to-moderate hikes, homemade mixes work well; for multi-day efforts with heavy, sustained sweat loss, a commercial product designed around full electrolyte replacement is the more reliable choice.
29. Hydration Considerations for Older Hikers
Thirst sensation naturally diminishes with age, meaning older hikers often don’t feel thirsty until dehydration is already underway—making a scheduled drinking habit even more important than relying on sensation. Building in water breaks at fixed intervals, rather than waiting to feel thirsty, helps close this gap.
A bottle with clear volume markings, rather than an opaque bladder, makes it easier to track actual intake against a planned target over the course of a hike. Pairing water with light, salty snacks at each break supports steady electrolyte balance without needing to calculate intake precisely.
As with any hiker managing a health condition, those on medications that affect fluid balance should follow their own physician’s guidance on hydration targets; the general strategies in this guide are meant as trail-planning information, not medical advice.
30. Hydration Myths Debunked
Myth: “You need 8 glasses of water a day, period.” This generic figure ignores activity level, climate, and body size entirely. On a hot, strenuous hike, your needs can easily double or triple that baseline; on a mild, short walk, it may overshoot what you actually lose.
Myth: “Clear urine means perfect hydration.” Truly colorless urine can actually indicate overhydration and electrolyte dilution. Pale straw yellow is the more reliable target—both very dark and completely clear are signals worth paying attention to.
Myth: “Caffeine and coffee dehydrate you on the trail.” Moderate caffeine intake has a mild diuretic effect, but research shows it doesn’t cause net fluid loss in people who consume it regularly. A trail coffee isn’t a hydration risk in normal amounts, though it shouldn’t replace your actual water intake.
Myth: “If I’m not thirsty, I’m hydrated.” As covered in Section 24, thirst is a lagging signal that shows up after mild dehydration has already begun. Scheduled drinking beats waiting for thirst, especially at altitude or in dry climates where respiratory losses are easy to miss.
Myth: “More water is always better.” Excessive plain water intake without electrolyte replacement on long, sweaty hikes can cause hyponatremia, which shares symptoms with dehydration and can be equally dangerous. Balance volume with sodium, especially on hikes over two hours.
31. Group Hiking Hydration Logistics
Hydration planning gets more complex with a group, since sweat rates, pace, and personal habits vary widely even among hikers on the same trail. A few logistics principles keep a group hydrated without one person’s oversight becoming the whole group’s risk.
Individual Responsibility, Shared Backup: Each hiker should carry and manage their own primary water supply rather than relying on a single group member to distribute it—if that person falls behind or has a leak, the whole group is affected. A shared filter or extra reservoir as group backup, rather than group primary water, is the safer structure.
Scheduled Group Stops: Build mandatory water breaks into the group’s pace plan at fixed intervals or landmarks, rather than leaving it to individual judgment. This catches hikers who are quietly under-drinking without wanting to slow the group down by asking to stop.
Know Your Group’s Weakest Link: Pace and hydration breaks should account for the least experienced or least fit hiker in the group, not the fastest. A group leader checking in on hydration status—not just physical pace—during breaks catches problems before they become emergencies.
32. Caffeine, Alcohol, and Hydration on Multi-Day Treks
On multi-day trips, camp beverages beyond plain water are common, and it’s worth understanding how they actually interact with hydration status.
Coffee and Tea: As noted in Section 30’s myth-busting, moderate caffeine doesn’t meaningfully dehydrate regular consumers. A morning trail coffee is fine as part of, not instead of, your water intake plan.
Alcohol: Unlike caffeine, alcohol is a genuine diuretic that increases fluid loss and impairs the body’s ability to regulate temperature—a real consideration at elevation or in cold camp conditions where you’re already managing hydration and warmth carefully. If alcohol is part of a multi-day trip’s camp routine, matching each drink with an equal amount of water helps offset the added fluid loss.
Recovery Context: Alcohol’s effects are compounded after a long, sweaty hiking day when you’re already in a fluid deficit heading into the evening. Prioritizing water and electrolytes before any alcohol at camp reduces the next morning’s dehydration headache and supports better sleep at altitude.
33. Hiking Hydration Gear for International Travel
Water safety standards vary enormously by country, and gear that’s optional for a U.S. day hike can become essential for hiking abroad. In regions where tap water and even some treated municipal water carry viral contamination risk beyond typical U.S. backcountry concerns, a purifier rather than a simple filter is the safer default, since purifiers are rated to remove viruses that some filters can’t.
UV-C bottles and purifier straws that specifically list virus removal in their certification are popular choices for international trekking for exactly this reason—compact, fast, and rated for a broader range of pathogens than a backcountry-focused filter.
It’s also worth packing a few chemical tablets as backup even when carrying a purifier, since airline travel, altitude changes, and unfamiliar water sources all raise the odds of an equipment issue mid-trip. A backup method that fits in a shirt pocket removes a significant point of failure on an international trek.
Before You Go: Research your specific destination’s water quality concerns—the right gear for high-altitude trekking in Nepal differs from what’s needed for a coastal trail in Western Europe. A purifier is rarely the wrong choice, but it’s not always the necessary one.
34. Choosing Bite Valves and Tube Accessories
The small accessories on a hydration bladder—the bite valve, tube, and any add-ons—have an outsized effect on how much you actually drink over a long hike, since a leaky, hard-to-use, or bad-tasting valve discourages the frequent sipping that good hydration depends on.
Bite Valve Types: Push-to-open valves require a firm bite before water flows, reducing accidental leaks in a packed bag but demanding slightly more effort per sip. Magnetic shut-off valves clip to a pack strap and seal automatically when released, virtually eliminating drips but adding a small magnetic component that can wear over time.
Tube Insulation: Beyond cold-weather freeze prevention covered in Section 8, an insulated tube cover also keeps water cooler in hot weather by shielding it from direct sun exposure along an exposed shoulder strap.
Quick-Disconnect Fittings: A quick-disconnect coupling partway down the tube lets you detach and refill the reservoir without threading the entire tube back through your pack’s routing—a small feature that saves real time and frustration on multi-day trips with frequent refills.
🛒 Shop Bite Valves & Tube Accessories35. Hot Drinks on the Trail: Morale, Warmth, and Hydration
Hot beverages serve a different role than plain water on the trail, and dismissing them as just a comfort item overlooks a real hydration and safety benefit. In cold or wet conditions, a hot drink at a rest stop warms your core temperature directly, which can meaningfully offset the early stages of hypothermia risk during a long, cold break.
Hot tea, broth, or coffee also tends to be consumed more readily than cold water in freezing temperatures, when the body’s thirst drive naturally drops even as fluid needs remain. A vacuum-insulated bottle carrying hot liquid solves two problems at once: it delivers welcome warmth and it encourages fluid intake exactly when cold-weather hikers are most likely to under-drink.
For summer hikes, the same insulated bottle works in reverse—ice-cold water stays palatable for hours, which similarly encourages more frequent drinking than lukewarm water sitting in a hot pack all afternoon. The temperature-control benefit of insulated gear, covered in Section 4, applies at both ends of the spectrum.
36. Matching Hydration Strategy to Terrain Type
Terrain affects hydration needs beyond just distance and elevation gain. Steep, technical terrain that demands two free hands for scrambling makes a hands-free bladder system far more practical than repeatedly stopping to dig out a bottle. A hydration vest or pack with a well-routed tube lets you sip mid-scramble without breaking concentration on foot placement.
Exposed ridgelines and alpine terrain above treeline offer no shade and often stronger wind, which increases both sun exposure and evaporative moisture loss even in cooler temperatures—a combination that catches hikers off guard since it doesn’t feel as hot as a desert trail despite similar fluid loss.
Forested, shaded trails at moderate elevation are the most forgiving terrain for hydration planning, since shade cover and generally cooler, more humid air reduce both sweat rate and evaporative loss compared to exposed routes at the same distance. Adjust your baseline calculation from Section 2 downward slightly for consistently shaded routes, and upward for exposed, high-wind, or high-UV terrain.
Terrain Checklist: Before a hike, note whether the route is mostly exposed or shaded, technical or smooth, and windy or still—each factor nudges your water target up or down independent of raw mileage.
37. Field Repairs: Fixing Hydration Gear Mid-Trip
Gear failures happen, and knowing basic field fixes can save a multi-day trip from a premature exit. A small repair kit specific to hydration gear weighs almost nothing and covers the most common failure points.
Bladder Punctures: A strip of waterproof tape (Tenacious Tape or similar) applied to a clean, dry surface around a small puncture or seam leak can hold for the remainder of a trip. For a torn bite valve, a spare valve carried in a repair kit is lighter and more reliable than attempting a field fix on the valve itself.
Cracked Bottles: A hairline crack in a hard-sided bottle can often be sealed temporarily with tape or a dab of quick-set epoxy carried in a repair kit, enough to get you to a resupply point without losing your primary water container.
Clogged Filters: Most squeeze and pump filters can be backflushed in the field using the syringe or backflush plunger that ships with the filter—carry it rather than leaving it behind to save a few grams, since a clogged filter with no way to clear it becomes dead weight.
A minimal hydration repair kit—tape, a spare bite valve, and your filter’s backflush tool—adds negligible weight and directly addresses the failure points most likely to compromise a multi-day trip’s water plan.
38. Hydration Planning Through Seasonal Transitions
Early-season and shoulder-season hikes bring hydration challenges that don’t fit neatly into the hot-weather or cold-weather categories covered earlier in this guide. Spring hikes often combine cold mornings with surprisingly warm, sun-exposed afternoons as snow reflects and intensifies UV exposure—meaning you can start a hike layered up and barely drinking, then find yourself sweating heavily by midday without having adjusted your intake.
Monsoon and heavy-rain seasons introduce a different trap: high humidity slows sweat evaporation, so sweat pools on the skin without cooling you effectively, while the sensation of being constantly damp from rain can mask how much fluid you’re actually losing. Humid-climate hikers often under-drink because they don’t feel the dry, thirsty sensation associated with hot, arid conditions, even though fluid loss remains high.
Fall transitions bring the reverse problem of spring: as temperatures drop, thirst drive decreases even before daily fluid needs have caught up, particularly on trails that were hot just weeks earlier. Adjusting your mental hydration baseline at each seasonal transition—rather than carrying the same fixed water plan year-round—closes the gap between how a hike feels and what your body actually needs.
Shoulder-Season Adjustment
Layer your hydration plan the same way you layer clothing: start conservative in cool morning conditions, but carry enough capacity to scale up if the afternoon runs hotter than the forecast suggested. A slightly larger reservoir than your morning conditions alone would call for is cheap insurance during unpredictable seasonal transitions.
39. Off-Season Storage: Keeping Hydration Gear Ready
How you store hydration gear between trips affects both its longevity and whether it’s actually ready to grab for a last-minute hike. Bladders and bottles that go into storage even slightly damp are the most common source of mold and mildew problems, often not discovered until the next trip is already underway.
Before long-term storage, fully disassemble bladders—separate the tube, bite valve, and any removable cap—and air dry every component completely, ideally for 24-48 hours in a well-ventilated space. Some hikers store a completely dry bladder in the freezer between trips, since the cold prevents any residual moisture from supporting mold growth, though this isn’t strictly necessary if drying was thorough.
Insulated bottles should be stored with lids off to prevent trapped moisture and odor buildup, and filters should be backflushed and fully dried before extended storage—a filter put away wet risks bacterial growth inside the cartridge itself, undermining the very safety purpose it serves. A quick pre-trip inspection of any gear that’s been stored for months, checking for cracks, off odors, or valve stiffness, catches problems before they show up on the trail.
40. Building Your Personal Hydration System: A Final Framework
With so many gear categories covered in this guide, it helps to step back and think in terms of a simple decision framework rather than trying to buy one of everything. Start with your most common trip type—if most of your hiking is 2-4 hour day hikes on established trails, a 2-3L bladder or a pair of insulated bottles, paired with basic electrolyte tablets, covers nearly everything you’ll need.
Add capability as your trips demand it: a filter or purifier once you start hiking routes without guaranteed water access, a repair kit once you’re spending multiple days between resupply points, and specialized gear like insulated tube covers or a purifier bottle once you’re hiking in genuinely extreme cold, heat, or international conditions.
Resist the urge to buy for the hardest hike you might someday do rather than the hikes you actually do most often. A lean, well-understood system you’ve tested and trust on familiar trails will serve you better than an expensive, unfamiliar setup pulled out of its packaging for the first time on a big trip.
The Core Principle: Every section of this guide points back to the same idea—know your route’s water sources, calculate your realistic needs, choose gear that matches how you actually hike, and build a consistent drinking habit around it. The gear supports the habit; it doesn’t replace it.
Hiking Hydration Gear: Your Questions Answered
Is a hydration bladder better than water bottles for hiking?
It depends. Bladders promote consistent sipping and are hands-free, great for steady hydration on technical terrain. Bottles are easier to monitor how much you’ve drunk, simpler to clean, and won’t spring a leak in your pack. Many experienced hikers use a combination: a bladder for water and a bottle for electrolytes.
How do I prevent my hydration bladder tube from freezing?
1) Insulate the tube with a cover. 2) After drinking, blow air back into the tube to clear water from the valve. 3) Store the bladder inside your pack, not in an external sleeve. 4) In extreme cold, consider switching to an insulated bottle kept inside your jacket.
How much water should I carry for a 3-hour hike?
For a moderate 3-hour hike in mild weather, plan for 1.5 to 3 liters. Start with 2 liters as a safe baseline. Always err on the side of carrying more, especially if the trail is steep, sunny, or has no water sources.
What’s the best way to clean a hydration bladder?
Rinse with warm water after each use. Periodically, fill it halfway with a mixture of warm water and baking soda or dedicated cleaning tablets. Scrub with a bottle brush, rinse thoroughly, and hang to dry completely with the opening wide open.
Do I need a water filter for day hikes?
If your route has reliable, treatable water sources and you’re comfortable with the weight, a lightweight filter (like the Sawyer Mini) provides safety and flexibility, allowing you to carry less water. On trails with no water, a filter is unnecessary.
Are insulated water bottles worth the weight for hiking?
Absolutely in hot or cold extremes. In heat, cold water is more palatable and encourages drinking. In cold, it prevents freezing and allows for warm drinks. The motivational and safety benefits far outweigh the slight extra weight for most hikers.
What are the signs of dehydration on the trail?
Early signs: Thirst, dry mouth, decreased urine output (dark yellow urine), fatigue. Advanced signs: Dizziness, headache, confusion, rapid heartbeat, cessation of sweating. If you experience advanced signs, stop, seek shade, and rehydrate immediately.
Can I use a regular plastic bottle for hiking?
Yes, a durable single-wall bottle (like a Nalgene or Smartwater bottle) is a classic, lightweight choice. The downside is it offers no temperature control—water gets hot in the sun and can freeze in winter. It’s a simple, reliable option for mild conditions.
How often should I drink while hiking?
Don’t wait for thirst. Aim for 3-4 large sips every 15-20 minutes. If using a bladder, take a sip whenever you think of it. Setting a timer can be helpful until drinking regularly becomes a habit.
What’s the difference between a water filter and a purifier?
Filters physically remove bacteria, protozoa, and sediment. Purifiers also kill viruses, which are smaller and can pass through some filters. In most U.S. backcountry, a filter is sufficient. For international travel or downstream of heavy human/animal activity, a purifier is recommended.
What’s the difference between a hydration vest and a hiking backpack for water carrying?
A hydration vest fits snugly against the torso with minimal bounce and quick-access soft flasks, ideal for trail running and fast day hikes. A hiking backpack offers more capacity and a hip belt to carry gear alongside water, better suited to longer, slower days with more cargo.
Is titanium or stainless steel better for a hiking water bottle?
Titanium is lighter and highly corrosion-resistant, favored by ultralight backpackers willing to pay a premium. Stainless steel is heavier but more affordable and equally durable, making it the better all-around choice for most day hikers who aren’t counting every gram.
How much extra water should I pack when hiking with kids or a dog?
Plan for roughly 25% more water than your standard per-person calculation. Kids and dogs dehydrate faster relative to body size and often don’t signal thirst until they’re already behind, so build in scheduled breaks rather than waiting for a request.
Should I drink water before I start hiking, or only during?
Both. Drink 500-750ml steadily in the 2-3 hours before you start, sip consistently throughout the hike rather than gulping large amounts infrequently, and continue rehydrating after you finish—your body keeps losing fluid through sweat and respiration even once you’ve stopped moving.
How heavy is the water I need to carry?
One liter of water weighs about 2.2 pounds. A 3-liter bladder alone adds close to 6.6 pounds before any other gear. Where reliable water sources exist along your route, carrying a filter and less water can meaningfully cut your base pack weight.
Is snowmelt safe to drink without treating it?
No. Snowmelt can still carry giardia and other pathogens from upstream animal activity, even though it looks pristine. Treat it the same way you would treat any other natural water source, using a filter, purifier, chemical tablets, or boiling.
Can I rely on water caches on long-distance trails like the PCT?
Treat caches as a bonus, never a guarantee. Caches maintained by trail angels can be empty, contaminated, or removed. Always carry a self-sufficient water capacity calculated for the full dry stretch, and use recent trail app comments to check current conditions before you commit.
Do smart water bottles actually help with hydration on the trail?
They can help hikers who struggle to build a consistent drinking habit, using reminders and intake tracking. The trade-offs are added weight, a battery to manage, and reduced reliability in extreme cold, so they suit day hikes and training more than multi-day backcountry trips.
Does altitude really increase how much water I need?
Yes. Faster breathing and drier mountain air increase respiratory water loss at elevation, even without heavy sweating. A reasonable adjustment is roughly 15-20% more water for every 3,000 feet gained above 8,000 feet, paired with steady electrolyte intake.
Are chemical purification tablets as effective as a filter?
Chemical tablets like chlorine dioxide kill bacteria, viruses, and most protozoa, but they need contact time—up to several hours for cryptosporidium—and won’t remove sediment the way a filter does. Many hikers carry tablets as a lightweight backup to a primary filter rather than a sole method.




 Home
Home
 Info
Info
 Compare
 Reviews
 Shop
Shop