
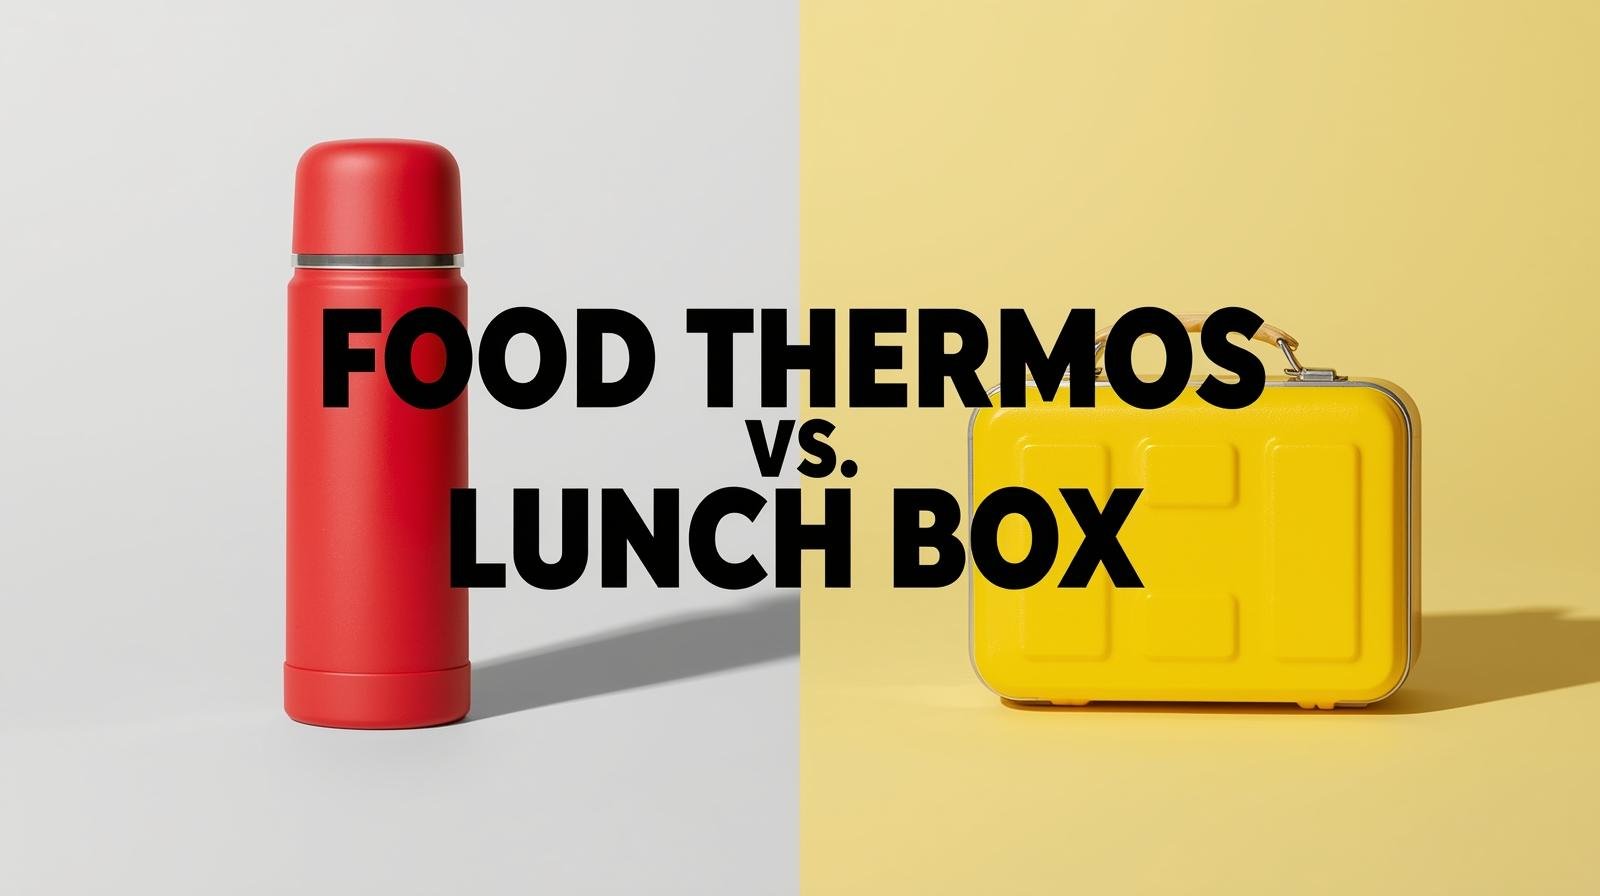
Food Thermos vs. Lunch Box: The Ultimate Showdown
It’s one of the great daily debates in the world of packed meals: should you use a food thermos or a lunch box? One promises piping hot soup on a dreary day, while the other offers a perfectly organized, multi-course meal. It’s a classic battle of Temperature vs. Variety. But which one is truly the champion for your daily needs?
As a team that has tested, packed, and relied on both for years, we can tell you the answer isn’t simple. It depends entirely on *what* you’re packing, *who* you’re packing for, and *where* you’re going. Forget the guesswork. We’re diving deep, comparing every feature head-to-head, to finally settle the score and help you choose the undisputed winner for your lifestyle.
Heads Up: Thermo Facts is reader-supported. Our recommendations are based on extensive, independent testing. When you buy through links on our site, we may earn a commission at no extra cost to you. This helps us continue our work. Learn more.
The Quick Answer: Choose a food thermos if your top priority is keeping a single-pot meal (like soup, chili, or pasta) hot or cold for many hours. Choose a lunch box if your priority is packing a varied meal with multiple components (like a sandwich, fruit, and snacks) that need to be kept separate and cool.
Deep Dive: What Exactly is a Food Thermos?
A food thermos—also known as an insulated food jar—is a marvel of engineering designed for one primary mission: to conquer temperature change. It’s a specialized container built to keep hot foods hot and cold foods cold for extended periods, typically from 5 to 15 hours.
Its secret weapon is double-wall vacuum insulation. Imagine two layers of stainless steel, one nested inside the other. In the manufacturing process, all the air is sucked out of the gap between these layers, creating a vacuum. Because there are no air molecules to transfer heat energy, the temperature inside the thermos has a very hard time escaping, and the outside temperature has a very hard time getting in. This is why you can fill a high-quality thermos with boiling soup and the outside will remain completely cool to the touch.
These are the ultimate solution for anyone wanting to enjoy a hot meal away from a kitchen. They are a staple in the world of thermos lunch kits for school and an essential for outdoor workers.
Top-Tier Food Thermos Examples:
1. Thermos Stainless King 16 oz
The undisputed classic. It offers a perfect balance of size, performance (7+ hours hot), and value. Its wide mouth and included folding spoon make it incredibly user-friendly. It’s the gold standard for a reason.
See on Amazon2. Stanley Classic Legendary Food Jar 24 oz
For those who need extreme performance. Built like a tank, this thermos boasts an incredible 15-hour heat retention and a massive capacity. It’s the top choice for long workdays and rugged outdoor adventures, easily one of the most durable thermos options on the market.
See on AmazonDeep Dive: Understanding the Modern Lunch Box
The humble lunch box has evolved far beyond the simple metal pail of yesterday. Today’s lunch box is a sophisticated system designed for its own primary mission: organization and preservation of freshness. Its main goal is to carry a multi-component meal while keeping everything separate, un-squished, and cool.
Insulation in a lunch box is typically simpler, relying on layers of foam or reflective material within a fabric shell (a soft cooler) or an air gap in a plastic/steel container (a bento box). While they provide some thermal resistance—often keeping things cool for 3-5 hours, especially with an ice pack—they are not designed to maintain temperature with the same efficiency as a vacuum-insulated thermos.
Their true strength lies in their compartments and structure. From bento-style boxes with perfectly portioned sections to large, insulated bags that can hold a feast, lunch boxes are all about meal variety. They are the foundation of what we consider the best thermos lunch boxes—the “box” part of the system.
Top-Tier Lunch Box Examples:
1. Bentgo Modern Bento Lunch Box
A master of organization. With multiple leak-proof compartments, it allows you to pack a sandwich, salad, and sides without anything mixing. It’s sleek, stylish, and perfect for office workers or students who value variety.
See on Amazon2. Carhartt Deluxe Insulated Lunch Cooler
This is a soft-sided workhorse. It features a huge main compartment for containers and drinks, plus a separate top section for snacks. Its heavy-duty fabric and superior insulation make it a top choice for keeping a large lunch cool all day.
See on AmazonThe Head-to-Head Battle: Food Thermos vs. Lunch Box
Now for the main event. We’re pitting these two contenders against each other across five crucial categories to see which one comes out on top.
| Feature | Food Thermos | Lunch Box |
|---|---|---|
| 🌡️ Temperature Control |
🏆 WINNER
Utilizes double-wall vacuum insulation to keep contents hot or cold for 5-15+ hours. This is its entire reason for being. It’s not just about keeping food safe; it’s about keeping it at a perfect, enjoyable temperature.
|
Relies on foam or air-gap insulation. With an ice pack, it can keep food cool and fresh for 3-5 hours. It cannot effectively keep food hot; it will only slow the cooling process slightly. Its job is preservation, not temperature maintenance. |
| 🍱 Meal Versatility & Organization |
Essentially a single-compartment container. It excels at one-pot meals but offers zero separation. You cannot pack a hot soup and a crisp cracker in the same thermos without creating a soggy mess. Its versatility is limited to what you can mix together. |
🏆 WINNER
This is the lunch box’s home turf. Bento-style boxes offer multiple, often leak-proof, compartments for separating a main, sides, and snacks. Cooler bags can hold multiple different containers, drinks, and whole pieces of fruit.
|
| 💪 Portability & Durability |
🏆 WINNER
Typically made from 18/8 food-grade stainless steel, food thermoses are incredibly durable and often built to last a lifetime. They are compact, self-contained, and completely leak-proof, making them easy to throw in any bag without worry. See our list of stainless steel thermos lunch containers for more. |
Durability varies wildly. Hard plastic bento boxes can crack if dropped, and fabric lunch bags can tear over time. While high-end models (like Carhartt) are very tough, the category as a whole is less durable than a steel thermos. They are also bulkier and less inherently “packable.” |
| 🧼 Ease of Cleaning |
Generally easy. A wide-mouth jar is simple to clean with a bottle brush. The challenge is the lid, which often has a silicone gasket that must be removed and cleaned periodically to prevent mold. It’s a single, focused cleaning task. |
🏆 WINNER
Cleaning can be more involved, but it’s often simpler. Many bento boxes are top-rack dishwasher safe. A soft-sided lunch bag just needs a simple wipe-down. There are fewer hidden gaskets or complex threads to worry about. Overall, the day-to-day cleaning is faster. |
| 💰 Cost & Value |
🏆 WINNER
A high-quality food thermos can range from $20-$40. While the initial cost is higher than a cheap lunch box, its incredible durability means it’s often a “buy it for life” purchase. The long-term value is exceptional, as it’s unlikely to need replacing. |
Costs range from $10 for a simple bag to $50+ for a high-end bento system. Cheaper lunch boxes may only last a single school year, requiring frequent replacement. While you can find inexpensive options, the long-term value proposition is often lower than a quality thermos. |
Which One Is Right for YOU? A Scenario-Based Guide
The head-to-head battle shows they both have clear strengths. So, let’s apply this to real life. Find your persona below to get our definitive recommendation.
For Parents Packing School Lunches:
Verdict: You Need Both. (Start with a Lunch Box)
A child’s lunch needs variety. Start with a high-quality, multi-compartment lunch box (like a Bentgo) as your foundation for sandwiches, fruits, and veggies. Then, on days you want to send leftovers or soup, add a kid-sized (10oz) food thermos to their kit. The thermos goes *inside* or alongside their main lunch box.
For the Office Worker:
Verdict: A Food Thermos for Leftovers, a Bento Box for Salads.
This depends on your eating style. If you love bringing last night’s dinner for a hot lunch, a 16oz food thermos is your best friend. If you’re a meal-prepper who prefers salads, grain bowls, or bento-style lunches, a sleek bento box is the clear winner. Many office workers own one of each and choose based on the day’s menu.
For the Construction Worker / Outdoor Professional:
Verdict: Food Thermos, No Contest.
When you work outside, access to a microwave is a luxury you don’t have. A large-capacity, ultra-durable food thermos (like the 24oz Stanley) is not just a container; it’s an essential piece of gear. It guarantees a hot, satisfying meal that can power you through a physically demanding day, no matter the weather.
For the Salad Lover:
Verdict: A Lunch Box, Specifically a Bento.
A thermos is the enemy of a crisp salad. A bento box is its savior. It allows you to keep your greens separate from your toppings and your dressing, preventing a soggy mess. You can assemble it right before you eat for a perfect, fresh salad every time.
The Hybrid Solution: Can You Have It All?
What if you want the best of both worlds every day? The market has responded with innovative hybrid solutions.
The most famous example is the OmieBox, a bento box that features a removable, integrated vacuum-insulated thermos jar. This allows you to pack hot soup right next to cool fruit in the same container. It’s an ingenious solution, particularly for kids’ lunches, that directly addresses this entire debate.
The other hybrid solution is simply building your own kit: a high-quality insulated lunch bag (like the Carhartt) that’s large enough to hold a food thermos *and* other containers. This gives you maximum flexibility to customize your lunch each day.
Frequently Asked Questions
Q: Can you put a hot food thermos inside an insulated lunch box?
A: Absolutely! This is a great strategy. The thermos maintains the food’s heat, while the insulated lunch box provides a second layer of insulation and keeps the other items (like a drink or yogurt) cool. It’s the basis of a perfect lunch kit.
Q: How long will a standard lunch box keep food cold?
A: Without an ice pack, a few hours at most. With a good quality ice pack, a well-insulated lunch box can keep contents cool and at a food-safe temperature (below 40°F) for about 3 to 5 hours, sometimes longer depending on the ambient temperature.
Q: Can I use a drink thermos for food?
A: It’s not ideal. Drink thermoses typically have a narrow mouth, which makes them very difficult to fill, eat from, and clean. A proper food thermos has a wide mouth specifically for this purpose. Stick to food thermoses for food.
Q: Does preheating a thermos really make a difference?
A: Yes, a massive difference. Filling your thermos with boiling water for 5-10 minutes before adding your hot food preheats the steel interior. This prevents the cold steel from immediately sucking heat out of your food, adding hours to your heat retention time. It is the single most important step.
The Final Verdict: It’s Not a Fight, It’s a Partnership
After breaking it all down, it’s clear that the “food thermos vs. lunch box” debate isn’t about one being definitively better than the other. They are two different tools for two different jobs. A thermos is a specialist for temperature, while a lunch box is a specialist for variety.
The real winner is the person who understands the strengths of both and builds a lunch system that serves their needs. For most people, this means owning at least one of each.
- For unbeatable temperature control for single-pot meals, the Food Thermos reigns supreme.
- For unmatched variety and organization for multi-component meals, the Lunch Box is the champion.
By choosing the right tool for the right meal, you can say goodbye to disappointing lunches forever and guarantee a fresh, delicious, and perfectly-temperatured meal, no matter where your day takes you.
The Third Contender Nobody Talks About: Electric & Self-Heating Lunch Boxes
Every “food thermos vs. lunch box” article stops at two options, but that framing is quietly out of date. Over the past few years, a genuinely new category has muscled its way onto desks, into cars, and onto job sites: the electric lunch box. If you’ve searched for a “heated lunch box for work,” a “car lunch box that plugs into the outlet,” or an “office lunch warmer,” you’ve bumped into this category without necessarily realizing it deserves its own place in this comparison. We’re addressing it here because leaving it out would mean ignoring one of the fastest-growing segments of the packed-meal world, and because for a specific type of user, it solves a problem that neither a thermos nor a traditional lunch box can touch.
What Is an Electric Lunch Box, Exactly?
An electric lunch box is a portable, plug-in food warmer shaped like a small lunch container. Instead of relying on stored heat from vacuum insulation, it uses an internal heating element, usually powered through a USB port, a car’s 12V outlet, or a standard wall socket, to actively warm food on demand. Some versions include a small water reservoir underneath the food compartment, functioning like a mini steamer, while others heat directly through a metal plate at the base of the container.
The core distinction is active versus passive heating. A food thermos is a passive system: it captures heat that already exists in your food and slows the rate at which that heat escapes. An electric lunch box is an active system: it can take food that has gone completely cold, even food straight from the refrigerator, and generate new heat to bring it back up to eating temperature. That is a meaningfully different capability, and it opens up use cases that a thermos simply cannot serve.
Where Electric Lunch Boxes Win
Consider the commuter who packs dinner leftovers in the morning but doesn’t eat until well into the afternoon. By the time lunch rolls around, even a well-preheated thermos may have dropped from “steaming hot” to merely “warm,” particularly with foods like rice or dense casseroles that lose heat differently than a liquid soup. An electric lunch box sidesteps this problem entirely. You plug it in when you arrive at your desk, walk away for twenty to forty minutes depending on the model and how cold the food started, and come back to a fully reheated meal, no microwave required.
This makes the category especially popular in three groups: office workers without convenient microwave access (open floor plans with a single shared microwave and a long line at noon are a real and common complaint), long-haul truck drivers and delivery drivers who can plug a 12V model into their vehicle, and site-based workers such as electricians or inspectors who have access to a generator or truck outlet but no kitchen. It also shows up frequently as a practical gift for a parent who wants their child’s school lunch to arrive properly hot rather than lukewarm, provided the school allows an outlet-based device at the table, which is worth checking before you buy.
Where Electric Lunch Boxes Fall Short
The trade-offs are real and worth stating plainly. First, they require a power source; if you cannot plug one in, it functions only as a mediocre, unheated storage container, which makes it far less flexible than a thermos or bento box for outdoor or off-grid use. Second, heating times vary widely by wattage and by what you’ve packed. Dense, cold foods can take thirty to sixty minutes to reach a satisfying temperature, and the food will not heat as evenly as a microwave, so stirring partway through is often necessary. Third, most models are not designed to keep food cold beforehand, meaning you still need a separate ice pack or cooler bag to transport the food safely before it’s time to plug in and warm it, which adds a second piece of gear to the system rather than replacing anything. Fourth, cleaning is more involved than either alternative, since the heating base and any electrical components cannot go in the dishwasher and must be wiped by hand, while only the food container itself may be fully washable.
There’s also a durability and cost consideration. Electric lunch boxes contain wiring, heating elements, and sometimes small pumps or fans, all of which are more failure-prone over years of daily use than a slab of vacuum-sealed stainless steel or a simple insulated bag. Expect a shorter realistic lifespan than a quality thermos, and expect to pay a premium, typically in the $30 to $70 range, for a name-brand model with safety certifications, spill-resistant sealing, and a auto-shutoff feature that prevents overheating if you forget it’s plugged in.
How the Three Options Stack Up on the Question That Matters Most
If we boil the entire “food thermos vs. lunch box vs. electric lunch box” debate down to a single question, it’s this: do you need to preserve existing heat, or do you need to generate new heat? A thermos preserves. An electric lunch box generates. A traditional lunch box does neither; it simply protects and organizes. Once you frame it that way, the right choice for your morning routine becomes much clearer. If you’re eating within a few hours of packing and the food is already hot, a thermos remains the simpler, more reliable, zero-maintenance option. If you’re packing a meal the night before, storing it cold overnight, and want it fully hot by lunchtime regardless of how long it sits, an electric lunch box is solving a problem the other two categories cannot solve at all.
A Quick Buyer’s Checklist for Electric Lunch Boxes
- Confirm the wattage; higher wattage generally means faster heating but also faster battery or outlet draw if you’re using it in a car.
- Check whether it includes both a car adapter and a wall adapter, since some budget models only include one.
- Look for an auto-shutoff or timer function; this is a genuine safety feature, not a marketing gimmick, and it protects both the food and the device from overheating.
- Check the container material; stainless steel interiors are easier to clean and more durable than the plastic liners found in some budget models.
- Read the compartment layout carefully; some electric lunch boxes have a single well for one-pot meals, while multi-tier versions can separate a main dish from rice or vegetables, closer in spirit to a bento box than a thermos.
The Material Science Behind Your Container: Stainless Steel, Plastic, Glass, and Silicone
Whichever category you land on, the material your container is made from has an enormous effect on performance, safety, and how long the product actually lasts. This is one of the most overlooked factors in the thermos-versus-lunch-box debate, and it deserves its own close look.
Stainless Steel
Nearly every quality food thermos is built from 18/8 food-grade stainless steel, a designation referring to the alloy’s chromium and nickel content, which resists corrosion, doesn’t react with acidic foods like tomato-based sauces, and doesn’t retain odors the way plastic can over time. Stainless steel is also what makes vacuum insulation possible in the first place, since the metal can be formed into two nested walls with a sealed vacuum gap between them. The downside is weight; a large stainless thermos is noticeably heavier than an equivalent plastic bento box, and steel containers cannot go in the microwave, which matters if your office does have a microwave and you’d rather reheat than rely purely on retained heat.
BPA-Free Plastic
Most modern bento-style lunch boxes are made from BPA-free plastics such as Tritan or polypropylene. These materials are lightweight, often dishwasher and microwave safe, and can be molded into intricate compartment shapes that stainless steel simply cannot achieve at a reasonable cost. The trade-off is that plastic is more prone to staining from foods like turmeric-based curries or tomato sauce, can absorb odors over repeated use, and, if it’s a lower-quality plastic, may degrade with heat exposure over hundreds of dishwasher cycles. When shopping, look explicitly for “BPA-free” and ideally “phthalate-free” labeling, and check whether the manufacturer states the plastic is microwave-safe specifically, since not all BPA-free plastics are rated for direct microwave heating.
Glass
Glass containers, often with a plastic or silicone lid and sometimes housed in a protective sleeve, are popular among people specifically avoiding all forms of plastic contact with their food. Glass doesn’t stain, doesn’t absorb odors, and is completely microwave safe once the lid is removed. Its obvious weakness is fragility; a dropped glass container on a tile floor is unlikely to survive, which is why most glass lunch containers ship inside a padded silicone or neoprene sleeve for extra protection during transport.
Silicone
Silicone shows up less often as the primary container material and more often as gaskets, seals, and collapsible components. Silicone is prized for being flexible, heat resistant, and easy to clean, and it’s the material responsible for keeping a thermos lid leak-proof and a bento box’s compartments watertight. If you’ve ever had a thermos develop a musty smell, the silicone gasket around the lid is almost always the culprit, and it’s worth removing and cleaning that gasket separately on a weekly basis rather than assuming a quick rinse of the whole lid is sufficient.
Which Material Should You Choose?
If your top priority is longevity and you don’t mind extra weight, stainless steel is the clear winner, and it’s the reason a quality thermos can genuinely last a decade or more of daily use. If your priority is a lightweight, dishwasher-friendly system for varied meals, a BPA-free plastic bento box is the practical choice for most households. If you are specifically trying to minimize any contact between food and plastic, glass is worth the added care it requires. And regardless of which primary material you choose, pay attention to the silicone seals, since they’re the component most likely to need replacing or cleaning first.
The Complete Size and Capacity Guide, by User
One of the most common mistakes people make when buying either a thermos or a lunch box is choosing a size based on the container that looks nicest rather than the container that actually matches how much a person eats. Here’s a practical breakdown by user type.
Toddlers (Ages 2-4)
A 7 to 10 ounce food thermos is typically plenty for a toddler’s portion of soup, mac and cheese, or oatmeal, and a smaller size also means the food cools to a safe eating temperature faster, which matters for young children who might otherwise burn their mouths on food that stays dangerously hot in an oversized, highly efficient thermos. For a bento-style lunch box, look for models with very small, toddler-proportioned compartments and easy-open latches that small hands can manage independently, since a lunch box a toddler cannot open by themselves defeats part of the purpose of sending them to daycare or preschool with an independent meal.
Elementary School Kids (Ages 5-10)
A 10 to 12 ounce thermos is the sweet spot for most elementary-age appetites, large enough for a genuinely filling portion of soup or pasta without being so large that it goes half-eaten and gets sent home. For lunch boxes, this is the age group best served by a true bento-style design with 4 to 5 compartments, since kids in this range are picky enough to want their foods separated but old enough to manage a slightly more complex container with multiple latches or a zippered exterior bag.
Teenagers and Growing Athletes
Appetites increase substantially in the teenage years, particularly for kids involved in sports, and a 16 to 20 ounce thermos or a large-capacity insulated lunch bag with room for two or three separate containers becomes appropriate. This age group is also the one most likely to benefit from an electric lunch box if they have access to an outlet during a study hall or between practice and class, since it can accommodate a larger, denser meal that needs genuine reheating rather than gentle heat retention.
Adults with Standard Office Jobs
Most adults are well served by a 16 ounce thermos for soups and leftovers, or a bento box in the 800 to 1,200 milliliter range for salads, grain bowls, and multi-component meals. This is also the range where the choice often comes down less to capacity and more to lifestyle, since many office workers end up owning one of each and rotating based on what they’re eating that particular day.
Outdoor Workers and All-Day Physical Labor
This group has the highest caloric needs and the least access to reheating options, which is why the largest food thermoses on the market, in the 24 to 40 ounce range, are specifically marketed toward construction, utility, and field-service workers. For this group, a large insulated lunch bag or hard-sided cooler that can hold a big thermos plus additional sandwiches, fruit, and drinks for a full 10 to 12 hour shift is often the more practical overall system than any single container alone.
The Food Safety Science You Should Actually Know
This is the section that most lunch-packing guides skip entirely, and it’s arguably the most important one, because getting it wrong doesn’t just mean a mediocre lunch, it means a genuine risk of foodborne illness.
The Danger Zone
Food safety guidelines define the “danger zone” as the temperature range between 40°F and 140°F, the range in which bacteria multiply fastest. Food is considered safe to eat as long as it stays below 40°F (properly refrigerated or kept cold with sufficient ice packs) or above 140°F (kept properly hot, which is exactly what a well-preheated thermos is designed to do). The danger arises when food lingers in the middle of that range for an extended period, which is precisely what happens if a poorly insulated lunch box lets a cold lunch slowly warm toward room temperature over several hours, or if a thermos wasn’t preheated and the food inside never got hot enough to begin with.
Why Preheating and Precooling Actually Matter
This is not a minor tip; it is the single biggest factor in whether your thermos performs as advertised. A thermos’s job is to slow the rate of heat transfer, not to generate heat itself. If you fill a room-temperature thermos with hot soup, a significant amount of that heat gets absorbed by the cold interior walls of the container itself in the first few minutes, and you lose meaningful retention time before the food has even left your kitchen. Filling the thermos with boiling water and letting it sit for five to ten minutes before dumping the water out and adding your actual hot food preheats the steel, meaning your food’s heat goes toward staying hot rather than warming up cold metal. The same principle applies in reverse for cold foods and ice water.
The Two-Hour Rule
Regardless of container type, a widely cited food safety guideline holds that perishable food should not sit in the danger zone for more than two hours total, and that window shrinks to one hour if the ambient temperature is above 90°F, such as a hot car in summer. This is one of the strongest arguments for pairing an electric lunch box with a separate cold-storage step, since the food needs to remain safely cold until you’re ready to actively reheat it, rather than sitting at room temperature in the electric unit for hours before you plug it in.
Special Considerations for Dairy, Eggs, and Meat
Foods with high protein or dairy content, including anything with eggs, poultry, dairy-based sauces, or seafood, are more sensitive to temperature abuse than starchy or plant-based foods, and they deserve extra caution when you’re deciding between a passively insulated lunch box and a food thermos. If your lunch includes a chicken salad sandwich or an egg-based dish and you don’t have reliable refrigeration access, a hard-sided cooler bag with a properly frozen ice pack, not just a gel pack that’s been in the fridge, is a safer bet than relying on insulation alone.
Packing Techniques That Actually Improve Performance
Beyond preheating and precooling, a handful of practical packing habits make a measurable difference in how well either a thermos or a lunch box performs over the course of a day.
Fill It Fully
A thermos performs best when it’s filled close to the top, since a large air gap above the food gives heat more room to escape and creates convection currents inside the container that accelerate heat loss. If you’re packing a smaller portion, consider sizing down to a smaller thermos rather than under-filling a larger one.
Separate Wet and Dry Components at the Source
One of the most common lunch-box complaints is soggy food, and it almost always comes down to packing wet and dry components together rather than using the compartments as intended. Dressings, sauces, and anything liquid should go in the smallest available compartment or a separate small leak-proof container, added to the main dish only at eating time. This single habit solves the majority of “my lunch box makes everything soggy” complaints we hear about.
Use Frozen Fruit and Yogurt Tubes as Secondary Ice Packs
A genuinely useful trick for lunch boxes without a dedicated ice pack slot is to freeze a portion of fruit, a juice box, or a yogurt tube overnight and pack it alongside the rest of the meal. It thaws by lunchtime and does double duty as both food and a temperature buffer for everything else in the bag.
Layer Thermos Contents Strategically
For thermos meals with multiple ingredients, such as a pasta dish with a protein and vegetables, layering matters. Placing the ingredient most prone to overcooking, like delicate vegetables, closer to the top and the heartier ingredients like a protein or starch at the bottom means the top layer is exposed to slightly less residual cooking heat over the following hours, reducing the mushy-vegetable problem that many thermos users complain about.
Vent, Don’t Seal, Certain Foods
Foods that release steam, like fresh-cooked rice or dense casseroles, can create excess condensation inside a sealed thermos, leading to a slightly waterlogged texture by lunchtime. Letting these foods cool for just a couple of minutes before sealing the lid, rather than packing them straight off the stove, reduces this effect considerably.
Care, Cleaning, and Maintenance: The Complete Guide
Both categories need routine maintenance, but the specific failure points differ enough that they deserve a separate, detailed look.
Thermos Cleaning Best Practices
The body of most stainless steel thermoses can be cleaned with warm soapy water and a bottle brush designed for narrow containers, but the lid deserves special attention. Most thermos lids disassemble into two or three pieces, including one or more silicone gaskets, and these should be removed and washed separately at least once a week, since food particles and moisture trapped behind a gasket are the most common cause of a musty thermos smell. For deeper cleaning or stubborn odors, a solution of one part white vinegar to two parts warm water left to soak inside the thermos for thirty minutes, followed by a thorough rinse, handles most odor issues without resorting to harsh chemicals that could leave a residual taste.
Lunch Box and Bento Cleaning Best Practices
Hard-sided plastic bento boxes are frequently dishwasher safe on the top rack, but always check the manufacturer’s guidance first, since the heat of a dishwasher’s drying cycle can warp lower-quality plastics over time even if the wash cycle itself is fine. Soft-sided insulated lunch bags generally cannot be machine washed at all and should be wiped down with a damp cloth and mild soap, with any removable liners washed separately if the bag includes one. For either type, air-drying fully before closing and storing the bag or box prevents the trapped-moisture mold growth that is the single most common complaint among long-term lunch bag owners.
Electric Lunch Box Cleaning Best Practices
Because the heating base contains electrical components, it should never be submerged in water. Most models feature a removable food tray that can be hand-washed or, on some models, placed in the dishwasher, while the heating base itself should only be wiped with a barely damp cloth after unplugging and allowing it to cool completely.
A Simple Weekly Maintenance Routine
- Disassemble and deep-clean any lids, gaskets, or seals separately from the main body.
- Inspect for any lingering odors and address them with a vinegar soak if needed.
- Check silicone seals for cracking or hardening, which are early signs they need replacing.
- Fully air-dry every component before reassembling and storing, ideally with the lid left slightly open overnight.
The Environmental and Sustainability Comparison
For an increasing number of buyers, the environmental footprint of a lunch system is as important as its practical performance, and this is worth addressing directly rather than treating it as an afterthought.
A high-quality stainless steel thermos has a genuinely long usable lifespan, often ten years or more with basic care, and stainless steel itself is highly recyclable at the end of its life. This makes a well-chosen thermos one of the lower-impact options over time, even though its manufacturing footprint per unit is higher than a simple plastic container, because that footprint is spread across a decade or more of daily use rather than a single school year.
Plastic bento boxes and lunch bags vary considerably. A high-quality BPA-free plastic container built to last several years is a reasonable middle ground, but cheaper, single-season plastic lunch boxes that crack, warp, or get discarded within a year contribute meaningfully more waste over the same period of use. If sustainability is a priority, buying fewer, better-made lunch boxes rather than replacing cheap ones annually is the more impactful decision than any single material choice.
Electric lunch boxes introduce an additional environmental consideration in the form of embedded electronics, which are harder to recycle responsibly than a simple steel or plastic container and represent a growing category of small-appliance electronic waste. If you choose this category, look specifically for manufacturers that offer a take-back or recycling program for the device at the end of its life.
Budget Breakdown: What You Actually Get at Each Price Tier
Understanding what changes as you move up in price helps you avoid both overspending on features you won’t use and underspending on a container that won’t survive daily use.
Budget Tier ($10-$20)
At this tier, food thermoses typically offer 4 to 6 hours of heat retention rather than the 8-plus hours of premium models, and the stainless steel used is often a thinner gauge, which can dent more easily. Budget bento boxes at this price point are usually made from thinner plastic, with fewer compartments and simpler, less reliably leak-proof latches. These are reasonable choices for occasional use or for younger children who are hard on their belongings, but they typically need replacing within a year or two of regular use.
Mid Tier ($20-$40)
This is where most of the well-known, highly reviewed products on the market sit, offering the 7 to 12 hour heat retention windows that make a thermos genuinely useful for a full workday, along with thicker, more durable plastic and genuinely leak-proof seals on bento-style lunch boxes. For most households, this tier offers the best balance of price and long-term reliability.
Premium Tier ($40-$70+)
At the top end, you’re paying for extended heat retention approaching 15 hours or more, premium finishes, lifetime warranties from established brands, and, in the case of lunch boxes, genuinely rugged, multi-year-rated fabric and hardware designed for professional daily use. Electric lunch boxes at this tier add features like faster heating elements, quieter operation, and more robust auto-shutoff safety systems.
Common Problems and How to Actually Fix Them
“My thermos isn’t keeping food hot anymore.”
This is almost always one of three issues: you’re skipping the preheat step, the silicone gasket has degraded and is no longer sealing properly, or the vacuum seal itself has failed, often from a dent that compromised the wall structure. If preheating doesn’t solve it and the gasket looks intact, a dent-related vacuum failure means the thermos needs to be replaced, since there’s no practical way to restore a broken vacuum seal at home.
“My lunch box smells bad no matter how much I wash it.”
Check the seals and gaskets first, since these trap moisture and food particles more than the main body does. A vinegar soak, combined with fully air-drying with the lid open rather than sealing it closed while even slightly damp, resolves the vast majority of persistent odor issues.
“My bento box compartments leak into each other.”
Confirm you’re closing all latches evenly rather than just the ones nearest to you, since an unevenly closed lid is the most common cause of leaking in an otherwise leak-proof-rated container. If all latches are properly closed and it’s still leaking, the silicone seal along the lid’s edge may have a gap or tear and typically needs replacing rather than the entire unit.
“My electric lunch box isn’t heating evenly.”
Most models heat from a single plate at the base, so food that’s packed too deep or in an unevenly distributed layer will heat unevenly by design. Spreading food in a thinner, more even layer and stirring halfway through the heating cycle addresses this in most cases.
Seasonal and Activity-Based Buying Considerations
The right choice can shift depending on the time of year and the specific activity you’re packing for, which is worth thinking through before committing to a single system.
Back-to-School Season
This is when demand and prices for both categories spike, and it’s also when many schools issue specific guidance about what students are and are not allowed to bring, including outlet-based devices like electric lunch boxes, which are frequently not permitted in classroom settings. Check your school’s specific policy before investing in this category for a student.
Summer and Outdoor Activities
Hot weather increases the urgency of reliable cold retention, and a hard-sided cooler-style lunch box with a properly frozen ice pack outperforms a soft-sided bag in direct sun or a hot car. This is also the season where a thermos’s cold-retention capabilities, often overlooked in favor of its hot-food reputation, become genuinely useful for cold soups, smoothies, and infused water.
Air Travel
A common question is whether a filled food thermos can go through airport security. TSA rules generally treat any liquid or gel-like food, including soup, as subject to the same 3.4-ounce liquid restriction as any other liquid in carry-on luggage, unless it’s frozen solid, so a thermos is best emptied before security and filled afterward, or checked in luggage if a full, hot meal genuinely needs to travel with you.
Gym and Post-Workout Meals
For anyone packing a post-workout meal to eat immediately after a gym session, a lunch box’s food-safe cold storage matters more than a thermos’s heat retention, since the priority is usually a protein-forward meal or shake kept safely cold until the workout ends, rather than a hot meal.
The Final Buying Checklist
Before you check out, run through this list to make sure you’re choosing the right container, and the right size, for how you actually eat.
- Do you primarily eat one-pot meals like soup, chili, or pasta, or multi-component meals with several separate items? This single question determines whether you should start with a thermos or a bento-style lunch box.
- How many hours pass between when you pack your lunch and when you eat it? Longer gaps favor a thermos for hot food or, for very long gaps with cold-start food, an electric lunch box.
- Do you have reliable access to an outlet during your meal? If not, rule out electric lunch boxes entirely, since they offer little benefit without power.
- What’s your realistic tolerance for hand-washing versus dishwasher convenience? This should influence your material choice as much as your category choice.
- Are you buying for a child, and if so, can they operate the latches, spoon, or lid independently? A container a child cannot use without help defeats much of its practical purpose.
- What’s your actual budget tier, and are you buying for occasional use or genuinely daily use for years? This should guide you toward the budget, mid, or premium tier discussed above rather than defaulting to the cheapest or most expensive option available.
More Questions, Answered
Q: Is it safe to put a hot thermos of soup directly into a backpack next to electronics or books?
A: Yes, provided the thermos is a genuinely leak-proof, sealed design, since the outer wall of a quality vacuum-insulated thermos stays close to room temperature even when the interior is near boiling. Double-check the lid seal is fully engaged before placing it upright in a bag.
Q: How do I know if my thermos has lost its vacuum seal?
A: The clearest sign is a sudden, noticeable drop in heat retention time compared to when it was new, especially if the thermos has been dropped or dented at some point. A quick test is to fill it with boiling water, seal it, and check the temperature after four hours; a significant, unexpected drop suggests the vacuum has failed.
Q: Can I put an electric lunch box through airport security or in checked luggage?
A: Most electric lunch boxes are allowed in both carry-on and checked luggage, but any liquid food inside is still subject to standard liquid restrictions in carry-on bags, so it’s best to pack it empty and add food after arrival.
Q: Do bento boxes actually keep food from getting soggy, or is that marketing?
A: Properly designed compartments do genuinely reduce sogginess by physically separating wet and dry ingredients, but the effect depends heavily on how you pack it. Sauces and dressings should always go in the smallest compartment or a separate small container, added only at eating time, regardless of how good the compartment seals are.
Q: Is stainless steel or plastic better for someone with metal sensitivities?
A: Food-grade 18/8 stainless steel is considered hypoallergenic for the vast majority of people and is a common recommendation for those sensitive to nickel found in lower-grade metals, since the finishing process used on food-grade steel significantly reduces surface nickel exposure. Anyone with a diagnosed metal allergy should still consult their own guidance, but stainless steel is broadly considered one of the safer material choices available.
Q: How often should I actually replace a lunch box or thermos?
A: A quality stainless steel thermos can reasonably last eight to ten years or more with basic care, while budget plastic bento boxes and soft-sided lunch bags typically show visible wear, staining, or seal degradation within one to three years of regular use, which is a reasonable point to consider replacement.
Q: Can I microwave food directly inside a bento box?
A: Only if the specific model is explicitly labeled microwave-safe, and even then, always remove any silicone seals or non-microwave-safe lids first. Never microwave a stainless steel thermos or any metal-lidded container under any circumstances.
Q: What’s the actual difference between a “food jar” and a “food thermos”?
A: These terms are used interchangeably by most manufacturers and shoppers. Technically, “Thermos” was originally a specific brand name that became genericized over time, similar to how “Kleenex” is often used to describe any facial tissue, so “food jar” and “food thermos” both typically refer to the same category of wide-mouth, vacuum-insulated food container.
The Brand Landscape: How to Read Marketing Claims Critically
Walk through the lunch-gear aisle of any store and you’ll see heat-retention numbers, capacity claims, and “leak-proof” badges plastered across nearly every box. It’s worth understanding how these numbers are actually generated so you can compare products meaningfully rather than taking every marketing claim at face value.
Heat-retention hours advertised on a thermos are typically measured under controlled laboratory conditions: the container is filled with liquid at a specific starting temperature, sealed, and left completely undisturbed at a stable ambient room temperature until the contents drop to a defined threshold, often around 140°F for “hot” claims. Real-world use rarely matches these conditions exactly. Opening the lid partway through the day to check on your food, starting with food that isn’t quite as hot as the lab’s test liquid, or using the thermos in a colder environment like an air-conditioned office or a cold car in winter will all reduce the real-world retention time below the number printed on the box. Treat advertised hours as a best-case ceiling rather than a guarantee, and if a product claims 12 hours of retention, expect meaningfully less in typical daily use, especially if you open it even once before your actual mealtime.
“Leak-proof” is another term worth scrutinizing. Manufacturers use this word inconsistently, and it can mean anything from “will not drip when held upright and closed properly” to a genuinely tested claim that holds up when the container is inverted, shaken, or dropped. Reviews from other buyers, particularly ones that specifically mention transporting the container in a bag alongside other items, tend to be more reliable indicators of real leak resistance than the packaging claim alone.
Capacity is usually the most trustworthy number on the packaging, since it’s a straightforward physical measurement, but it’s still worth checking whether the stated capacity refers to the container filled completely to the brim or filled to a practical “fill line” that leaves room for sealing, since the two can differ by 10 to 15 percent and affect how much food you’re actually able to pack.
A Practical Gifting Guide
Lunch gear is a surprisingly common gift category, whether for a new employee starting their first office job, a student heading off to college, or a family member who’s recently taken up a more active outdoor lifestyle. Matching the gift to the actual person, rather than to what looks impressive on a shelf, makes a meaningful difference in whether it actually gets used.
For a new office worker, a mid-tier 16-ounce food thermos paired with a compact insulated lunch bag covers the two most common office lunch scenarios, hot leftovers and a packed salad or sandwich, without overcommitting to a single style before you know their habits. For a college student moving into a dorm with limited kitchen access, an electric lunch box is a genuinely thoughtful and practical gift, since dorm life often means a stretch of hours between a dining hall meal and the next opportunity to eat something hot, and a plug-in warmer solves a problem a thermos alone cannot. For an outdoor enthusiast or someone starting a physically demanding job, a large-capacity, rugged food thermos in the 24-ounce-plus range, ideally from a brand known for durability, is both practical and likely to be used daily for years. For a parent of young children, a well-reviewed, easy-to-clean bento box with large, simple compartments and a leak-proof design solves the daily headache of packing a varied lunch that survives a backpack and a bus ride without spilling.
Whatever you choose, resist the temptation to buy the largest or most feature-packed option available. A container that’s oversized for the recipient’s actual appetite or overly complicated to clean is far more likely to sit unused in a cabinet than one that’s modestly sized and genuinely easy to live with day after day.
Bringing It All Together
The original question of food thermos versus lunch box was never really a fair fight, because the two products are built to solve different problems, and the growing presence of electric lunch boxes only reinforces that point further. A thermos preserves temperature. A traditional lunch box organizes and protects a varied meal. An electric lunch box actively generates heat when neither of the other two approaches can. None of these tools is objectively superior; each is simply better matched to a specific set of habits, schedules, and food preferences.
The most reliable path to a genuinely satisfying packed lunch isn’t picking a single winner from this comparison, but rather being honest with yourself about how you actually eat, how much time passes before your meal, what access you have to power or refrigeration throughout the day, and how much maintenance you’re realistically willing to keep up with. Once those answers are clear, the right container, or the right combination of containers, becomes an easy and obvious choice rather than a guessing game.




 Home
Home
 Info
Info
 Compare
 Reviews
 Shop
Shop