
What Does a Thermostat Do in a Car? (The Engine’s Gatekeeper Explained)
The modern internal combustion engine is a marvel of engineering, but it has a very specific “Goldilocks” zone. Run it too cold, and efficiency plummets. Run it too hot, and it destroys itself. The tiny, inexpensive component responsible for maintaining this delicate balance is the thermostat. Yet, despite its importance, it is often misunderstood.
In this comprehensive guide, we will strip away the complexity and explain exactly how this valve works, why the physics behind it matters, and how to choose the right one for your vehicle. We’ll also cover where to find it, what it costs to fix, how to replace one yourself from start to finish, and how to tell a bad thermostat apart from other cooling-system troublemakers like the water pump, radiator cap, or cooling fan.
⚡ The Quick Answer (AEO)
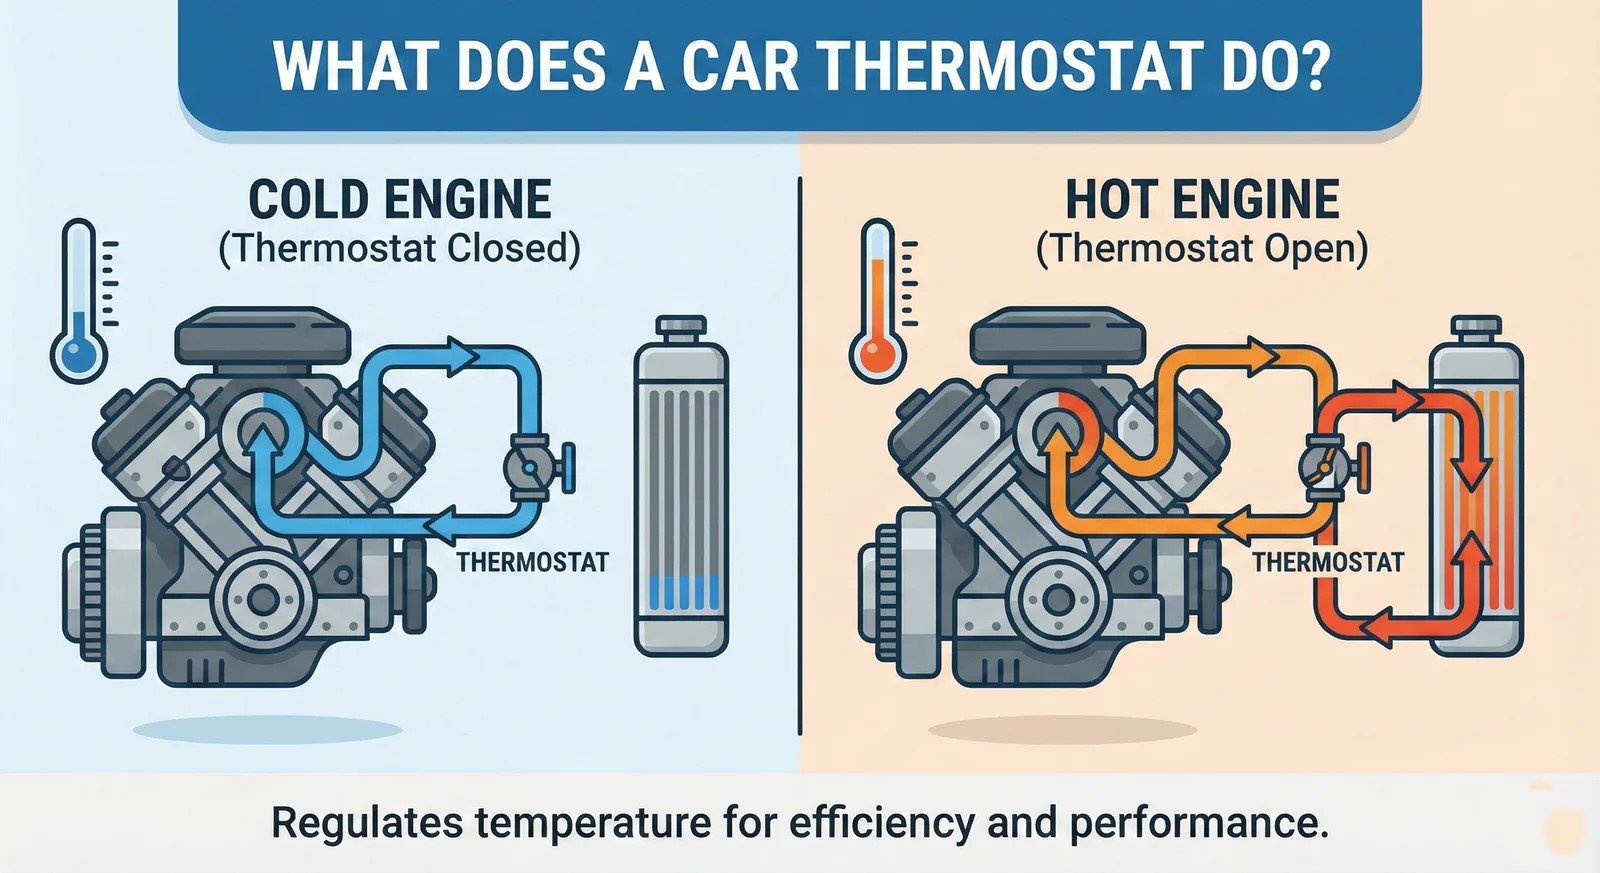
A car thermostat is a temperature-sensitive valve located between the engine and the radiator. Its primary job is to regulate the flow of coolant.
- When Cold: It stays closed, keeping coolant inside the engine block to help it warm up quickly.
- When Hot: It opens, allowing hot coolant to flow to the radiator to be cooled down.
This ensures the engine stays at its optimal operating temperature, usually between 195°F and 220°F.
The “Gatekeeper” Analogy: How It Works
Think of the thermostat as a bouncer at a club. The engine block is the VIP section, and the radiator is the general admission area.
When you first start your car in the morning, the engine is cold. To run efficiently, the oil needs to thin out and the metal components need to expand slightly. If the “bouncer” (thermostat) let the coolant leave the engine immediately to go to the radiator, the engine would never get warm. It would be constantly cooled by the radiator before it ever generated heat.
So, the thermostat shuts the gate. It forces the coolant to circulate only inside the engine block. As the combustion heats up the metal, the coolant gets hot. Once it reaches a specific temperature rating (e.g., 180°F or 195°F), the thermostat says, “Okay, you’re too hot now,” and opens the gate. The hot coolant rushes to the radiator to cool off, and cool coolant rushes in to replace it.
Watch the video above for a visual breakdown of how the cooling system loop functions.
The Physics: Inside the “Wax Pellet”
How does the thermostat know when to open? It isn’t electronic (in most older cars); it’s purely mechanical physics. Inside the thermostat is a small cylinder filled with a special wax.
When this wax heats up, it melts and expands significantly. This expansion pushes a rod which physically forces the valve open against a spring. As the coolant cools down, the wax contracts and solidifies, and the spring pushes the valve closed again. This cycle happens constantly while you drive to keep the temperature steady.
The wax used inside most automotive thermostats is a specially formulated paraffin blend, sometimes mixed with copper powder to help it conduct heat more evenly. Paraffin was chosen decades ago because it undergoes a dramatic, predictable volume change as it transitions from solid to liquid — expanding by roughly 15% to 20% in volume across a narrow temperature band. Engineers can “tune” the exact opening temperature by blending different chain-length paraffins together, which is why you can buy thermostats rated at 160°F, 180°F, 190°F, 195°F, or 203°F for the same vehicle platform. The rod that the wax pushes against is typically a small stainless steel or brass pin sealed inside a rubber sleeve, and it’s this pin-and-sleeve arrangement that ultimately unseats the poppet valve and lets coolant pass into the radiator circuit.
It’s worth appreciating just how elegant this design is. A wax-pellet thermostat requires no electrical power, no sensors, and no computer input to function — it is a purely self-regulating mechanical feedback loop that has barely changed in principle since it was first adopted widely in the mid-20th century. That said, the last decade has seen a shift toward electronically controlled thermostats on many newer platforms, which we’ll cover in detail later in this guide, because they change some of the diagnostic and replacement advice.
Where Is the Thermostat Located in a Car?
One of the most common questions after “what does a thermostat do” is simply “where is mine?” The honest answer is: it depends on the engine, but there are a few reliable rules of thumb that will get you close on almost any vehicle.
On the vast majority of front-wheel-drive four-cylinder and V6 engines, the thermostat lives inside a housing where the upper radiator hose bolts to the engine. Follow the large rubber hose that runs from the top of the radiator back toward the engine — where that hose terminates in a metal or plastic housing bolted to the cylinder head or intake manifold, that’s almost always the thermostat housing. On many V6 and V8 engines, particularly those with the intake manifold sitting in the “valley” between the cylinder heads, the housing is tucked near the front of the intake, sometimes partially hidden behind accessory brackets, the alternator, or the serpentine belt.
A smaller number of engines — some Hondas, older Toyotas, and various Chryslers among them — locate the thermostat housing lower down, near where the water pump lives, or integrated directly into the water pump’s outlet. Modern platforms increasingly use a plastic module that combines the thermostat, housing, and sometimes even coolant temperature sensors into one sealed unit, which is faster to service but usually can’t be repaired piece by piece — the whole module gets replaced together.
If you’re not confident identifying it visually, the fastest way to confirm the location on your specific make and model is to search “[your year, make, model] thermostat housing location” or check a repair manual for your car, since hose routing varies enough between manufacturers that a single universal diagram won’t always match your engine bay.
Why Temperature Ratings Matter (160°F vs 180°F vs 195°F)
Not all thermostats open at the same temperature. The rating stamped on the device (e.g., 195°F) is the temperature at which it starts to open.
| Rating | Best Application | Pros/Cons |
|---|---|---|
| 160°F | Racing / High Performance | Keeps engine denser for power, but increases emissions and sludge buildup. Read 160 vs 180 comparison. |
| 180°F | Older V8s / Towing | A middle ground. Good for engines prone to detonation under load. |
| 195°F | Modern Daily Drivers | Standard for fuel efficiency and emissions. Read 180 vs 195 comparison. |
Electronic (Map-Controlled) Thermostats vs. Traditional Wax-Pellet Units
Since roughly the early 2000s, a growing number of manufacturers — BMW, Mercedes-Benz, GM, and several others — have moved toward what’s often called a “map-controlled” or “electronically controlled” thermostat. Instead of relying solely on the temperature of the coolant flowing past the wax pellet, these units include an electric heating element wrapped around the wax pellet itself. The engine control module (ECM) can send current to that heating element to artificially warm the wax and force the valve open sooner than the coolant temperature alone would dictate.
Why would an automaker want to override the physics? Because it lets the computer optimize opening timing for the driving situation rather than a fixed temperature. Under light cruising, the ECM can let the engine run a bit hotter than usual to maximize fuel efficiency and reduce friction. Under hard acceleration or heavy load, it can intentionally open the thermostat earlier, dropping coolant temperature preemptively, to build a safety margin against detonation and knock before things get critical. This is one reason some German and Korean vehicles show water temperature gauges that seem to move around more than an older, simpler American car — the movement is intentional, not a sign of a problem.
| Feature | Wax-Pellet (Mechanical) | Electronic (Map-Controlled) |
|---|---|---|
| Control input | Coolant temperature only | Coolant temperature + ECM commands based on load, RPM, and driving mode |
| Typical cost to replace | Lower — often $15 to $60 for the part | Higher — commonly $80 to $250+ for the part due to the added electrical components |
| Failure diagnosis | Usually confirmed with a simple temperature-gauge and hose-temperature check | May require scan tool data (commanded vs. actual thermostat position, or fuel trims) to confirm |
| Common failure mode | Sticking open or closed due to mineral deposits or a broken spring | Heating element failure, wiring/connector corrosion, or the mechanical wax pellet failing just like a standard unit |
If your vehicle uses an electronic thermostat and you suspect a fault, a scan tool that can display live “commanded thermostat” or coolant temperature data is far more useful than a simple code reader, since a generic OBD-II code for “thermostat rationality” doesn’t tell you whether the fault is electrical or mechanical.
How Much Does a Thermostat Replacement Cost?
Cost is one of the most-searched questions about this repair, and the honest answer is that it varies quite a bit depending on how you approach it and what you drive.
The part itself is usually inexpensive. A standard mechanical thermostat for a common four-cylinder or V6 engine typically runs somewhere between $8 and $40 at a parts store. Add a new gasket or O-ring, which is cheap insurance and should always be replaced alongside the thermostat, and you’re still well under $50 in parts for most vehicles. Electronic, map-controlled thermostats or integrated housing modules cost considerably more, sometimes climbing into the $100 to $250+ range because you’re paying for the housing, sensor, and wiring harness connector as a single assembly rather than just a valve.
Labor is where the bigger swings happen. On an easy-access engine — many older domestic V8s and simple four-cylinders — a shop might complete the job in under an hour. On transverse-mounted V6 engines crammed sideways into a tight engine bay, or on vehicles where the thermostat housing sits underneath the intake manifold or requires removing other components to reach, labor can stretch to two or three hours. Because most shops charge a flat labor rate rather than time-and-materials, that difference in access time is usually the single biggest factor separating a $150 repair from a $500+ repair.
| Scenario | Approximate Total Cost | Notes |
|---|---|---|
| DIY, easy-access engine | $15 – $50 | Just parts: thermostat, gasket, and a jug of coolant if a full drain-and-fill is done |
| Independent shop, standard mechanical unit | $150 – $400 | Includes labor, coolant, and disposal fees |
| Dealership or luxury vehicle | $300 – $700+ | Higher labor rates and, often, electronic thermostat housings |
| Complicated access (thermostat under intake, timing cover, etc.) | $400 – $800+ | Extra disassembly time drives labor cost up significantly |
A few things can push the price higher than expected regardless of which category you fall into: a seized or corroded housing bolt that snaps during removal, a housing that’s cracked and needs full replacement rather than just the thermostat, or a shop bundling in a full coolant flush and radiator inspection because they found other issues while they had things apart. None of that is necessarily a bad thing — catching a failing hose or a cracked housing before it strands you on the highway is worth the extra line item — but it does explain why two shops can quote very different numbers for what sounds like the same job.
How Long Do Thermostats Last?
There’s no hard mileage interval printed in most owner’s manuals for thermostat replacement the way there is for, say, timing belts or spark plugs. In practice, most factory thermostats last somewhere between 60,000 and 100,000 miles, or roughly seven to ten years, under normal conditions. Several factors shorten or extend that lifespan considerably.
Coolant condition matters more than almost anything else. Coolant that hasn’t been changed on schedule becomes acidic over time as its corrosion inhibitors deplete, and that acidity attacks the spring and valve seat inside the thermostat just as it attacks the radiator and water pump. Mineral scale from old coolant or from someone having topped off with plain tap water at some point can also build up on the valve and cause it to stick. Vehicles that see a lot of stop-and-go city driving or frequent short trips cycle the thermostat open and closed far more often than highway-heavy driving does, which accelerates mechanical wear on the spring and pellet seal over time.
Because the part is inexpensive relative to the labor needed to reach it on many vehicles, a lot of experienced technicians recommend replacing the thermostat proactively any time the cooling system is already open for another repair — a water pump replacement, a timing belt or timing chain job, or a radiator swap — even if the old thermostat still tests fine. Paying for the labor twice on two closely spaced repairs rarely makes financial sense when the thermostat itself costs so little.
What Happens When It Fails?
Like any mechanical part, thermostats fail. They can fail in two ways:
- Stuck Open: The engine never warms up. You’ll have no cabin heat in winter and poor fuel economy.
- Stuck Closed: The engine overheats rapidly because coolant is trapped. This is catastrophic.
If you suspect failure, check our detailed diagnostic guide: Signs of a bad thermostat in a car.
Recognizing the Symptoms at a Glance
Because a stuck-open and a stuck-closed thermostat produce almost opposite symptoms, it helps to lay them out side by side so you can quickly narrow down which failure mode you’re dealing with before you start troubleshooting.
Temperature gauge runs hot, fast
Classic sign of a thermostat stuck closed. The needle can climb into the danger zone within just a few minutes of driving, especially at low speed where there’s little airflow across the radiator to compensate.
Temperature gauge never gets warm
A thermostat stuck open lets coolant bypass the engine’s warm-up cycle entirely. The needle stays low, the heater blows lukewarm or cool air, and fuel economy quietly suffers because the engine control unit stays in a richer, less efficient warm-up fuel map longer than it should.
Upper radiator hose stays cold
With the engine warmed up and idling, a cold upper radiator hose while the lower hose is warm usually means the thermostat hasn’t opened yet, or is stuck shut entirely.
Coolant boiling over or steam from under the hood
Trapped, overheated coolant with nowhere to go can push past the radiator cap’s pressure rating, leading to visible steam, a sweet burning smell, and, in severe cases, a cracked head gasket.
Fluctuating or erratic temperature gauge
A thermostat that’s partially stuck — opening and closing unpredictably rather than smoothly — can cause the gauge to bounce around rather than settle at a steady operating temperature.
Check engine light with a coolant temperature code
Codes like P0128 (“coolant thermostat below regulating temperature”) specifically point to a thermostat that’s stuck open or opening too early, since the engine is taking too long to reach closed-loop operating temperature.
Thermostat vs. Other Cooling System Problems: How to Tell Them Apart
A lot of overheating complaints get blamed on the thermostat when the real culprit is somewhere else in the cooling system. Since a full diagnosis can save you from paying for the wrong part twice, it’s worth knowing how to distinguish a bad thermostat from these other common suspects.
| Component | Failure Symptom | Key Difference from a Bad Thermostat |
|---|---|---|
| Water pump | Overheating, coolant leak near the front of the engine, whining or grinding noise from the pump pulley/bearing | Usually accompanied by visible coolant leaking or dripping under the front of the car, and often a noise the thermostat alone would never cause |
| Radiator cap | Overheating under load, coolant overflow reservoir overfilling, weak coolant flow | A worn cap fails to hold system pressure, dropping the coolant’s boiling point; swapping in a new cap is a five-minute, low-cost test to rule this out |
| Cooling fan / fan clutch | Overheating specifically at idle or in slow traffic, but temperature normalizes at highway speed | A thermostat problem tends to affect temperature regardless of speed, while a fan problem is worse when there’s little airflow through the grille |
| Head gasket | Overheating, white exhaust smoke, bubbling in the coolant reservoir, milky oil | Head gasket failure typically comes with combustion gas contaminating the coolant, which a simple block/combustion leak test can confirm and a thermostat swap won’t fix |
| Low coolant / air pocket | Gauge spikes intermittently, heater blows cold air off and on | Often resolved simply by properly bleeding air from the system after a top-off, no parts replacement required |
Step-by-Step: How to Replace a Car Thermostat Yourself
Replacing a thermostat is genuinely one of the more approachable DIY jobs under the hood, provided you have basic hand tools and are comfortable working around a cooling system that may still have some residual pressure and hot fluid. Always let the engine cool completely before starting — never open a cooling system on a hot engine.
-
Confirm the correct part and rating
Cross-reference your vehicle’s year, make, model, and engine size to buy a thermostat with the correct temperature rating and physical dimensions. Grab a new gasket or O-ring at the same time — reusing the old one is one of the most common causes of a post-repair coolant leak.
-
Let the engine cool completely
Wait until the engine is fully cool to the touch, ideally several hours after driving, before opening any part of the cooling system. Opening a hot system can cause pressurized, near-boiling coolant to spray out.
-
Drain the coolant
Place a drain pan under the radiator’s drain petcock or remove the lower radiator hose to let coolant flow into a catch container. Draining even a portion of the system reduces the mess and spillage when you open the thermostat housing.
-
Locate and remove the thermostat housing
Follow the upper radiator hose back to where it meets the engine, then remove the hose clamp and pull the hose free. Unbolt the housing, taking a photo first if the orientation isn’t obvious, since some housings can be reinstalled backward.
-
Remove the old thermostat and clean the mating surfaces
Note the orientation of the old thermostat before removing it — most units have a small air-bleed valve or jiggle pin that needs to face up. Scrape away all traces of the old gasket material from both the housing and the engine’s mating surface using a plastic scraper to avoid gouging soft aluminum surfaces.
-
Install the new thermostat and gasket
Seat the new thermostat in the same orientation as the old one, with the air-bleed valve or jiggle pin at the top (usually the 12 o’clock position) so trapped air can escape during refilling. Apply a thin bead of gasket sealant if the manufacturer’s instructions call for it, then fit the new gasket.
-
Reinstall the housing and torque the bolts evenly
Tighten the housing bolts in a criss-cross pattern to even, moderate torque rather than cranking down one bolt fully before touching the others — this helps the gasket seal evenly and reduces the risk of warping a plastic housing.
-
Reconnect the hose and refill the cooling system
Reattach the upper radiator hose and tighten the clamp, then refill the system with the correct coolant type and concentration for your vehicle — never mix coolant types, and never use straight water as a permanent fix.
-
Bleed air from the system
Many vehicles have a dedicated bleeder screw near the highest point of the cooling system; open it slowly while refilling until a steady stream of coolant (no air bubbles) comes out, then close it. On systems without a bleeder screw, running the engine with the radiator cap off and the heater on full blast, while periodically squeezing the upper hose, helps push trapped air out.
-
Start the engine and watch for leaks and proper warm-up
Run the engine with the cap on (or in a coolant recovery bottle-fed system, per manufacturer instructions) until it reaches operating temperature and the upper radiator hose gets hot, confirming the new thermostat has opened. Check every fitting you touched for leaks, and recheck the coolant level once the engine has fully cooled again, topping off as needed.
Essential Tools for the Job
Replacing a thermostat is one of the easiest DIY jobs on a car. Here is what you need.
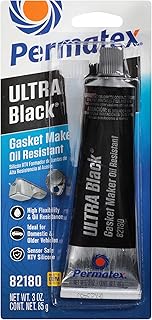
Permatex Gasket Maker
Don’t Leak. Even if your new thermostat comes with a paper gasket, a thin bead of this silicone ensures a watertight seal against the housing.
Check Price on Amazon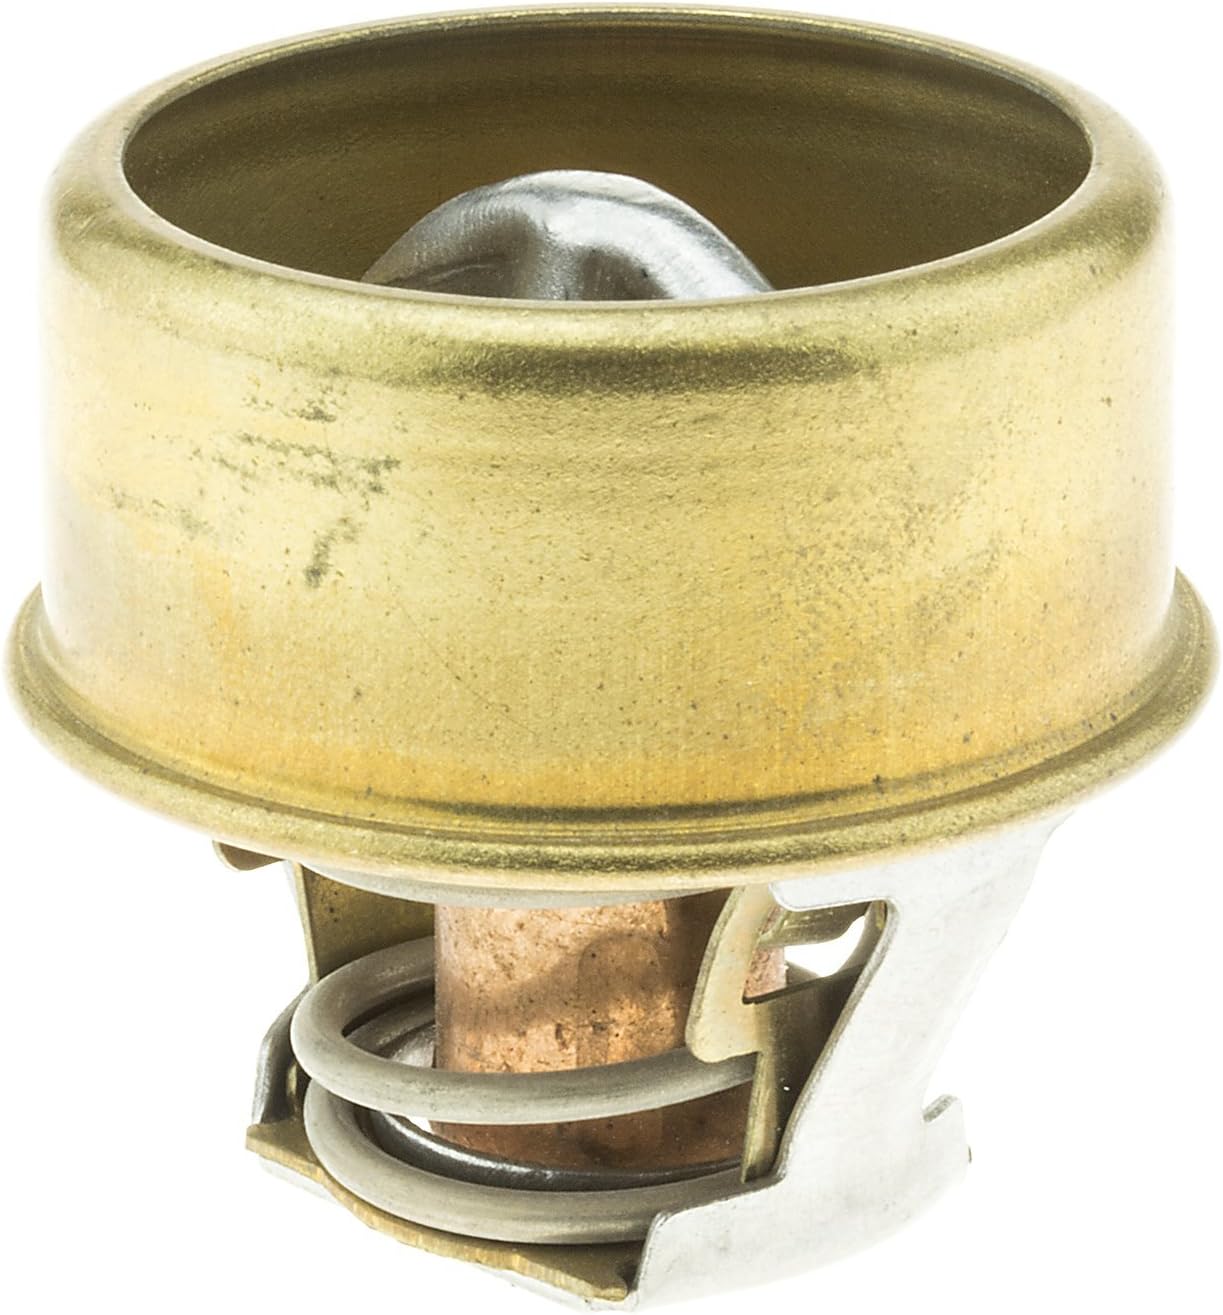
MotoRad Fail-Safe Thermostat
The Safety Upgrade. Unlike standard units, this is designed to lock in the OPEN position if it fails, saving your engine from overheating.
Check Price on Amazon
Coolant Burping Funnel
Prevent Air Pockets. After changing the thermostat, air gets trapped in the system. This “Spill-Free” funnel makes bleeding the air easy.
Check Price on AmazonBeyond the three items above, a few other tools make the job noticeably smoother. A basic socket set with extensions helps reach housing bolts tucked behind brackets or hoses, since a wrench alone often can’t get the right angle. A large drain pan rated for automotive fluids keeps coolant off your driveway and garage floor — remember that used coolant is toxic to pets and wildlife and should never be poured down a storm drain. A digital infrared thermometer is a genuinely useful diagnostic aid both before and after the repair: pointing it at the upper radiator hose lets you watch, in real time, exactly when the new thermostat opens, which is the single best confirmation that the repair worked as intended.
Preventive Maintenance: Making Your Next Thermostat Last
A handful of habits meaningfully extend thermostat life and reduce the odds of a surprise failure. Sticking to the manufacturer’s recommended coolant change interval is the single biggest factor, since fresh coolant’s corrosion inhibitors protect the thermostat’s spring and seat from the acidic byproducts that accumulate as coolant ages. Using the coolant type specified for your vehicle — rather than whatever is cheapest or happens to be on the shelf — also matters, since mixing incompatible coolant chemistries (for example, an older green ethylene-glycol formula with a newer orange or pink extended-life formula) can create gel-like deposits that clog small passages and interfere with thermostat operation.
It’s also worth periodically inspecting the coolant reservoir and radiator for signs of rust-colored or oily contamination, since a compromised head gasket or a failing radiator can introduce debris into the coolant that accelerates thermostat wear well before the part would otherwise fail. Finally, if you ever have to top off coolant in an emergency with plain water, treat that as a temporary fix only — get the system properly flushed and refilled with the correct coolant-to-water ratio as soon as reasonably possible, since running diluted coolant for an extended period reduces both freeze protection and corrosion protection.
Thermostat Housing Replacement vs. Thermostat-Only Replacement
A question that trips up a lot of first-time DIYers is whether they need to replace just the thermostat itself, or the entire housing it sits in. The answer depends heavily on your specific engine design, and getting it wrong is one of the more common reasons a “quick” thermostat job turns into a return trip to the parts store.
On older, simpler designs, the housing is a separate metal or plastic piece that bolts to the engine, and the thermostat is a discrete component that drops into a recessed pocket inside that housing, sealed by a gasket or O-ring. In this arrangement, you almost never need to replace the housing itself unless it’s physically cracked, warped, or has a stripped bolt hole — the thermostat and gasket alone are the wear items, and they’re what you’ll find sold separately at any parts store.
On a growing number of modern platforms, however, manufacturers have moved to what’s sometimes called an “integrated thermostat housing” or “thermostat assembly.” In this design, the thermostat itself is permanently fused, pressed, or molded into a plastic housing along with the coolant temperature sensor and sometimes a bleed valve, and the whole unit is sold and replaced as a single sealed cartridge. You cannot buy just the internal wax-pellet element separately for these designs — when the thermostat fails, you’re replacing the entire housing assembly, sensor included, even though only the thermostat portion actually broke.
This distinction matters for cost planning. A thermostat-only job might run you $10 to $30 in parts. An integrated housing assembly for the same failure on a different engine platform might run $60 to $200 in parts alone, simply because of how the manufacturer chose to package the components. Before you order a part, it’s worth a quick search of your specific engine to confirm which category it falls into, since ordering a standalone thermostat for a vehicle that actually requires the full integrated assembly is a common and frustrating mistake.
Coolant Types and Why They Matter to Your Thermostat
The coolant circulating past your thermostat isn’t just plain water — it’s a carefully formulated mixture designed to prevent freezing, resist boiling, lubricate the water pump, and most importantly for this discussion, inhibit corrosion throughout the cooling system. Manufacturers generally specify one of a few broad coolant chemistries, and using the wrong one, or mixing types, can shorten thermostat life considerably.
Inorganic Additive Technology (IAT) coolants are the traditional green formulas long associated with older domestic vehicles. They use silicate and phosphate inhibitors that protect metal surfaces effectively but deplete relatively quickly, which is why IAT coolant traditionally needed replacement every two years or 24,000 to 30,000 miles.
Organic Acid Technology (OAT) coolants, often orange, red, or dark green in color, use a different corrosion-inhibitor chemistry that lasts significantly longer — commonly five years or 100,000-plus miles — but is not chemically compatible with IAT coolant. Mixing the two can cause the inhibitors to react and form a gel-like precipitate that clogs small passages, including the ones inside and around a thermostat.
Hybrid Organic Acid Technology (HOAT) coolants, frequently yellow or pink and common on many Asian and European vehicles, blend elements of both approaches. As with OAT coolant, cross-contaminating HOAT with an incompatible chemistry defeats the corrosion protection both formulas are designed to provide.
The practical takeaway: always check your owner’s manual or the cap on your coolant reservoir for the specified coolant type before topping off or doing a full flush, and when in doubt, a “universal” or “all-makes” coolant blend formulated to be compatible across chemistries is a safer choice than guessing. A thermostat sitting in degraded, contaminated, or incompatible coolant will fail sooner than one bathed in properly maintained fluid, regardless of how well the part itself was manufactured.
Common Mistakes When Replacing a Thermostat
Even a job as simple as a thermostat swap has a handful of well-known pitfalls that account for the majority of comeback repairs and warranty claims on the part. Knowing them ahead of time can save you a second trip under the hood.
Installing it backward or upside down
Most thermostats have a specific orientation, often marked by a small jiggle valve or bleed hole that must face upward. Installing it flipped can trap air, prevent proper sealing, or in some designs prevent the valve from opening at all.
Reusing the old gasket
Gaskets compress permanently once torqued down and rarely reseal properly the second time. A new gasket costs only a dollar or two and is far cheaper than redoing the job after a leak develops.
Over-tightening housing bolts
Especially on plastic housings, which are increasingly common, overtightening can crack the housing outright or warp it just enough to create a slow, hard-to-diagnose seep.
Skipping the air bleed step
Trapped air pockets can mimic an overheating condition or a faulty new thermostat, leading some DIYers to needlessly replace a perfectly good part a second time.
Not checking coolant compatibility
Topping off with whatever coolant is on hand, without checking that it matches the existing chemistry in the system, can undermine the very corrosion protection you’re trying to preserve.
Buying the wrong temperature rating
Grabbing a generic thermostat without confirming the exact rating specified for your engine can lead to poor fuel economy, a check engine light, or unnecessary engine wear even though the part “fits.”
How the Thermostat Interacts With Other Engine Systems
It’s easy to think of the thermostat as an isolated cooling-system part, but its behavior ripples outward into several other systems that depend on the engine reaching, and holding, a stable operating temperature.
Emissions and fuel trims: The engine control module relies heavily on coolant temperature to decide when to exit its fuel-enriched cold-start mode and enter normal “closed loop” operation, where oxygen sensor feedback fine-tunes the air-fuel ratio for efficiency and lower emissions. A thermostat stuck open artificially delays this transition every single time you drive, which is why a cold-running engine reliably shows up as worse gas mileage on a fuel economy dashboard, not just a subjectively “chillier” cabin.
Turbocharged engines: On turbocharged platforms, precise thermal management becomes even more important, since the turbocharger itself generates substantial additional heat that the cooling system has to handle on top of combustion heat. Many turbo engines use electronically controlled thermostats specifically so the ECM can open the valve earlier under boost to protect against the elevated knock risk that comes with hotter intake charge temperatures.
Automatic transmission cooling: On many vehicles, the transmission fluid is cooled via a heat exchanger built into the radiator’s end tank, meaning the coolant that flows past your thermostat also indirectly regulates transmission temperature. A cooling system that never reaches proper operating temperature because of a stuck-open thermostat can, in some designs, leave the transmission running cooler than ideal too, which paradoxically can increase internal transmission wear from thicker, less-flowing fluid during cold operation.
Cabin climate control: Beyond simple heater performance, some vehicles use engine coolant temperature as an input for climate control logic, including how aggressively the HVAC system blends air or engages auxiliary electric heating elements on hybrid and electric-assist platforms. A malfunctioning thermostat can therefore show up as oddly inconsistent cabin temperature behavior that seems, at first glance, unrelated to the cooling system at all.
Frequently Asked Questions
Q: Can I run my car without a thermostat?
A: Technically yes, but you shouldn’t. Without a thermostat, the coolant flows too fast to absorb heat effectively from the engine, or it over-cools the engine preventing oil from working properly. It causes excessive wear.
Q: How often should I change it?
A: There is no set mileage, but it is “cheap insurance.” We recommend changing it whenever you flush your coolant or replace your water pump (roughly every 5 years or 100,000 miles).
Q: Does the thermostat control the cabin heater?
A: Indirectly, yes. If the thermostat is stuck open, the coolant never gets hot enough to warm up the heater core, leaving you shivering in the driver’s seat.
Q: How much does it cost to replace a car thermostat?
A: Parts alone typically run $8 to $40 for a standard mechanical unit, or $100 to $250+ for an electronic, map-controlled unit. With labor included, most drivers pay somewhere between $150 and $400 at an independent shop, though tight-access engines and dealership labor rates can push that toward $700 or more.
Q: Where is the thermostat located on my engine?
A: Most commonly, it’s housed where the upper radiator hose connects to the engine. Some vehicles place it lower, near the water pump, or integrate it into a combined housing module — check a repair guide for your specific make and model if you can’t spot it by following the hose.
Q: Can I replace a thermostat myself without a mechanic?
A: Yes, for most vehicles this is a beginner-friendly DIY job requiring basic hand tools, a drain pan, and about an hour of time, provided you let the engine cool fully first and properly bleed air from the system afterward.
Q: What is an electronic or map-controlled thermostat?
A: It’s a thermostat with a built-in electric heating element that the engine computer can activate to open the valve earlier than coolant temperature alone would trigger, allowing more precise control over engine temperature for efficiency and performance under different driving conditions.
Q: What does the P0128 code mean?
A: P0128 indicates the engine coolant temperature stayed below the thermostat’s expected regulating temperature for too long after startup, which almost always points to a thermostat stuck open or opening prematurely.
Q: Will a stuck-closed thermostat damage my engine?
A: Yes, potentially severely. Trapped coolant can’t dissipate heat, causing rapid overheating that can warp a cylinder head, blow a head gasket, or crack an engine block if the vehicle isn’t shut off quickly.
Q: Can a bad thermostat cause poor fuel economy?
A: Yes. A thermostat stuck open keeps the engine running cooler than designed, which keeps the engine control unit in a fuel-enriched warm-up mode longer and prevents the engine from reaching its most efficient operating temperature.
Q: How do I know if it’s the thermostat or the water pump?
A: A failing water pump typically causes a visible coolant leak, a whining or grinding noise from the front of the engine, or play in the pump’s pulley, none of which a thermostat failure alone produces. A stuck thermostat, by contrast, usually shows up purely as an abnormal temperature gauge reading with no leak or noise.
Q: Is it safe to drive with a bad thermostat?
A: If it’s stuck closed and the engine is overheating, no — continuing to drive risks serious engine damage and you should stop as soon as it’s safe to do so. If it’s stuck open and the engine simply runs cold, it’s not an immediate safety issue, but it should still be addressed promptly to protect fuel economy and engine wear.
Thermostat Failure by Vehicle Type: What to Expect
While the underlying wax-pellet or electronic mechanism is broadly similar across the industry, the practical experience of a thermostat failure — and what it costs to fix — varies noticeably by vehicle category.
Compact and midsize sedans tend to have the most accessible thermostat housings of any vehicle category, typically reachable without removing other major components, which keeps labor costs on the lower end of the spectrum. These platforms overwhelmingly use straightforward mechanical thermostats, making diagnosis and replacement relatively predictable.
Pickup trucks and body-on-frame SUVs, especially those with larger V8 engines, often have more physical room in the engine bay, which can make the job easier despite the bigger engine, though some V8 designs place the housing low and toward the front, behind cooling fan shrouds or accessory brackets that add a few extra steps.
Transverse-mounted front-wheel-drive V6 engines, common in many midsize and larger sedans and crossovers, are frequently cited by technicians as some of the most labor-intensive thermostat jobs, simply because the engine is turned sideways in a tight bay, and the thermostat housing can end up facing the firewall rather than a more accessible direction.
European luxury vehicles are more likely to use electronically controlled, map-based thermostats integrated into a housing that also carries the coolant temperature sensor, meaning a failure often calls for the full assembly rather than a low-cost standalone part, and diagnosis sometimes benefits from manufacturer-specific scan tool data rather than a generic code reader alone.
Hybrid and electric-assist vehicles add another layer of complexity, since many use a second, separate cooling loop for the battery pack or power electronics in addition to the traditional engine cooling loop, and some hybrid engines use a dedicated electric water pump and electronically controlled thermostat specifically to allow the gasoline engine to shut off and restart efficiently without long warm-up penalties. Owners of these vehicles should generally lean toward a dealership or hybrid-specialist shop unless they’re very confident distinguishing between the two cooling circuits.
When to DIY and When to Call a Professional
Not every thermostat job is equally beginner-friendly, and knowing when to hand the work to a professional can save you time, money, and a potential comeback repair.
Good DIY candidate
The housing is clearly visible and accessible without removing other major components, the vehicle uses a standard mechanical thermostat, and you have basic hand tools plus a drain pan on hand.
Good DIY candidate
You’re comfortable safely draining and disposing of used coolant, and you’re willing to take the extra time needed to properly bleed air from the system after refilling.
Consider a professional
The thermostat housing sits underneath the intake manifold, behind the timing cover, or requires removing other major components just to gain access, since misjudging torque or gasket surfaces in these tight spaces can create expensive secondary problems.
Consider a professional
Your vehicle uses an electronically controlled thermostat and you don’t have access to manufacturer-specific scan tool data to confirm the diagnosis before buying an expensive integrated housing assembly.
Consider a professional
You’ve already attempted the repair once and are still seeing overheating, poor heater performance, or warning lights, since a second failure often points to a related issue like a head gasket or water pump that needs proper diagnostic equipment to confirm.
Consider a professional
Your vehicle is a hybrid or plug-in hybrid with a separate battery cooling loop, where distinguishing between cooling circuits before draining anything is important to avoid introducing air into the wrong system.
Warning Signs You Shouldn’t Ignore Before It Fails Completely
Thermostats rarely fail without at least some warning, even if that warning is subtle at first. Catching these early signs can be the difference between a routine, inexpensive repair and a roadside breakdown with expensive engine damage.
Pay attention if your temperature gauge, which normally settles at roughly the same spot on every drive, starts behaving inconsistently — running slightly hotter than usual on some trips, or taking noticeably longer to reach its normal position on cold mornings. These small deviations are often the earliest sign that a thermostat’s spring is beginning to weaken or that mineral deposits are starting to interfere with smooth valve movement, well before the part fails outright.
Similarly, if you notice your cabin heater output has become slightly less hot than it used to be, particularly on short trips or during cold weather, that can indicate the thermostat is beginning to open a bit earlier or more often than its rating specifies, letting coolant reach the radiator before it’s fully up to temperature. It’s easy to dismiss this as “just an old car,” but it’s worth having checked, since it’s one of the most reliable early indicators of thermostat wear available to an attentive driver without any special tools.
Finally, keep an eye on your coolant reservoir level over several weeks, not just at a single glance. A thermostat nearing failure sometimes coincides with, or accelerates, small coolant losses elsewhere in the system as pressure cycling becomes less predictable. A gradual downward trend in coolant level, even a small one, is worth investigating before it becomes a sudden overheating event on the highway.
Explore More Cooling System Guides
Your engine’s temperature is critical to performance. Learn more about optimizing it:





 Home
Home
 Info
Info
 Compare
 Reviews
 Shop
Shop