
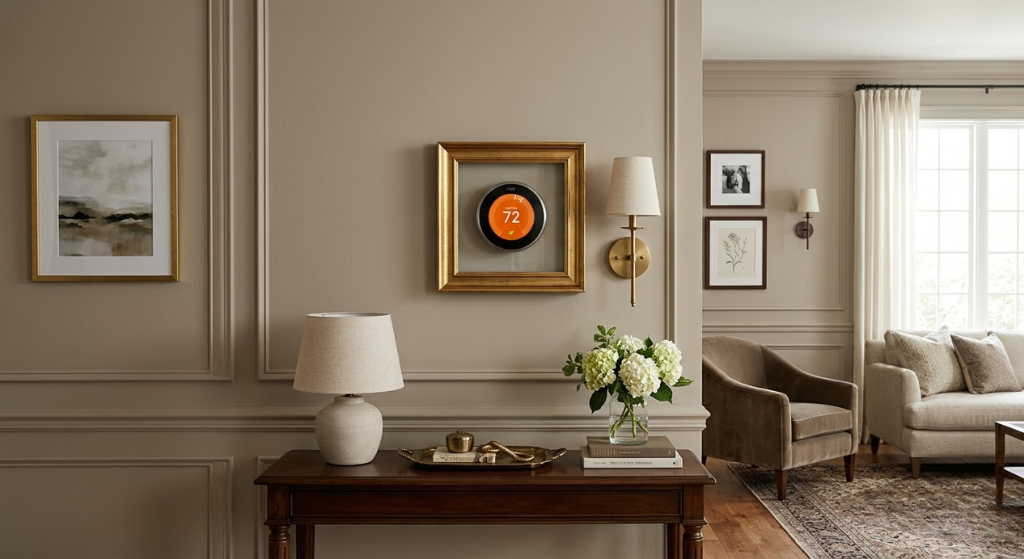
25 Thermostat Cover Ideas That Actually Blend Into Your Home
That beige plastic box on your wall has a job to do — but it doesn’t have to be an eyesore. From a $5 thrift-store frame to a custom-built vintage cabinet, these ideas will make your thermostat disappear — beautifully.


The thermostat is almost always placed at eye level, right in the middle of a hallway or main living area — in a spot nobody would choose for something unsightly. Every single idea below takes less than an afternoon and costs less than a candle set from a home store.
01. Why Cover Your Thermostat?
Aesthetics Are Just the Start
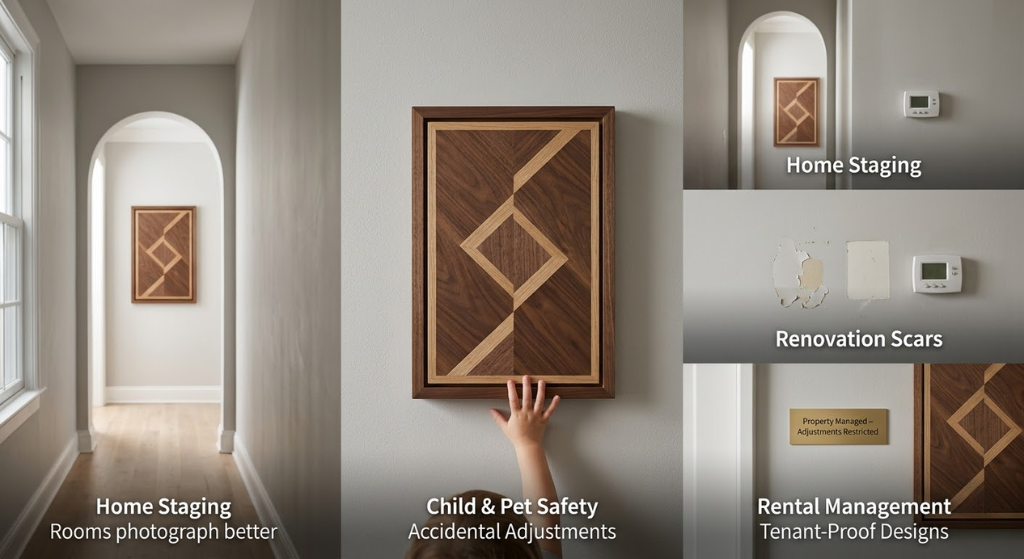
Beyond pure looks, thermostats get covered for child safety, rental management, renovation cover-ups, and home staging. A good cover solves all of these simultaneously.
- Child & pet safety — prevents accidental adjustments
- Rental management — discreet tenant-proof designs
- Renovation scars — hides paint damage around old units
- Home staging — rooms photograph better without visible hardware
Thermostat cover searches spike every January and September — the start of heating and cooling season. If you’re here from Pinterest, you’re in great company.
02. Safety Rules Before You Start
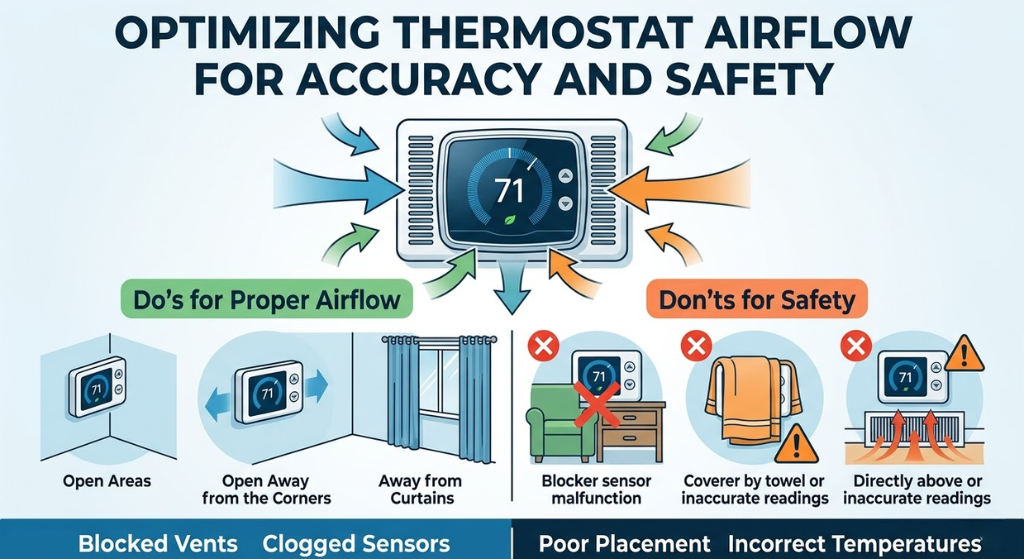
Never fully seal a thermostat in an airtight enclosure. The sensor needs ambient room air. A sealed box traps the device’s own heat — leading to short-cycling and wasted energy. This is one of the most common reasons a thermostat doesn’t reach its set temperature.
Always allow airflow. Slots, mesh, open back, or a gap at the bottom — air must circulate past the sensor.
No heat sources nearby. Candles or lamps above the thermostat corrupt temperature readings.
Keep the display accessible. Hinged fronts or sliding panels let you adjust without dismounting the cover.
Kill the breaker first. Before drilling near the thermostat or touching wiring, always switch off the circuit.
Check smart sensor sightlines. Nest radar and Ecobee PIR sensors need clear views — covers blocking the front face disable these features.
Many leases prohibit wall drilling. Use Command adhesive strips — fully removable, no wall damage, lease-compliant.
03. Frame & Shadow Box Ideas
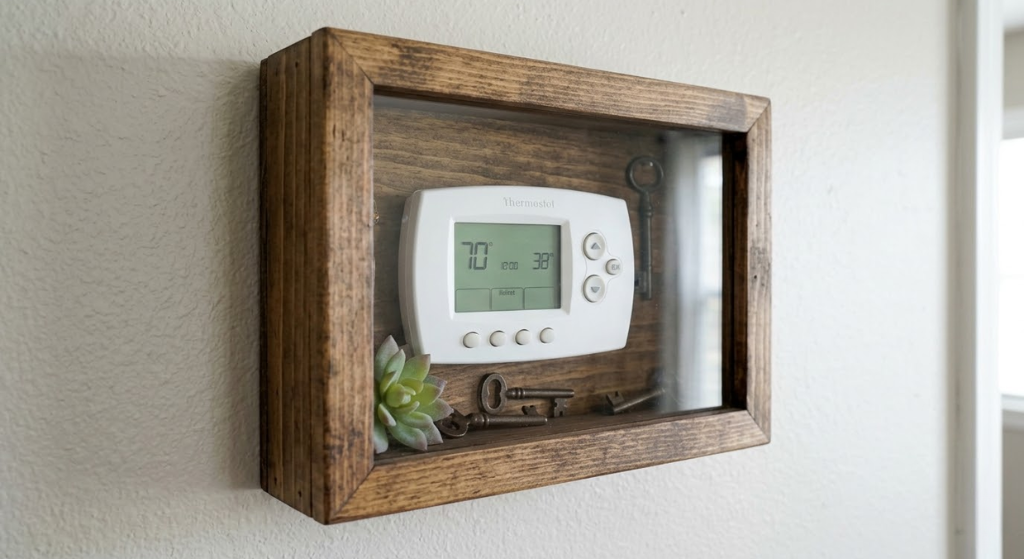
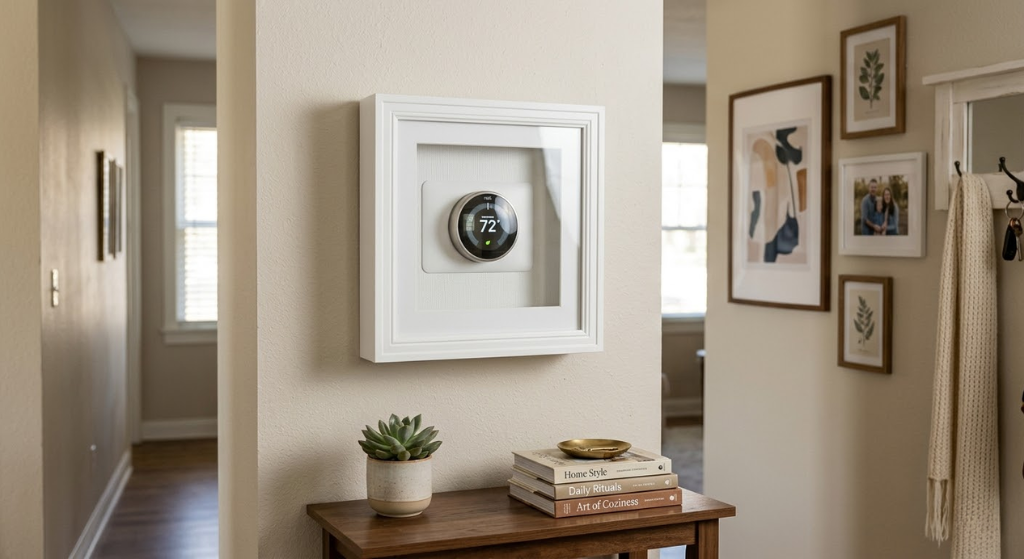
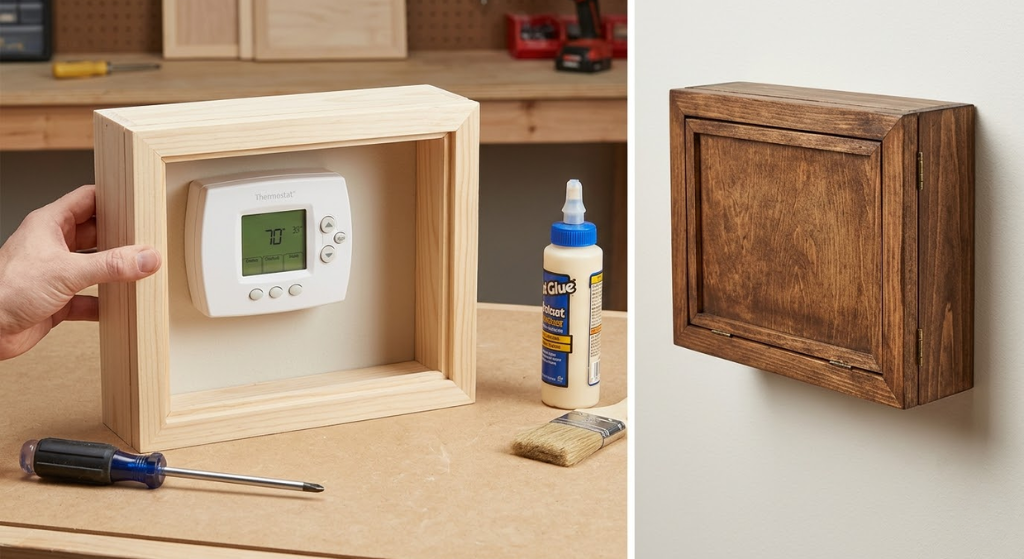
A 2–3 inch deep shadow box creates a recessed built-in look. Paint to match your wall trim for a near-architectural effect.
DIY
A thrifted ornate frame painted metallic gold turns the thermostat into a genuine decorative feature against any wall.
Vintage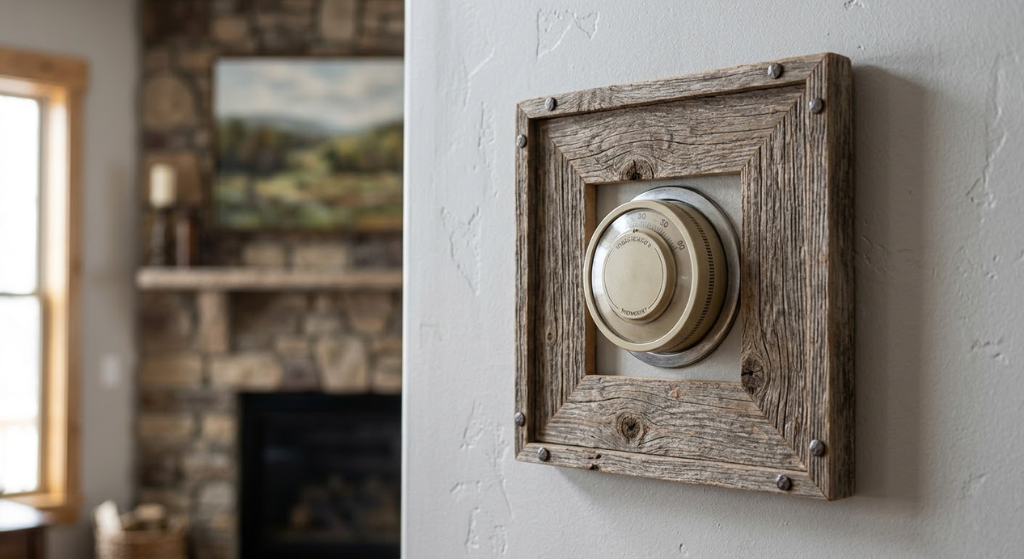
Rough-cut reclaimed wood adds instant farmhouse character. Whitewash for a coastal-modern look.
DIY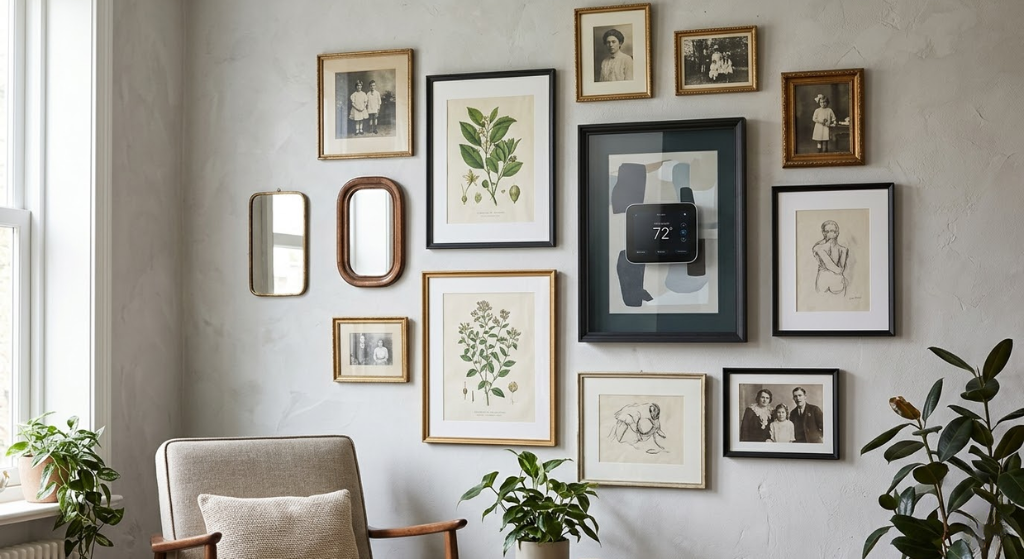
Frame the thermostat and build a gallery arrangement around it. It becomes just another piece — invisible in plain sight.
Easy
A slim black or brushed brass frame suits contemporary homes. Perfect alongside white Ecobee or Nest units.
Ready-Made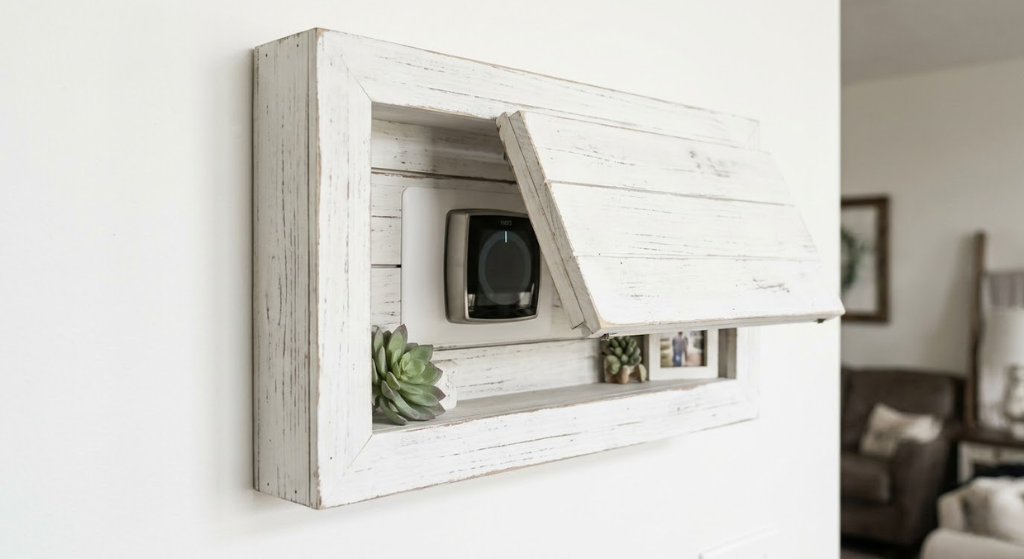
Mini shiplap on the back wall with a trim border front — layered, designer-quality look from scratch.
DIYDIY Frame Cover: 6 Steps
Measure the thermostat’s exact dimensions including any wall plate.
Find a frame with an opening at least 1 inch larger than the thermostat on all sides.
Remove the glass and backing entirely. Open frame only — no sealed surfaces.
Paint or finish to match your room’s trim or accent wall color.
Mount with picture hooks, Command strips, or small screws avoiding wiring behind the wall.
Check for level. Adjust until perfectly aligned.
✓ Pros
- Costs as little as $5
- Zero airflow restriction
- Fully reversible for renters
- Works with any brand
- Unlimited style variety
✗ Cons
- Frames — doesn’t fully hide — the unit
- Wires still visible at the bottom
- Needs careful sizing to look intentional

04. Hallway Thermostat Cover Ideas
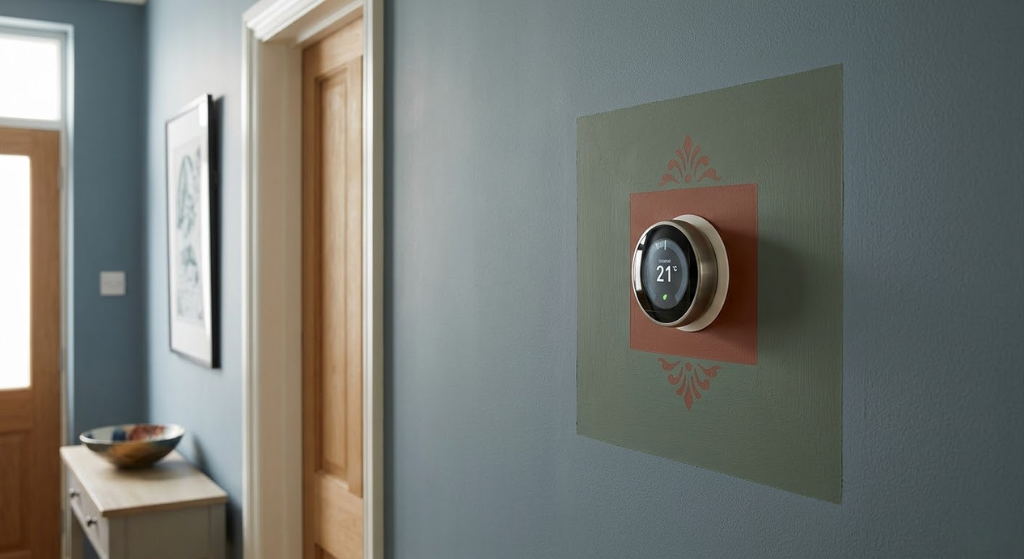

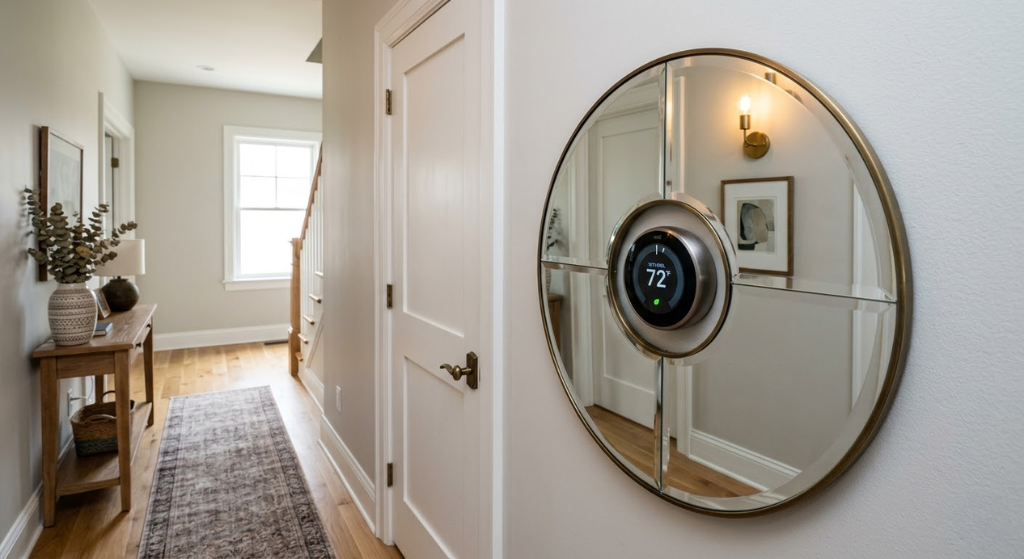
Hallways demand restraint — space is tight and wall real estate is precious. The best hallway covers are slim, streamlined, and work with the existing flow rather than against it.
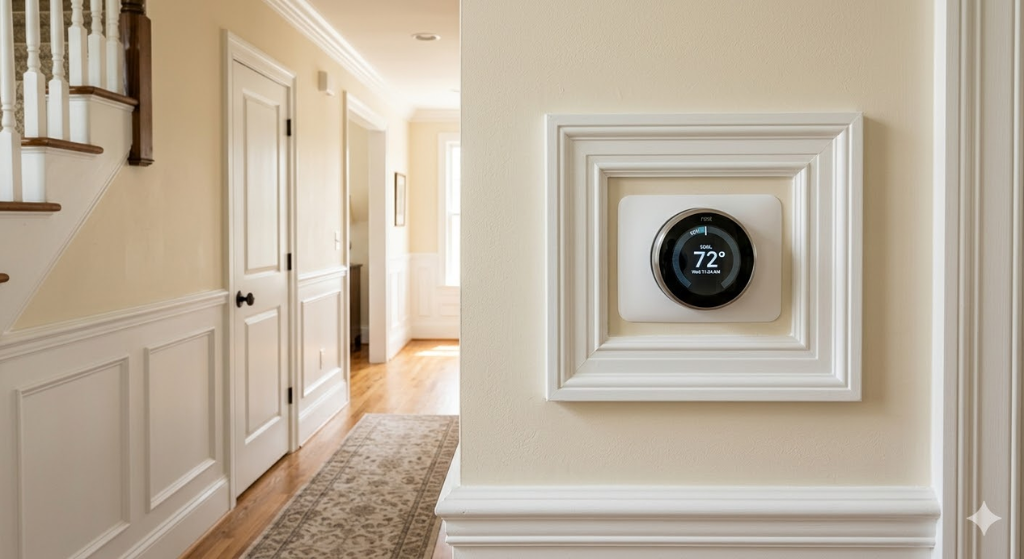
MDF trim boards painted to match your wall create a recessed invisible effect — the single best hallway solution.
DIY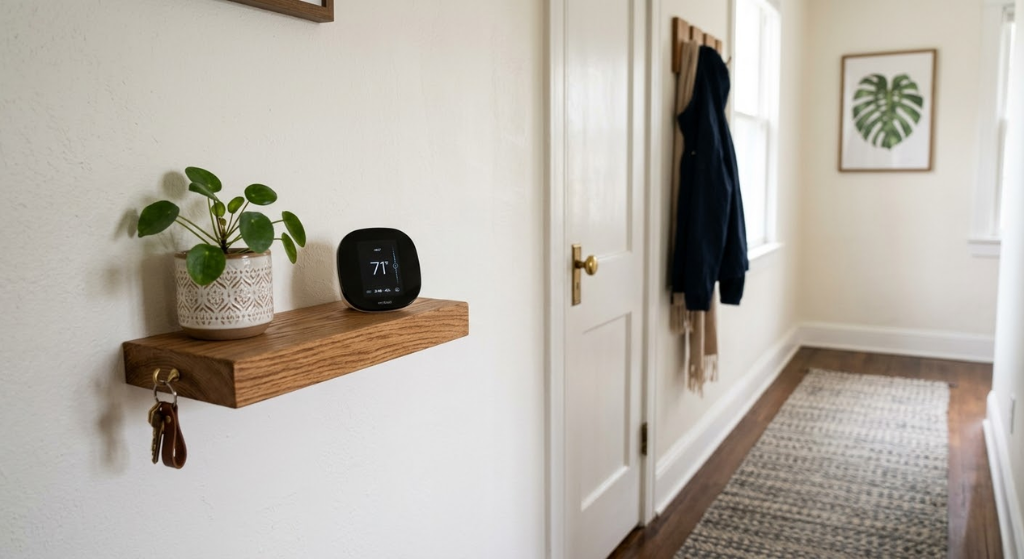
A shelf 6–8″ above the thermostat reframes it as part of a styled vignette with a plant, candle, or small print.
Easy Install
A small decorative mirror above the thermostat doubles apparent hallway width and makes the wall feel intentional.
Ready-Made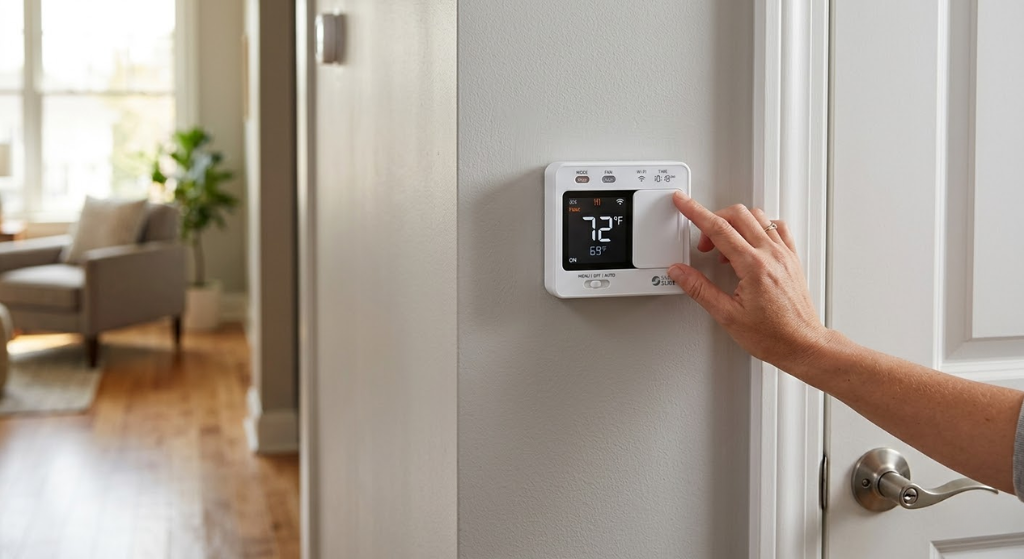
A tiny barn-door style panel on a micro-rail slides sideways to reveal the thermostat — a genuine farmhouse design feature.
DIYIf your hallway thermostat is near the front door, guests see it immediately. A frame surround painted in your trim color takes less than an afternoon and transforms that first impression entirely.

05. Living Room Thermostat Cover Ideas
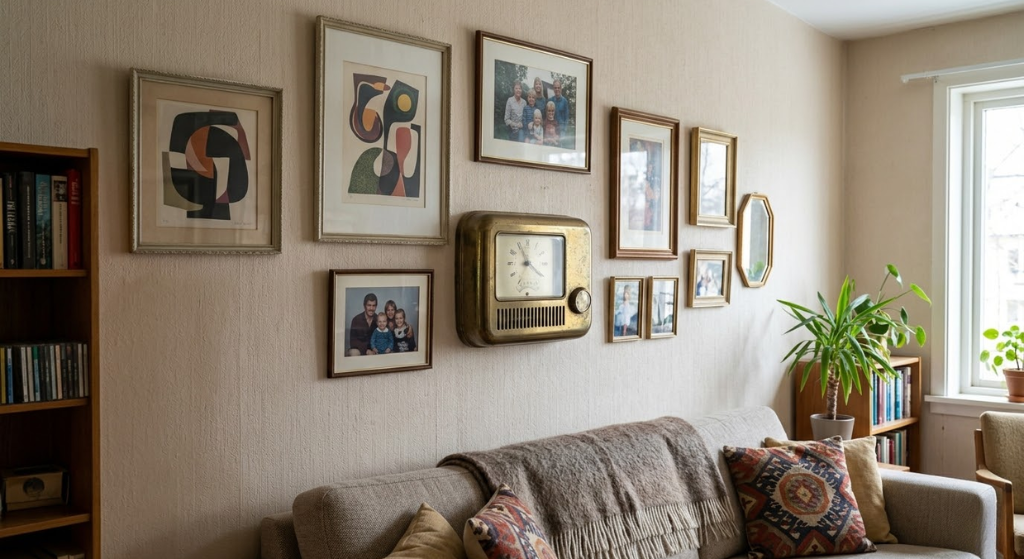

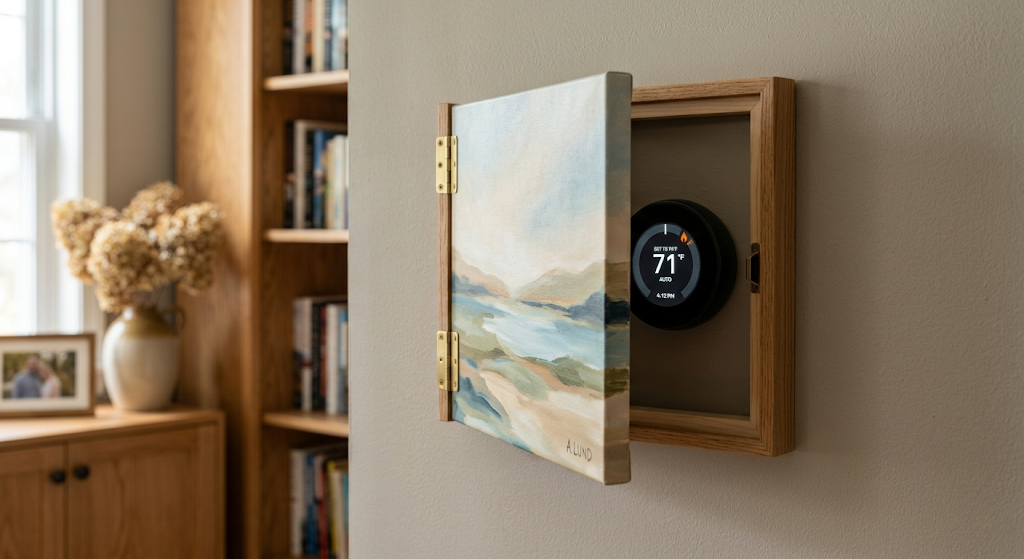
The living room is where you have the most creative freedom — more wall space, richer design context, and a higher tolerance for bold decorative choices.
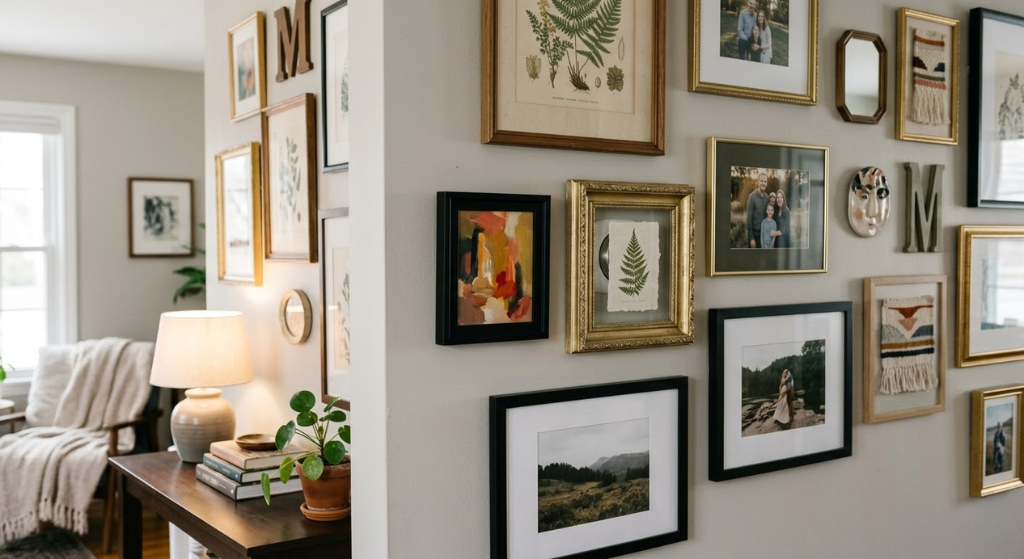
Frame the thermostat and build a gallery arrangement around it — it becomes just another piece, invisible in plain sight.
Easy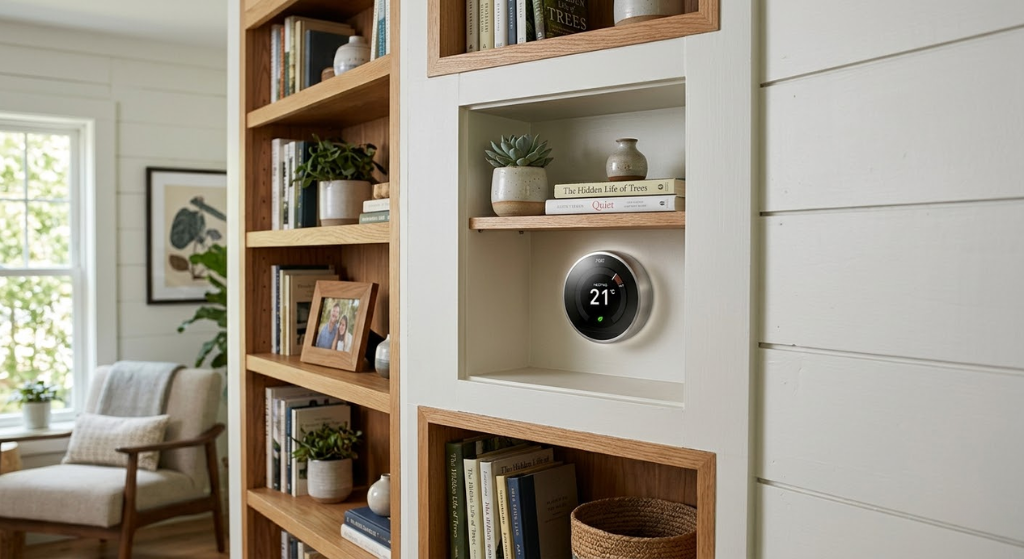
Frame out a box with floating shelves above and below — the thermostat becomes an architectural centrepiece.
DIY
A canvas print on a piano hinge hangs like art and swings open for access. Elegant and completely functional.
DIY
A large vertical mirror above the thermostat pulls focus upward, making the device visually secondary.
Ready-Made
06. Wall Art Thermostat Cover Ideas
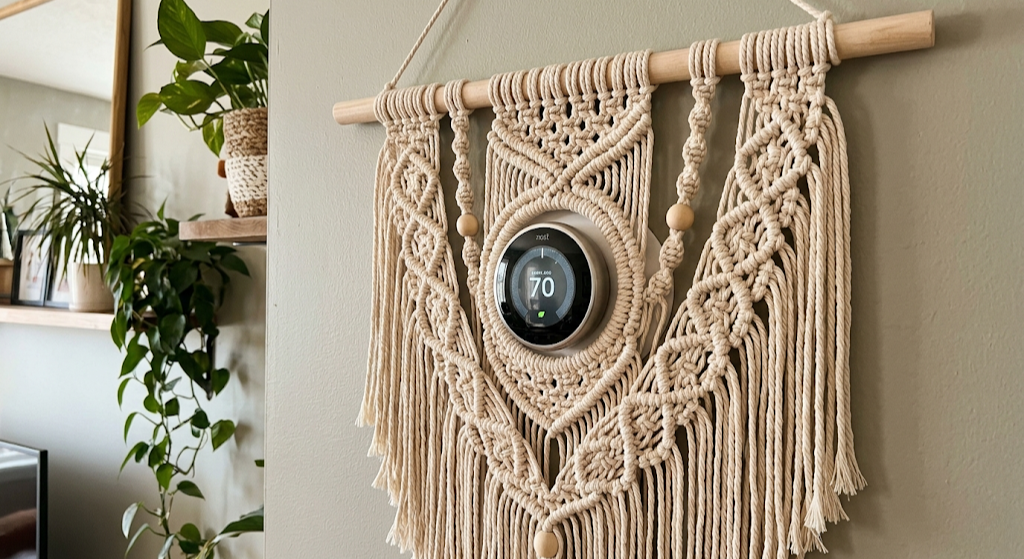
Art That Hides Without Hiding
Hang art over the thermostat. Macramé and woven hangings score perfectly for airflow — they’re essentially made of holes. For solid framed prints, use spacer bumpers on the back to leave a 0.5–1 inch gap for air circulation.
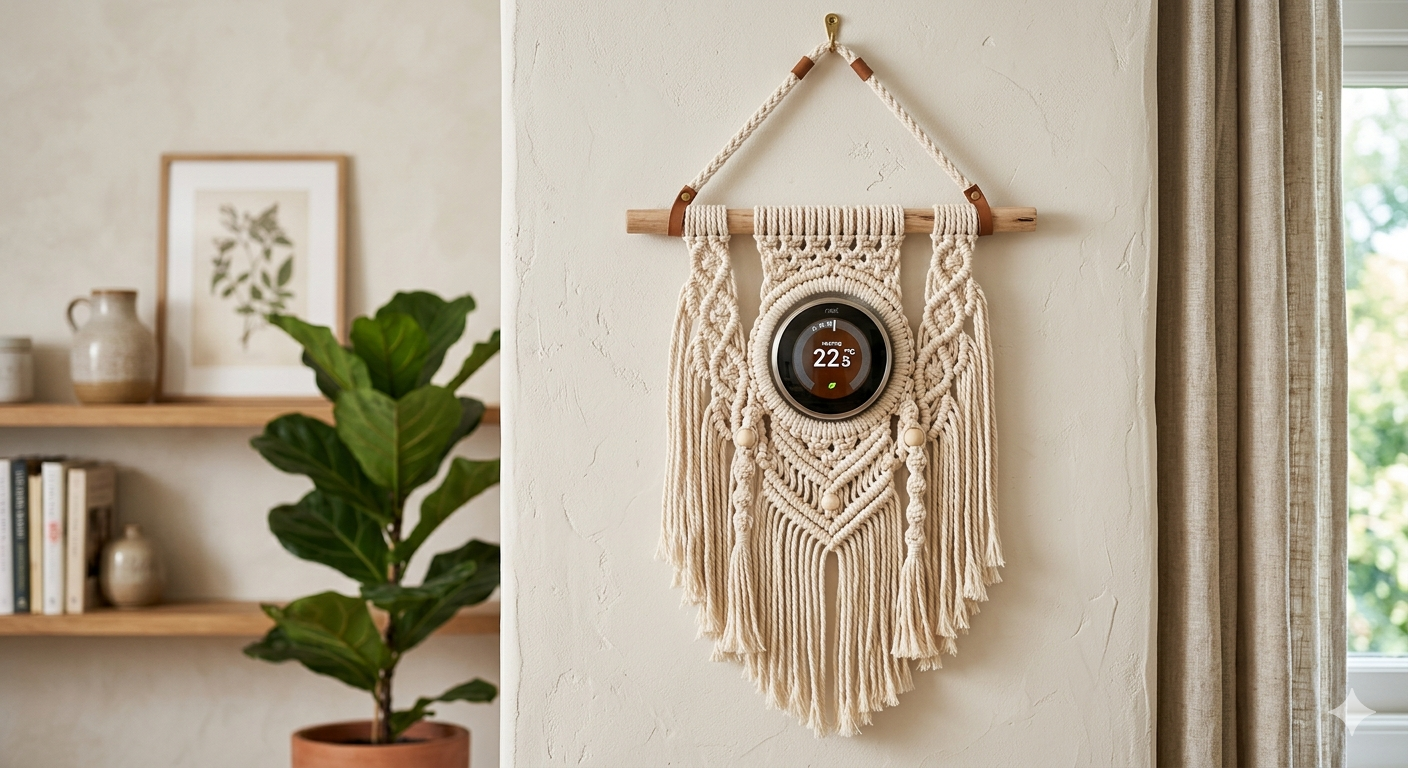
Open-weave macramé drapes naturally over the thermostat with maximum airflow through its structure.
Best Airflow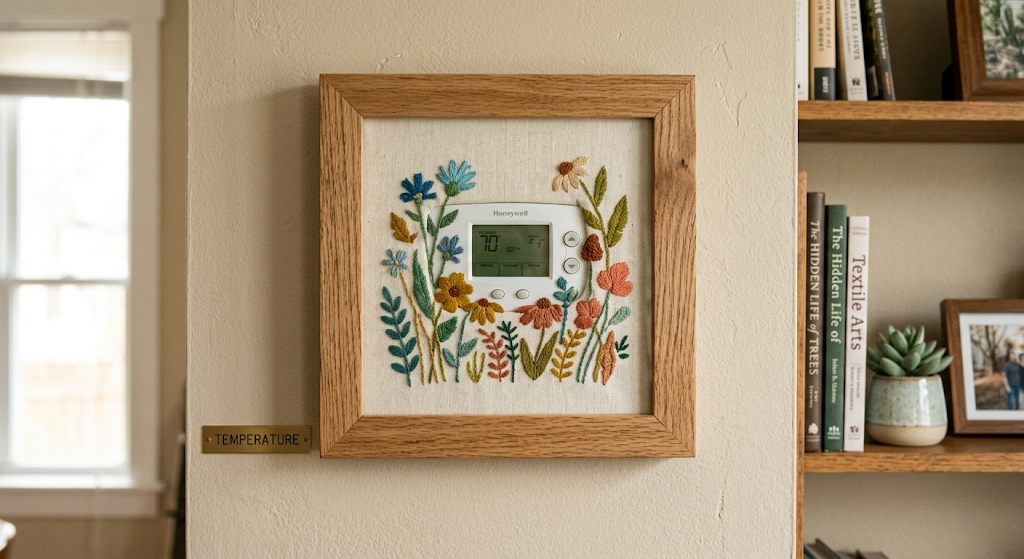
Stretch patterned fabric over a canvas stretcher bar for a soft handmade look. Swap seasonally for fresh décor.
DIY
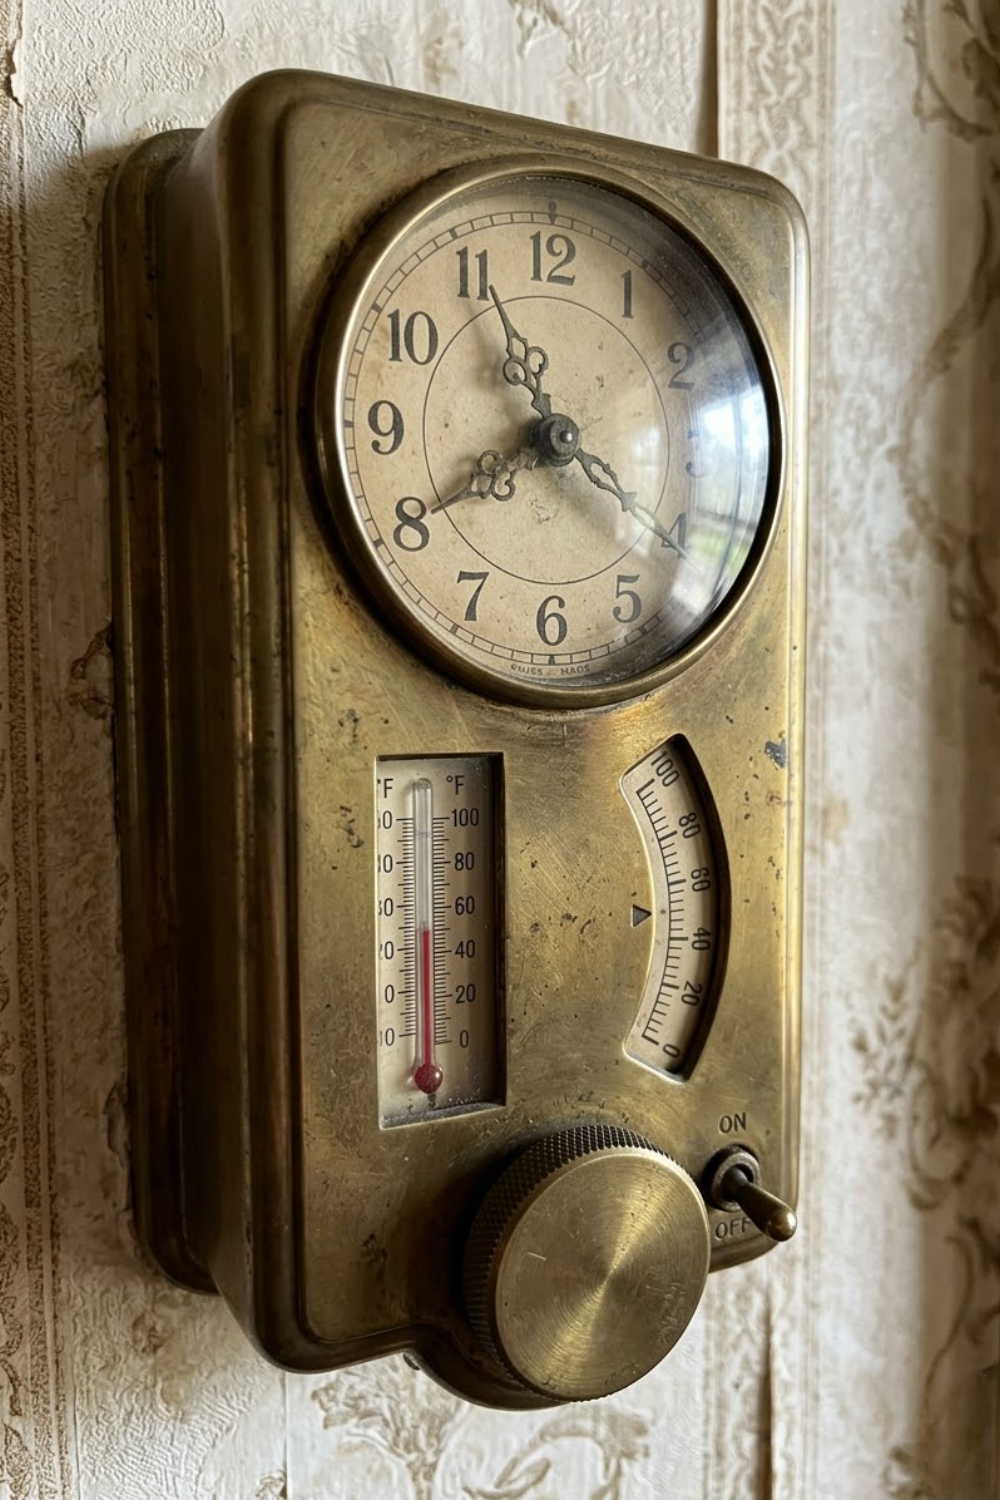
A decorative clock with an open back is both functional art and a perfect thermostat cover — two for one.
Functional07. Basket & Wicker Cover Ideas
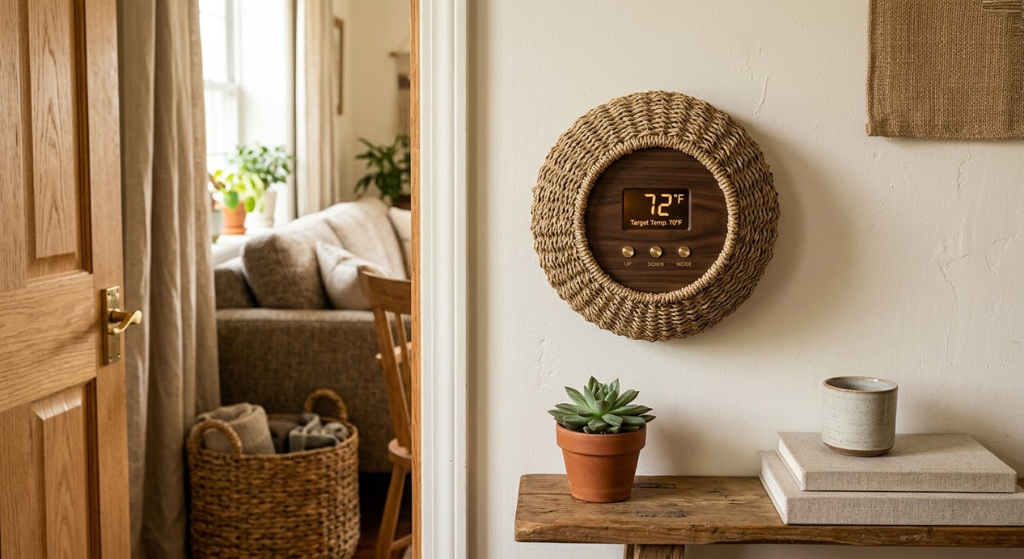
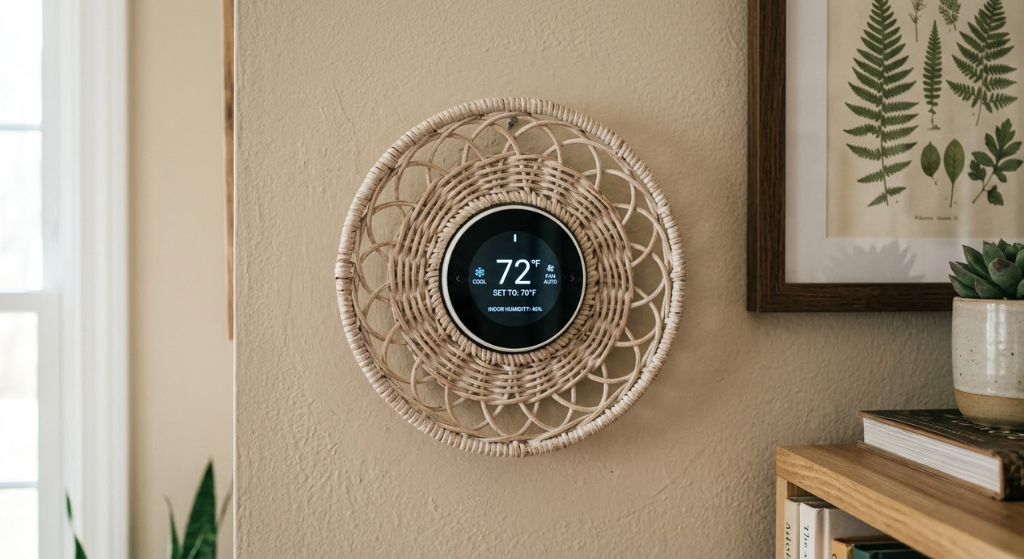
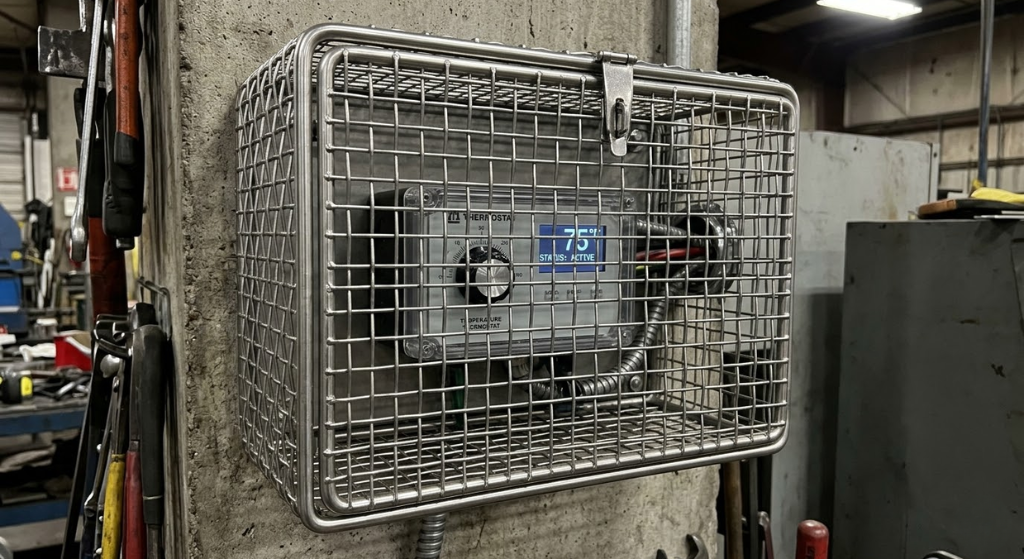
Open-weave construction means air passes through freely. The organic texture of natural fiber reads as intentional décor rather than a cover-up. Mount with Command strips — lift off the hooks for thermostat access.
| Basket Style | Best For | Price | Airflow | Level |
|---|---|---|---|---|
| Natural seagrass, open weave | Coastal, boho, Scandi | $15–$35 | ✓ Excellent | Easy |
| Whitewashed rattan | Farmhouse, shabby chic | $20–$45 | ✓ Excellent | Easy |
| Painted bamboo tray | Modern, minimalist | $10–$30 | ✓ Good | Easy |
| Woven wire metal basket | Industrial, loft | $20–$50 | ✓ Excellent | Easy |
| Rope-wrapped box, open front | Nautical, coastal | $25–$55 | ✓ Good | Medium |
| Solid wicker, tight weave | Traditional, cottage | $15–$40 | ⚠ Moderate | Easy |

08. Vintage & Antique Thermostat Cover Ideas
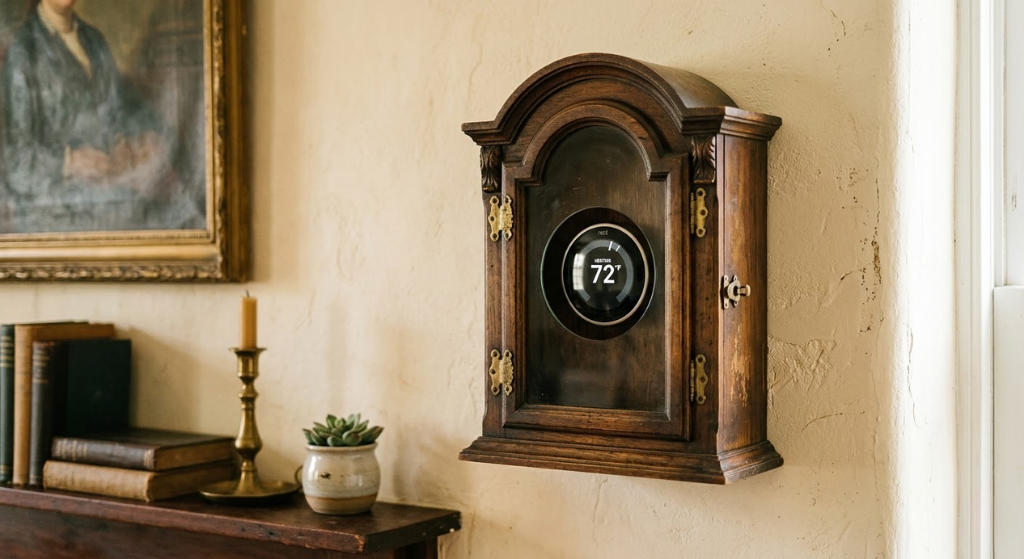
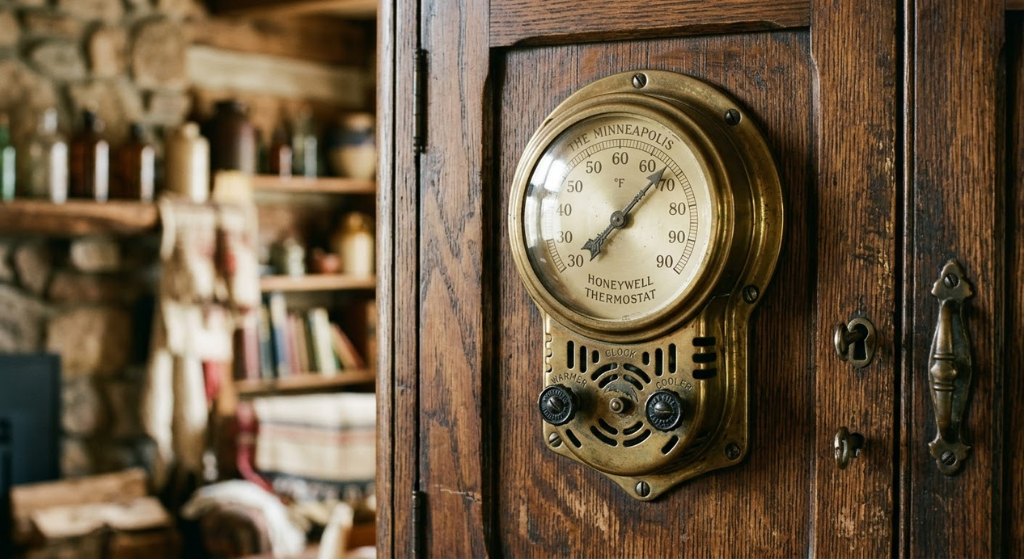
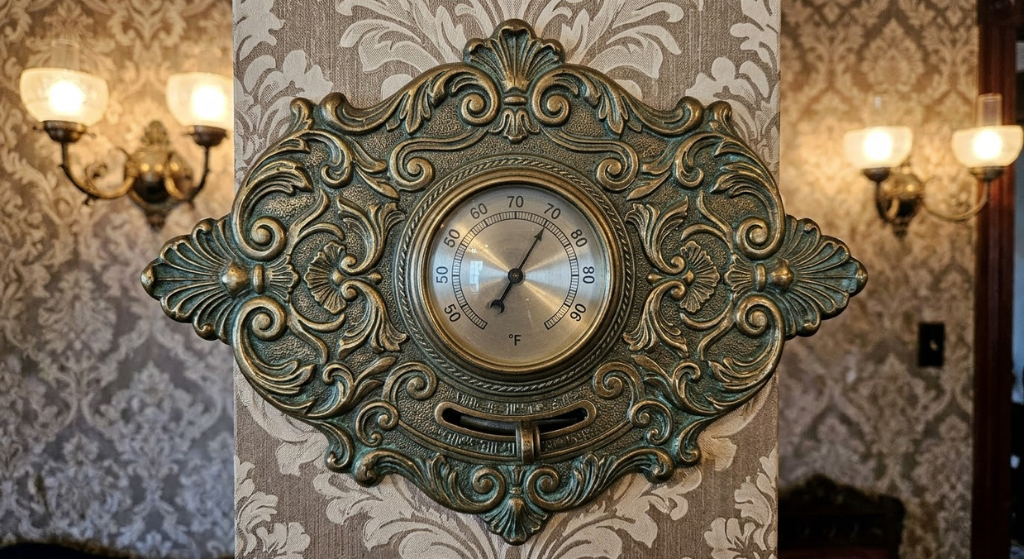

Remove the mechanism, hinge one side to the wall. Open the glass front for thermostat access. A genuine conversation starter.
Vintage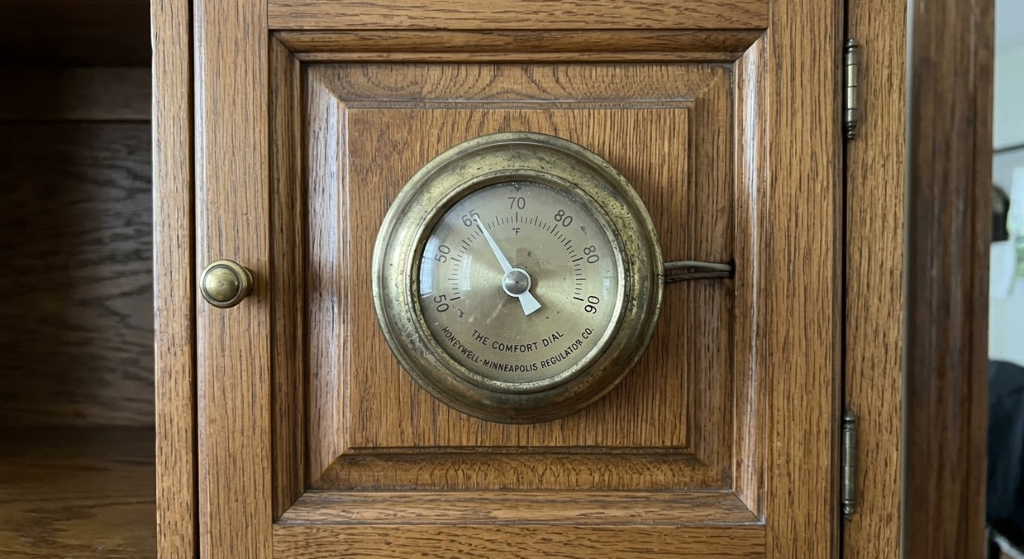
An antique cabinet door with glass panel inserts, hinged to the wall. Glass allows visibility and natural airflow.
Thrift Find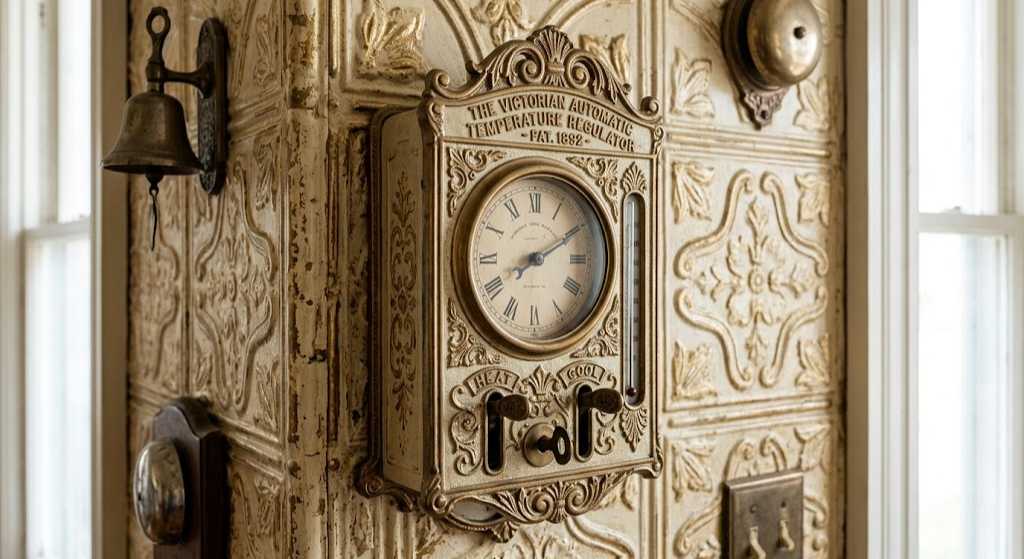
Pressed tin ceiling tiles in antique bronze add extraordinary character. Perforated backs provide excellent airflow.
Vintage
Hardbound books glued spine-outward to a backing board create a faux shelf that blends into a book-lined wall.
DIYAlways test that the vintage cover opens easily before permanent mounting. A stuck antique latch on a cold January morning is a real problem.
09. DIY Thermostat Cover Ideas
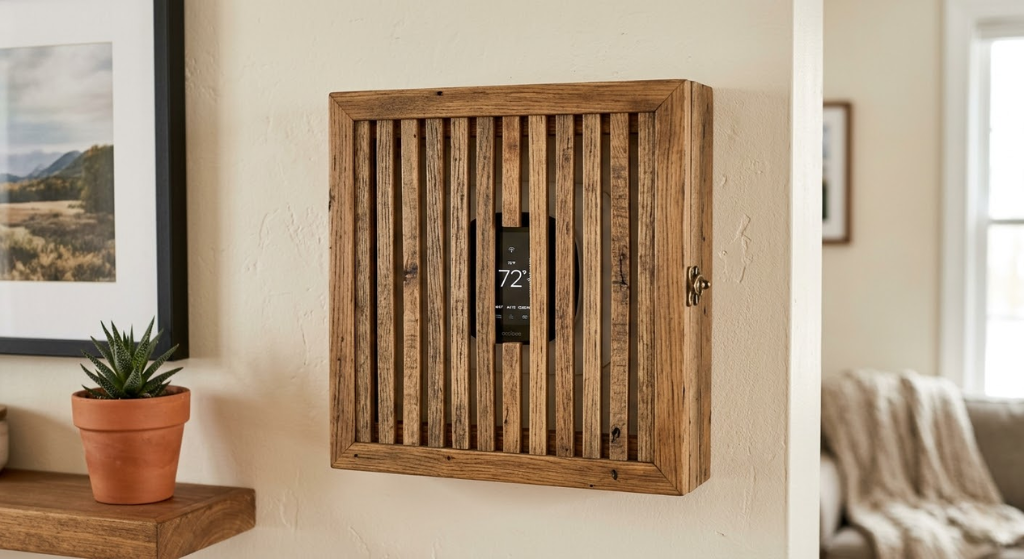
Weekend Projects from $5
DIY covers give total control over size, material, finish, and style — at a fraction of commercial prices. The most popular on Pinterest right now: the shiplap shadow box and the louvered shutter panel. Both suit the farmhouse aesthetic dominating home décor feeds in 2026.
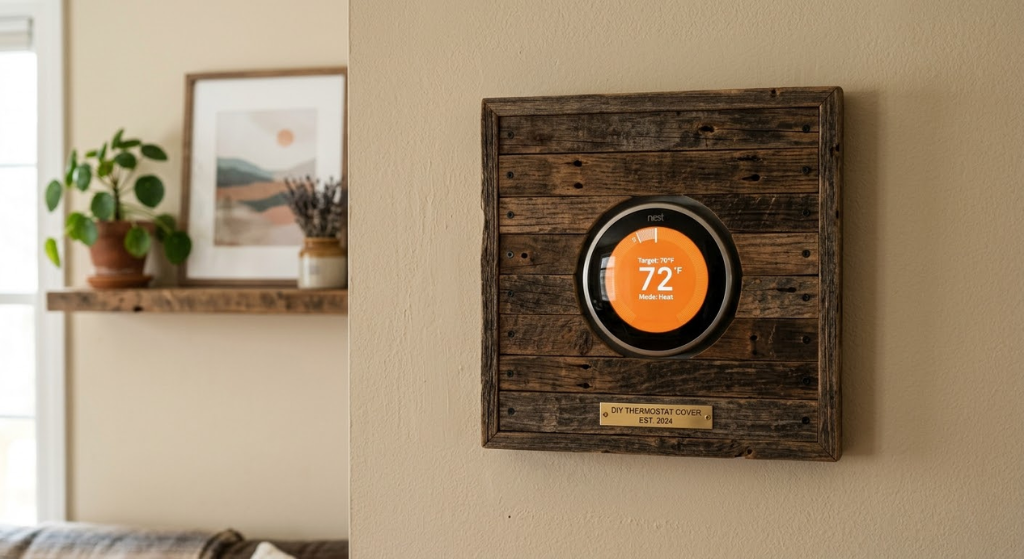
Pallet wood strips mounted horizontally with 1/4″ gaps between each. Maximum airflow, maximum character.
DIY · Weekend
1×4 pine box with mini shiplap on the back wall, picture-frame front edge, hinged one side. Paint in trim color.
DIY · Pinterest Fave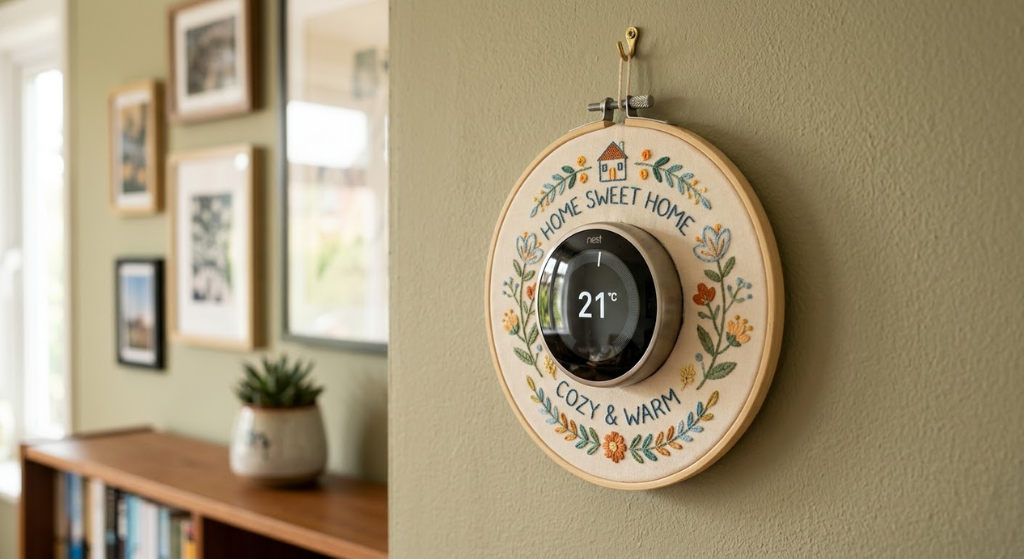
Stretch patterned fabric across a 12–16″ hoop and mount with Command strips. Total cost: under $10.
DIY · $5–$10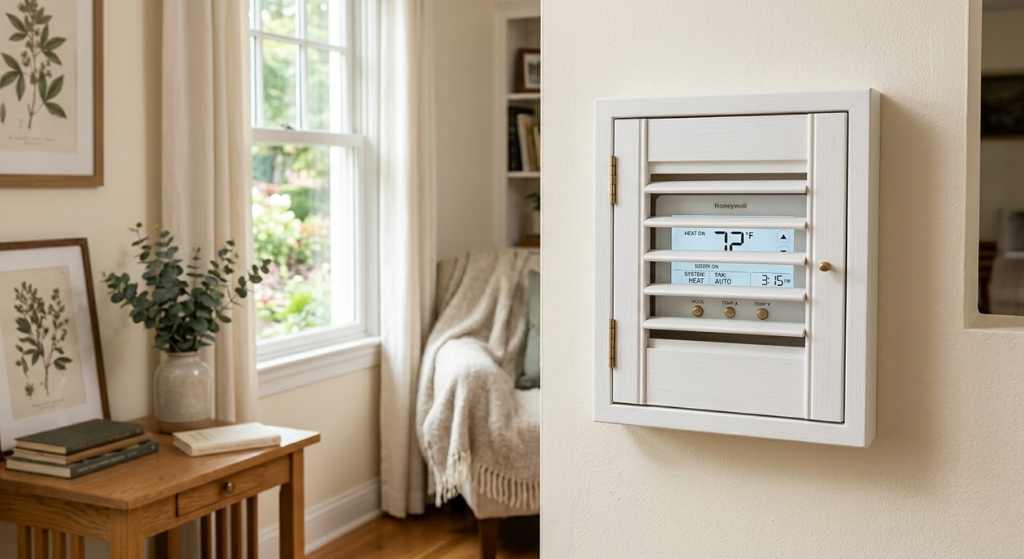
MDF with chalkboard paint on a hinge. Doubles as a message board next to the temperature control. Ideal for kitchens.
DIY · Functional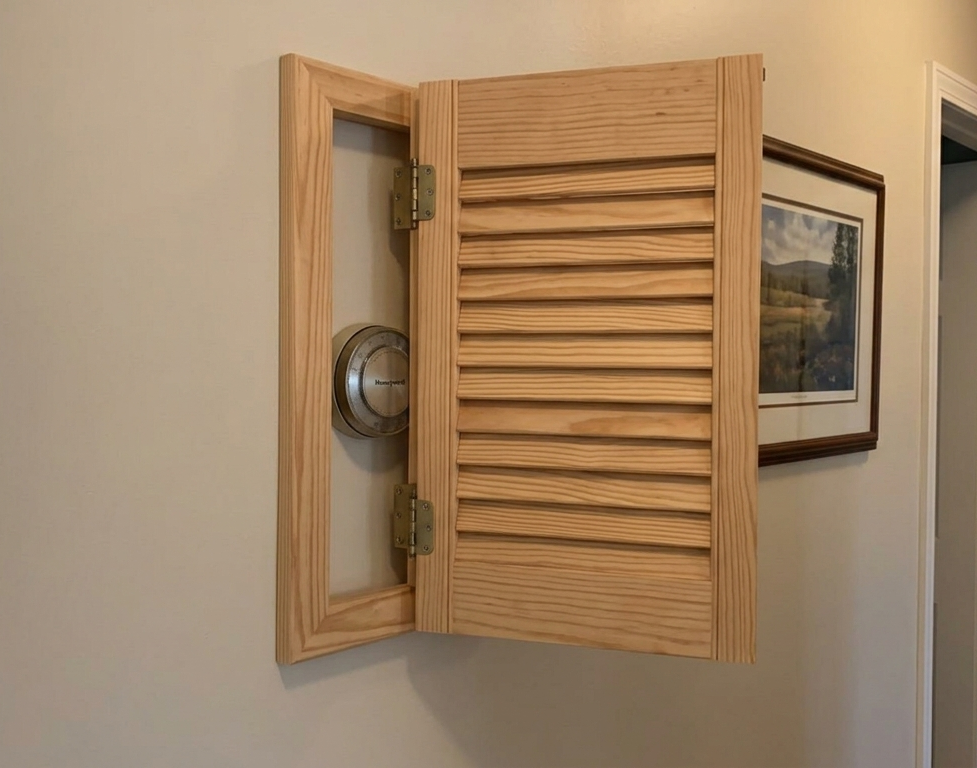
A small louvered shutter from any home center is almost perfectly designed for thermostat covers. Best-in-class airflow.
DIY · Best Airflow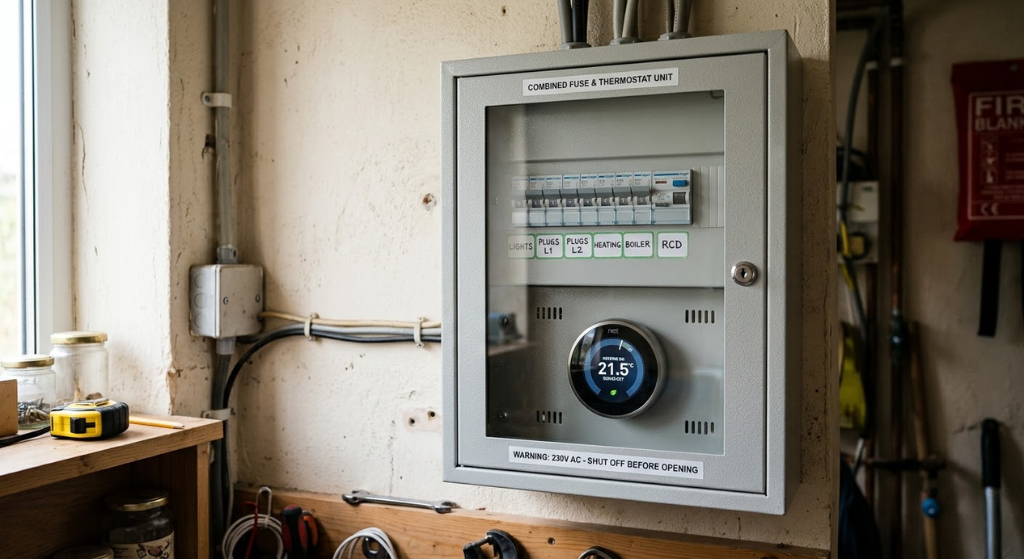
If both units share a wall, one hinged cabinet covers both — mesh on the thermostat side, solid door on the fuse box side.
DIY · Advanced✓ DIY Pros
- Fully custom to exact dimensions
- Cost: $5–$30 typically
- Match any style perfectly
- Repaint or modify later
✗ DIY Cons
- Requires time and basic tools
- Poor fit risk if measurements off
- Structural mistakes can cause airflow issues
10. Covers for Smart Thermostats
Nest, Ecobee, Honeywell — Special Considerations
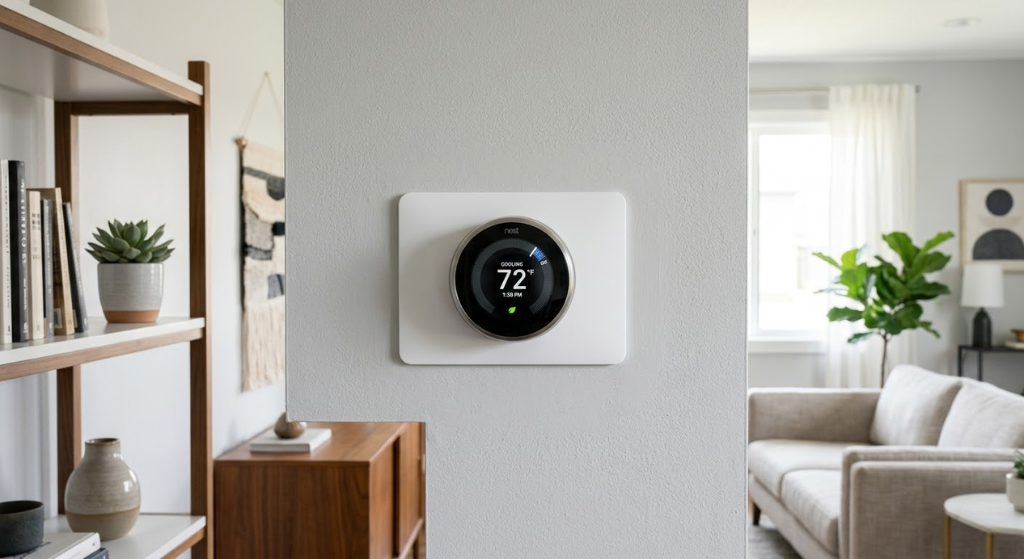
Smart thermostats use occupancy sensors, proximity detection, and sometimes radar (Nest 4th Gen). Covering the front face disables these features and eliminates the energy savings you paid for. The safest approach is always a frame around — not over the device. For a deeper comparison, the Nest vs Honeywell comparison covers both technical and design differences.
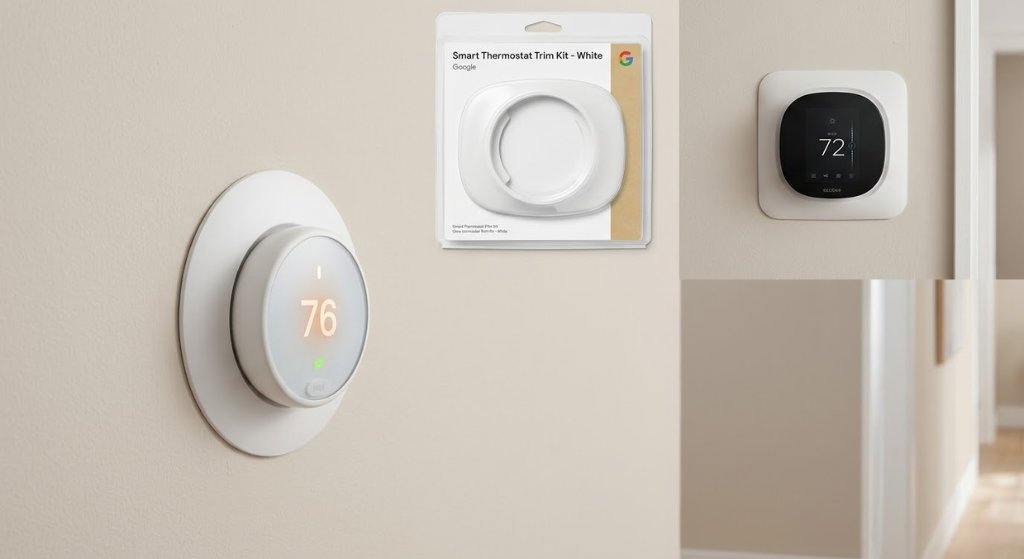
Nest and Ecobee official trim kits are designed not to interfere with sensors. The cleanest, most compatible solution.
Smart-Safe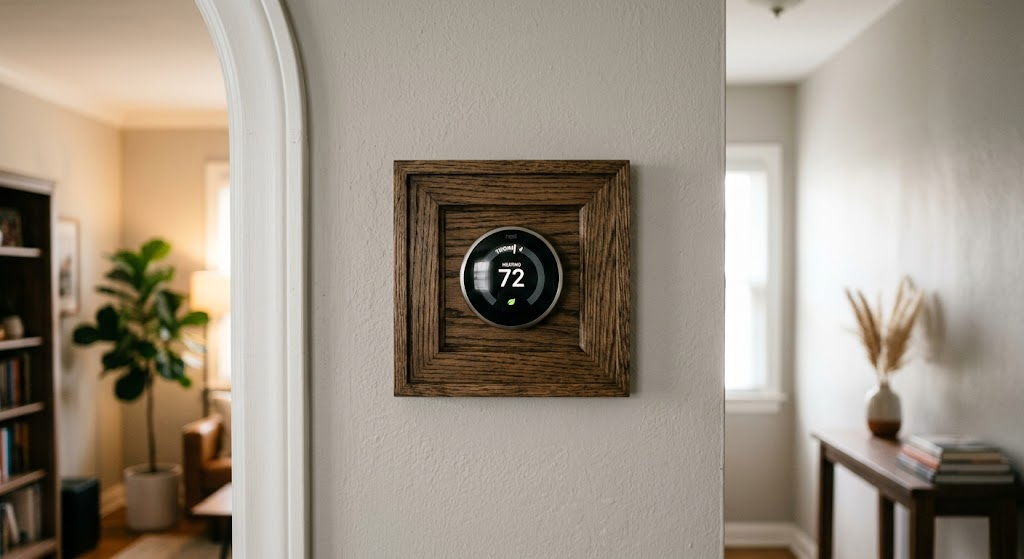
A decorative frame mounted around — not covering — the smart thermostat. All sensors remain completely unobstructed.
Smart-Safe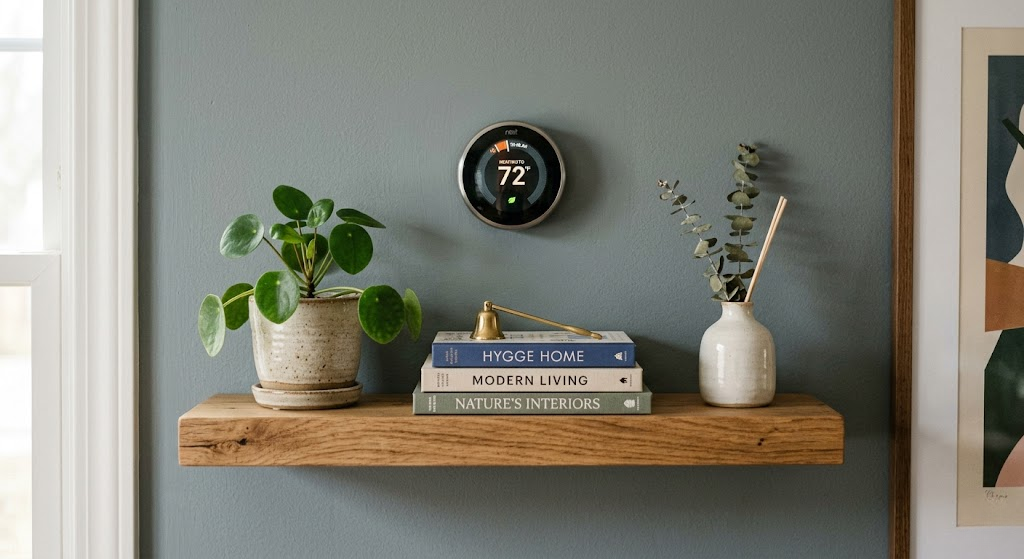
A shelf 8″ above styled with a plant, print, and speaker creates a “tech hub” that makes the device feel intentional.
Smart-SafeNever use a basket, box, or opaque cover over a smart thermostat. If your system has been acting up since installing a cover, check our thermostat troubleshooting guide.

11. Customization Ideas

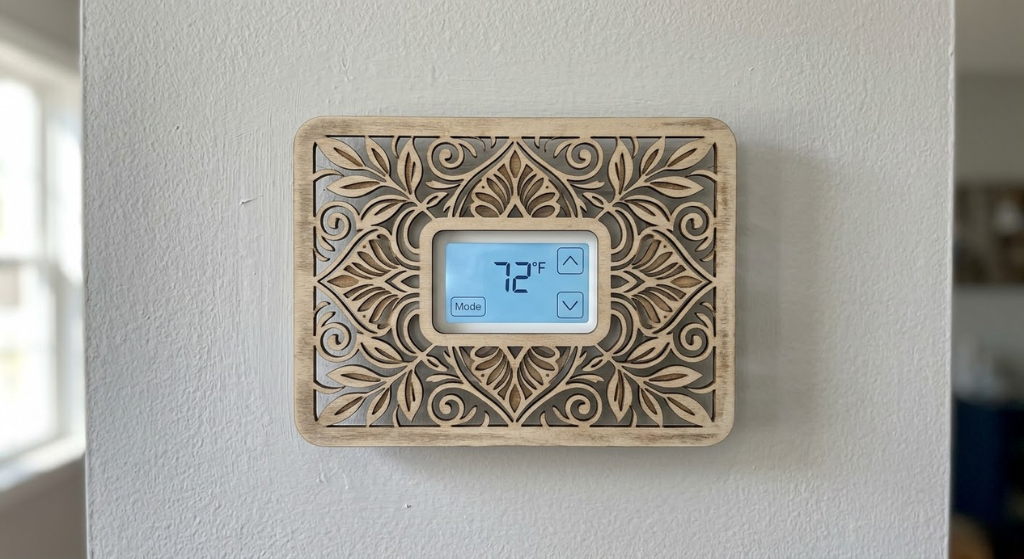
- Paint to match or contrast — chalk paint for vintage matte, gloss for a lacquered accent
- Wallpaper lining inside — a patterned remnant inside a box cover creates a delightful surprise when opened
- Hardware upgrades — antique brass strap hinges, ceramic knobs, leather pull tabs dramatically elevate perceived quality
- Stenciling & decoupage — botanical motifs or geometric patterns add handmade character without advanced skills
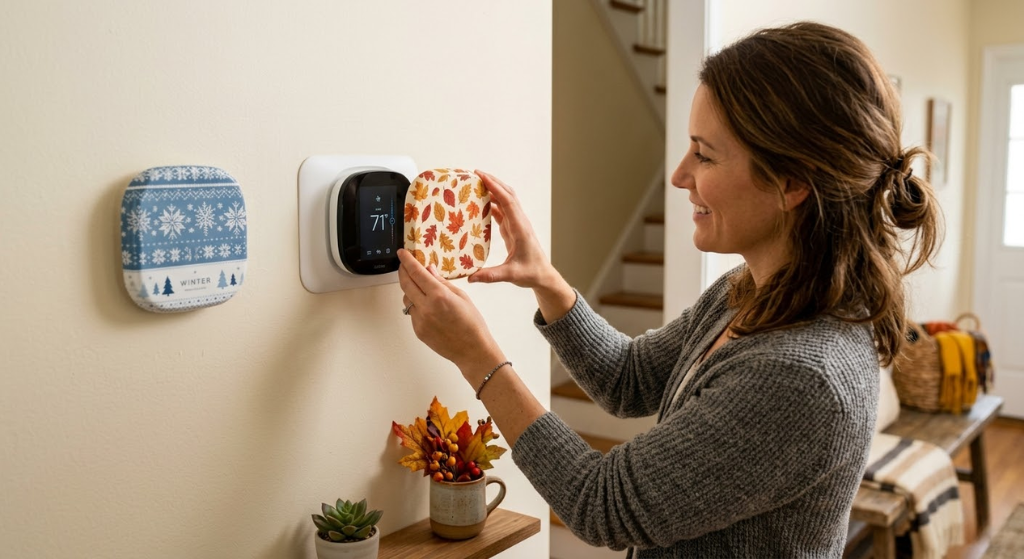
- Seasonal swap fronts — whitewashed linen in summer, deep navy velvet in winter
While improving how your thermostat looks, review how efficiently it’s running. Our guide to smart thermostat energy savings with geofencing covers the key settings that meaningfully cut HVAC costs.
12. Bathroom & Kitchen Thermostat Cover Ideas
Humidity and grease change the calculus for a thermostat cover. A bathroom thermostat sits a few feet from a hot shower, and a kitchen unit lives near steam, splatter, and the occasional flour cloud. Wood that looks perfect in a dry hallway can warp, swell, or peel within a season in these rooms, so material choice matters more here than almost anywhere else in the house.
The safest bathroom approach is a sealed-finish wood or PVC-trim surround — several coats of polyurethane, or a marine-grade varnish, keep moisture from soaking into the grain while the open front still lets air reach the sensor. Avoid raw wicker or seagrass in a bathroom; natural fiber wicks humidity and can develop mildew over time, which is one of the more common complaints in bathroom-décor forums. A powder-coated metal frame or a acrylic shadow box are both excellent humidity-proof alternatives that never need refinishing.
In the kitchen, grease is the bigger enemy. A thermostat mounted near the stove or a swinging door gathers airborne oil residue faster than anywhere else in the home, which is why a wipeable surface beats a porous one every time. Painted MDF with a satin or semi-gloss topcoat, laminate, or glass-front shadow boxes all wipe clean with a damp cloth in seconds. A chalkboard-panel cover doubles as a grocery list holder and still wipes down easily, making it one of the most requested kitchen-specific cover styles.
If your kitchen thermostat sits directly above a stove or near a dishwasher vent, consider relocating the frame surround an inch or two off the wall using standoff spacers. The extra air gap prevents heat and steam from pooling directly against the cover.
| Room | Main Risk | Best Material | Avoid |
|---|---|---|---|
| Bathroom | Humidity, mildew | Sealed wood, powder-coated metal, acrylic | Raw wicker, unsealed rattan |
| Kitchen | Grease, steam | Painted MDF (glossy topcoat), laminate, glass | Fabric, unfinished wood, macramé |
| Laundry room | Lint, humidity | Wipeable painted wood, metal mesh | Open-weave textiles |
13. Bedroom Thermostat Cover Ideas
Bedrooms call for the softest, quietest design language in the house — this is where macramé, embroidery hoops, and framed textile art genuinely shine as thermostat covers. Because the goal in a bedroom is usually calm rather than statement-making, muted linen, cream boucle, and soft neutral tones read better than the bold metallics or high-contrast frames that suit a living room gallery wall.
A thermostat positioned above a headboard or beside a closet door is easy to visually absorb into a small textile grouping — pair the cover with one or two similarly sized prints in the same frame family and the eye stops registering it as a separate object. For nurseries and kids’ bedrooms specifically, choose designs that also function as a tamper deterrent: a locking or high-mounted frame keeps curious hands away from the dial, which matters more in a room where a child spends unsupervised time.
- Linen-wrapped stretcher frame — soft, breathable, and blends into bedding-adjacent palettes
- Woven rattan fan shape — a popular boho bedroom accent that also happens to ventilate perfectly
- Personalized embroidery hoop — monogram or botanical motif, ideal above a headboard
- Soft-close hinged shadow box — quiet operation matters more at night than in any other room
If the thermostat sits within a toddler’s reach, mount any cover with tamper-resistant screws rather than Command strips, and consider a small keyed or magnetic latch so the unit can’t be pulled off the wall.
14. Office & Commercial Thermostat Cover Ideas
Shared offices, coworking spaces, and small retail storefronts have a different problem entirely: not aesthetics, but access control. A commercial thermostat cover usually needs to physically prevent employees, customers, or building tenants from changing the setpoint, while still looking professional enough to sit in a lobby or open-plan floor.
Lockable polycarbonate thermostat guards are the standard commercial solution — clear or smoked plastic boxes with a keyed lock that let the display stay visible without letting anyone touch it. These are inexpensive, code-compliant in most commercial leases, and take under ten minutes to install with double-sided industrial tape or two screws. For a nicer look in a reception area or conference room, a branded wood-veneer surround with the same lockable mechanism hidden inside achieves both goals: professional appearance and setpoint control.
✓ Commercial Cover Pros
- Prevents unauthorized setpoint changes
- Keeps the readout visible for compliance
- Fast, tool-light installation
- Available in branded finishes
✗ Commercial Cover Cons
- Lockable units cost more than decorative-only covers
- Key management adds an admin step
- Bulkier than most residential styles
For open-plan offices with a shared HVAC zone, pairing a locking guard with a posted temperature policy resolves the majority of thermostat disputes — a recurring source of workplace friction according to facilities-management surveys.
15. Baseboard Heater & Radiator Thermostat Covers
Homes with baseboard electric heat or hydronic radiators often have a line-voltage thermostat mounted directly on or beside the heater itself, rather than a low-voltage wall unit. This changes the safety math considerably: line-voltage thermostats run at full household current, so any cover has to leave generous clearance and can never be a sealed enclosure, since the heater below is already generating significant ambient heat on its own.
The safest approach for a baseboard-mounted thermostat is a slim metal or heat-resistant composite trim plate rated for proximity to a heat source — never raw wood or fabric, both of which are fire risks this close to a heating element. If the thermostat is wall-mounted a few feet above a radiator rather than on the unit itself, standard low-voltage cover ideas apply, but keep at least 12 inches of clearance from the radiator’s rising heat plume so readings stay accurate.
Never mount a decorative wood, fabric, or paper-based cover directly on or immediately above a baseboard heater or radiator. Use only manufacturer-rated, heat-resistant covers in this zone, and consult an electrician before modifying anything near line-voltage wiring.
16. Thermostat Cover Sizing & Measuring Guide
Sizing mistakes are the number one reason a DIY thermostat cover looks accidental rather than intentional. A cover that’s too tight crowds the wall plate and blocks airflow; one that’s too loose looks like a leftover picture frame rather than a purpose-built surround. Getting the measurements right takes five minutes and prevents a second trip to the hardware store.
Measure the thermostat body width and height, including any raised bezel or display housing — not just the wall plate underneath.
Measure the wall plate separately. Many thermostats have a plate that’s wider than the unit itself; your cover opening needs to clear the larger of the two.
Add a minimum 1-inch buffer on all four sides for airflow and visual breathing room — 1.5 to 2 inches looks more intentional on a frame or shadow box.
Check depth, not just width and height. Smart thermostats like Nest and Ecobee protrude further from the wall than basic models; a shallow shadow box may not close properly over a deep unit.
Measure wire slack if the cover will sit slightly proud of the wall — most low-voltage thermostat wiring has only an inch or two of give.
| Thermostat Type | Typical Width | Typical Height | Typical Depth |
|---|---|---|---|
| Basic mechanical/digital | 3–4″ | 4–5″ | 0.75–1.25″ |
| Programmable touchscreen | 3.5–4.5″ | 4.5–5.5″ | 1–1.5″ |
| Nest (3rd/4th Gen) | 3.3″ | 3.3″ | 1.2″ |
| Ecobee (Premium/Enhanced) | 4.5″ | 4.3″ | 1″ |
| Honeywell T-series | 4–4.5″ | 4.5–5″ | 1–1.3″ |
When in doubt, size up rather than down. A slightly larger frame reads as a deliberate design choice; an undersized one reads as a mistake.
17. Materials Deep Dive: What to Build or Buy a Cover From
Every material on this list shows up somewhere else in this guide, but it helps to compare them side by side once you know your room, your climate, and your tools. The right material is a balance of ventilation, moisture tolerance, weight, and how much finishing work you’re willing to do.
Wood
Pine and poplar are the easiest woods to cut, sand, and paint for a first-time project; MDF is even easier to cut cleanly but needs a sealed primer coat before painting or it will absorb moisture at the edges. Reclaimed or pallet wood brings texture and character with zero finishing required if you like the weathered look, but always check for embedded staples or nails before cutting.
Metal
Powder-coated steel and brushed aluminum frames are essentially maintenance-free and handle humidity, grease, and UV fading better than any other material on this list. The tradeoff is that metal is harder to modify at home — most people buy metal frames ready-made rather than fabricating them.
Natural fiber
Seagrass, rattan, and wicker offer the best combination of airflow and texture of any material here, but they’re the least humidity-tolerant — reserve them for living rooms, bedrooms, and dry hallways rather than bathrooms or kitchens.
Fabric and textile
Linen, canvas, and macramé are the lightest-weight option and the easiest to swap seasonally, since most mount with Command strips or a lightweight hoop rather than screws. They’re also the most forgiving material for a first DIY project, since mistakes are cheap to redo.
Glass and acrylic
A glass-front vintage cabinet or an acrylic shadow box lets the thermostat stay fully visible while still reading as a designed object — useful if you want quick-glance access without opening anything. Acrylic is lighter and safer than glass for a DIY build, and both wipe clean easily.
18. Tools & Supplies Checklist for a DIY Cover
Most of the DIY builds in this guide use the same core toolkit. Gathering everything before you start turns a project that could stretch across two weekends into one that’s done in an afternoon.
| Tool / Supply | Used For | Skip It If… |
|---|---|---|
| Tape measure | Sizing the opening (see Sizing guide above) | Never skip this one |
| Miter saw or hand miter box | Clean corner cuts on frame or trim stock | Buying a pre-made frame |
| Wood glue + clamps | Joining frame corners | Using a pre-assembled kit |
| Sandpaper (150–220 grit) | Smoothing edges before paint | Using raw/reclaimed wood texture on purpose |
| Primer + paint or chalk paint | Finish and moisture resistance | Leaving natural wood or fiber exposed |
| Small hinges or a piano hinge | Swing-open access panels | Building an open frame with no door |
| Command strips or picture hooks | Renter-friendly, damage-free mounting | Owned home where screws are fine |
| Level | Straight, professional-looking install | Never skip this one either |
| Screwdriver + wall anchors | Permanent mounting into drywall | Using adhesive-only mounting |
A pre-made shadow box frame from a craft or home store eliminates the miter saw, glue, and clamps entirely — you only need sandpaper, paint, and a mounting method, cutting the tool list roughly in half.
19. Cost & Budget Planning
Thermostat covers span a wider price range than almost any other small home-décor purchase — from a literally free upcycled item to a $150+ commissioned antique piece. Knowing where your project falls before you start shopping keeps you from overspending on materials for what should be a five-dollar weekend project, or underspending on a cover that needs to survive daily bathroom humidity.
| Budget Tier | What You Get | Typical Spend |
|---|---|---|
| Free–$10 | Thrifted frame, embroidery hoop, fabric remnant, paint you already own | $0–$10 |
| $10–$30 | New craft-store shadow box, basic wicker basket, MDF + paint for a DIY build | $10–$30 |
| $30–$60 | Mid-range ready-made surround, hinged canvas panel, manufacturer trim kit | $30–$60 |
| $60–$150+ | Custom carpentry, antique cabinet restoration, designer commissioned piece | $60–$150+ |
A useful rule of thumb: spend proportionally to how often you’ll see the thermostat. A rarely used guest hallway rarely justifies a $100 cover, while a thermostat in your main sightline from the living room sofa is a reasonable place to spend a little more.
20. Common Thermostat Cover Mistakes to Avoid
✓ Do This
- Leave at least 1 inch of clearance on all sides
- Test that hinged doors open fully before final mounting
- Use humidity-tolerant material in bathrooms and kitchens
- Confirm smart thermostat sensors have a clear line of sight
- Measure twice, especially the depth
✗ Avoid This
- Sealing the thermostat in an airtight box
- Mounting heat sources like candles or sconces directly above it
- Using raw wicker or fabric in a steamy bathroom
- Painting over a smart thermostat’s sensor window
- Drilling into a rental wall without checking the lease
The single most common mistake in reader photos submitted to this site is a cover mounted flush against the wall with no gap at all — even a well-ventilated basket or louvered box needs a few millimeters of standoff space to actually move air past the sensor rather than just around the outside of the cover.
21. Cleaning & Maintenance for Thermostat Covers
A thermostat cover collects dust in exactly the same way any other wall-mounted object does, but because it sits directly over an airflow-sensitive sensor, dust buildup here has a functional cost, not just a cosmetic one. A light monthly dusting keeps both the cover and the thermostat itself working accurately.
Dust weekly to monthly with a dry microfiber cloth or a soft brush attachment — this matters more for louvered, mesh, and wicker covers where dust collects in the gaps.
Vacuum woven and mesh covers with a low-suction brush attachment every few months to clear buildup that a cloth can’t reach.
Wipe painted or sealed wood with a barely damp cloth, never a soaked one — excess moisture can still seep into seams even on a sealed finish.
Check hinges and hardware twice a year for any stiffness or rust, especially in bathrooms and kitchens, and add a drop of household oil if a hinge starts to squeak or stick.
Repaint or refinish chalk-painted or matte-finished covers roughly every one to two years, depending on how much sun or moisture exposure the wall gets.
22. Outdoor, Garage & Basement Thermostat Covers
Detached HVAC zones — a garage mini-split, a finished basement, or an outdoor-rated thermostat controlling a workshop — face a completely different environment than an interior wall: temperature swings, dust, occasional moisture, and sometimes direct exposure to sunlight through a window or open door. Decorative covers built for a living room won’t hold up here.
For unfinished basements and garages, a simple weatherproof plastic guard with UV-stable material is the practical choice over anything decorative — these spaces prioritize function, and a $10–$20 clear polycarbonate guard resists dust, impact, and minor moisture far better than a painted wood frame. In a finished basement that doubles as a living space, standard interior cover ideas apply again, though it’s worth choosing a slightly more moisture-tolerant material than you would upstairs, since basements typically run a few percentage points more humid year-round.
If sawdust or fine particulate is a regular presence in the space, favor a solid door with a small vent slot over an open mesh or basket design — mesh clogs with fine dust far faster than it does with ordinary household dust.
23. Renter, Lease & HOA-Friendly Thermostat Cover Rules
Beyond the general “check your lease” advice earlier in this guide, a few specific situations come up often enough to call out on their own. Rental and HOA restrictions are rarely about thermostats specifically — they’re almost always part of a broader no-drilling or no-permanent-alteration clause, so the workaround is usually the same regardless of what triggered it.
- No-drill leases: Command strips rated for the cover’s actual weight are the standard workaround; check the strip’s listed weight limit against your finished cover, not just the frame alone.
- HOA exterior-visible restrictions almost never apply to interior thermostat covers, but if your unit sits near a window visible from a shared hallway or common area, it’s worth a quick glance at the HOA’s interior-alteration policy just in case.
- Move-out requirements: Photograph the original bare thermostat before installing any cover, so you have a clear reference for restoring the wall to its original condition at lease end.
- Property manager approval: A quick photo and one-line email describing a removable, non-drilling cover is usually enough to get informal sign-off, even when a lease is silent on the topic.
24. How to Choose a Thermostat Cover: Buying Guide Checklist
With this many styles, materials, and price points on the table, it helps to narrow the decision to a short checklist rather than starting from scratch. Answer these five questions and the right category of cover usually becomes obvious.
Standard or smart thermostat? Smart units need a frame-around or manufacturer trim kit — never a fully covering box.
Which room? Humidity and grease rule out fabric and raw wicker in bathrooms and kitchens; anywhere else, material is mostly a style choice.
Rent or own? Renters lean toward Command-strip-mounted, fully removable designs; owners have the full range including drilled and hinged builds.
DIY or ready-made? Budget and available time both point the same direction — DIY saves money but costs an afternoon; ready-made is faster but pricier.
How often is it seen? A main-sightline living room thermostat justifies more design investment than a rarely used basement or laundry-room unit.
25. Brand-Specific Thermostat Sizing Chart
If you’re buying a ready-made trim kit or frame rather than building custom, confirming your exact thermostat model against manufacturer dimensions avoids a returned package. This is especially important for smart thermostats, where even generations of the same product line differ slightly in size.
| Brand & Model | Width | Height | Cover Note |
|---|---|---|---|
| Google Nest Learning (3rd/4th Gen) | 3.3″ | 3.3″ | Round — needs a circular or square-with-round-cutout frame |
| Nest Thermostat (2020, budget model) | 4.6″ | 2.6″ | Rectangular — smaller trim kits fit better than Learning-series kits |
| Ecobee Premium/Enhanced | 4.5″ | 4.3″ | Square-ish — official Ecobee trim plate is the safest bet |
| Honeywell T9/T10 | 4.1″ | 4.6″ | Compatible with most universal rectangular frames |
| Honeywell RTH-series (non-smart) | 3.75″ | 4.9″ | Fits nearly any standard low-voltage cover |
| Emerson Sensi | 3.4″ | 3.4″ | Square face — check depth before boxed covers |
| Wyze Thermostat | 4.4″ | 4.4″ | Square face, shallow depth — most frame styles fit easily |
When a manufacturer doesn’t publish exact millimeter specs, the fastest workaround is measuring the existing wall plate directly rather than relying on the thermostat’s marketing photos, which are rarely to scale.
26. Full Comparison Table
| Cover Type | Est. Cost | Difficulty | Airflow? | Smart-Safe? | Best Room |
|---|---|---|---|---|---|
| Frame / Shadow Box | $5–$30 | Easy | ✓ Yes | ✓ Yes | Any |
| Gallery Wall | $20–$80 | Easy | ✓ Yes | ✓ Yes | Living Room |
| Hinged Artwork Panel | $15–$60 | Medium | ✓ With gap | ✓ Yes | Living Room |
| Wicker / Rattan Basket | $15–$45 | Easy | ✓ Excellent | ⚠ Partial | Living Room |
| Louvered Wood Box | $20–$80 | Medium | ✓ Good | ⚠ Check | Any |
| Floating Shelf Vignette | $10–$40 | Easy | ✓ Yes | ✓ Excellent | Any |
| Vintage Clock Case | $10–$50 | Medium | ✓ Glass front | ⚠ Check | Living Room |
| Macramé Hanging | $15–$50 | Easy | ✓ Excellent | ⚠ May block radar | Bedroom |
| Reclaimed Wood Slat | $10–$30 DIY | Medium | ✓ Good | ⚠ Check | Farmhouse |
| Chalkboard Panel | $8–$20 DIY | Easy | ✓ Hinged | ✓ Hinged open | Kitchen |
| Manufacturer Trim Kit | $15–$60 | Easy | ✓ Excellent | ✓ Excellent | Any |
| Sealed Box (no vent) | Any | — | ✗ Never | ✗ Never | ❌ Avoid |

FAQ Frequently Asked Questions
Yes, as long as the cover does not block airflow. Always choose open-front, louvered, or slatted designs. A fully sealed box causes false temperature readings, HVAC short-cycling, and wasted energy.
A poorly ventilated cover traps the thermostat’s own heat, making it read warmer than the actual room. This leads to short-cycling — your system turns off before reaching the set temperature. Use covers with open slots, mesh panels, or a gap at the bottom.
Wood (pine, MDF), wicker, rattan, metal mesh, and fabric on a stretcher frame are all excellent. Avoid sealed plastic or solid wood boxes with no ventilation. A shadow box frame with an open back works beautifully with zero airflow concerns.
Smart thermostats use occupancy sensors, proximity detection, and sometimes radar. Covering the front face disables these features. Use a decorative frame around — rather than over — the unit, or use the manufacturer’s official trim kit.
Slim-profile options work best. A thin shadow box frame painted to match your wall trim, a small floating shelf styled above the thermostat, or a narrow decorative plate surround are ideal. Avoid bulky wicker baskets in tight hallway spaces.
Absolutely. Chalk paint gives a beautiful matte vintage finish on wood covers. Match your wall color for an invisible camouflage effect, or contrast for an accent feature. Allow full drying before installation.
Basic plastic snap-on covers: $10–$20. Mid-range decorative wooden or metal covers: $25–$60. Premium custom covers: $80–$150+. DIY options from thrift store frames: as little as $5.
Three approaches: (1) install a decorative picture frame surround on the wall around the thermostat, (2) mount a small floating shelf above it styled with plants or books, or (3) use a hinged artwork panel that swings open for access. All three require no wiring knowledge.
Yes. Use Command adhesive strips instead of screws. Floating frame surrounds and lightweight magnetic decorative plates are the best renter-friendly options — fully removable without wall damage.
Most universal covers fit standard low-voltage thermostats (roughly 3–4″ wide, 4–5″ tall). Smart thermostats — Nest, Ecobee Premium, Honeywell T9 — have unique form factors and require brand-specific trim kits or custom surrounds. Always measure before ordering.
Your Thermostat Doesn’t Have to Be an Eyesore
Whether you choose a $5 embroidery hoop, a thrifted antique clock case, or a custom shiplap shadow box, the right cover transforms one of your home’s most unavoidable eyesores into a genuine design moment. Prioritize ventilation, match your room’s style, and keep access easy.
And while you’re upgrading the look, make sure it’s performing well too. Our 10-minute diagnostic checklist is the fastest way to rule out common HVAC problems.





 Home
Home
 Info
Info
 Compare
 Reviews
 Shop
Shop